how to make a line pattern in maverouls designer
Texture creation w' Marvelous Designer 8
Marvelous Designer has become a favorite of mine for texture creation and in MD 8 it has become much easier to make complex shapes. This tutorial will going over the whole creation process but the new feature that helps is the trace UVs to pattern feature.
Please note I will not be going over every single tiny step, this tutorial is more for experienced users who are already comfortable with modelling, baking, and working in SD. I do go more detailed on the MD side of things as that is the main focus.
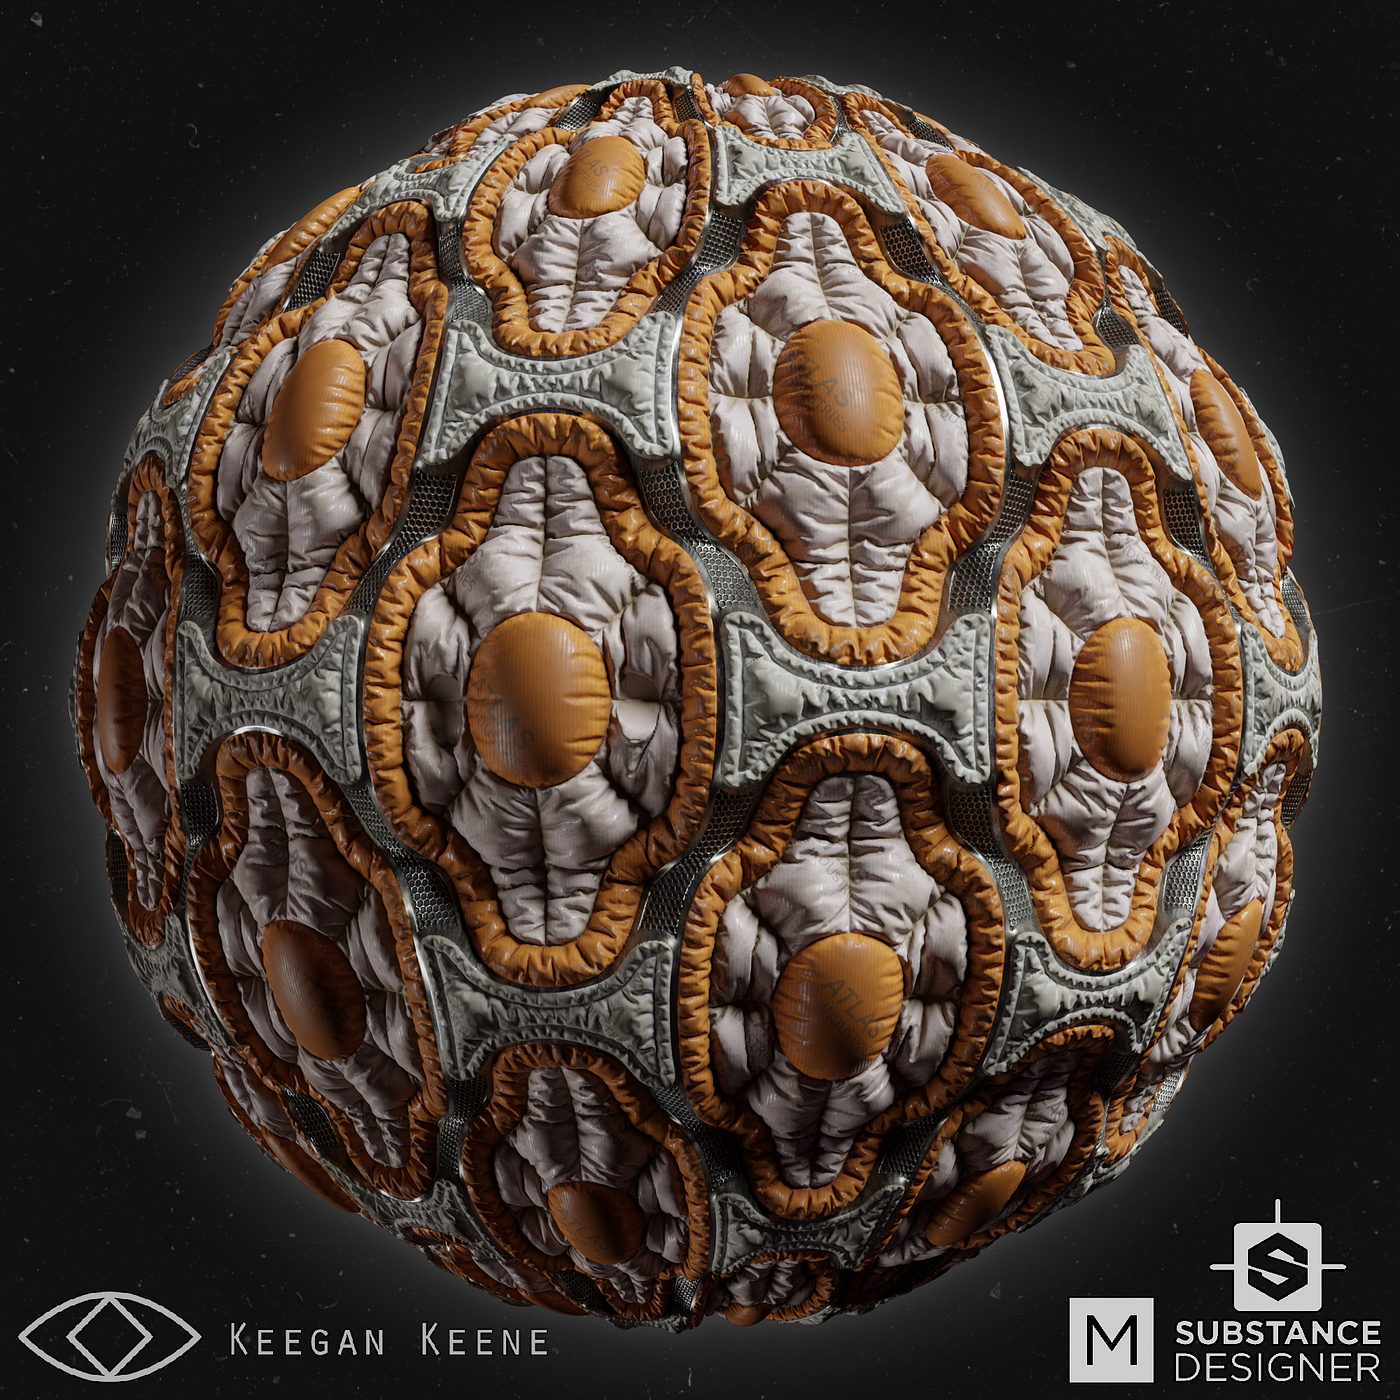
Here is the texture we will be making:
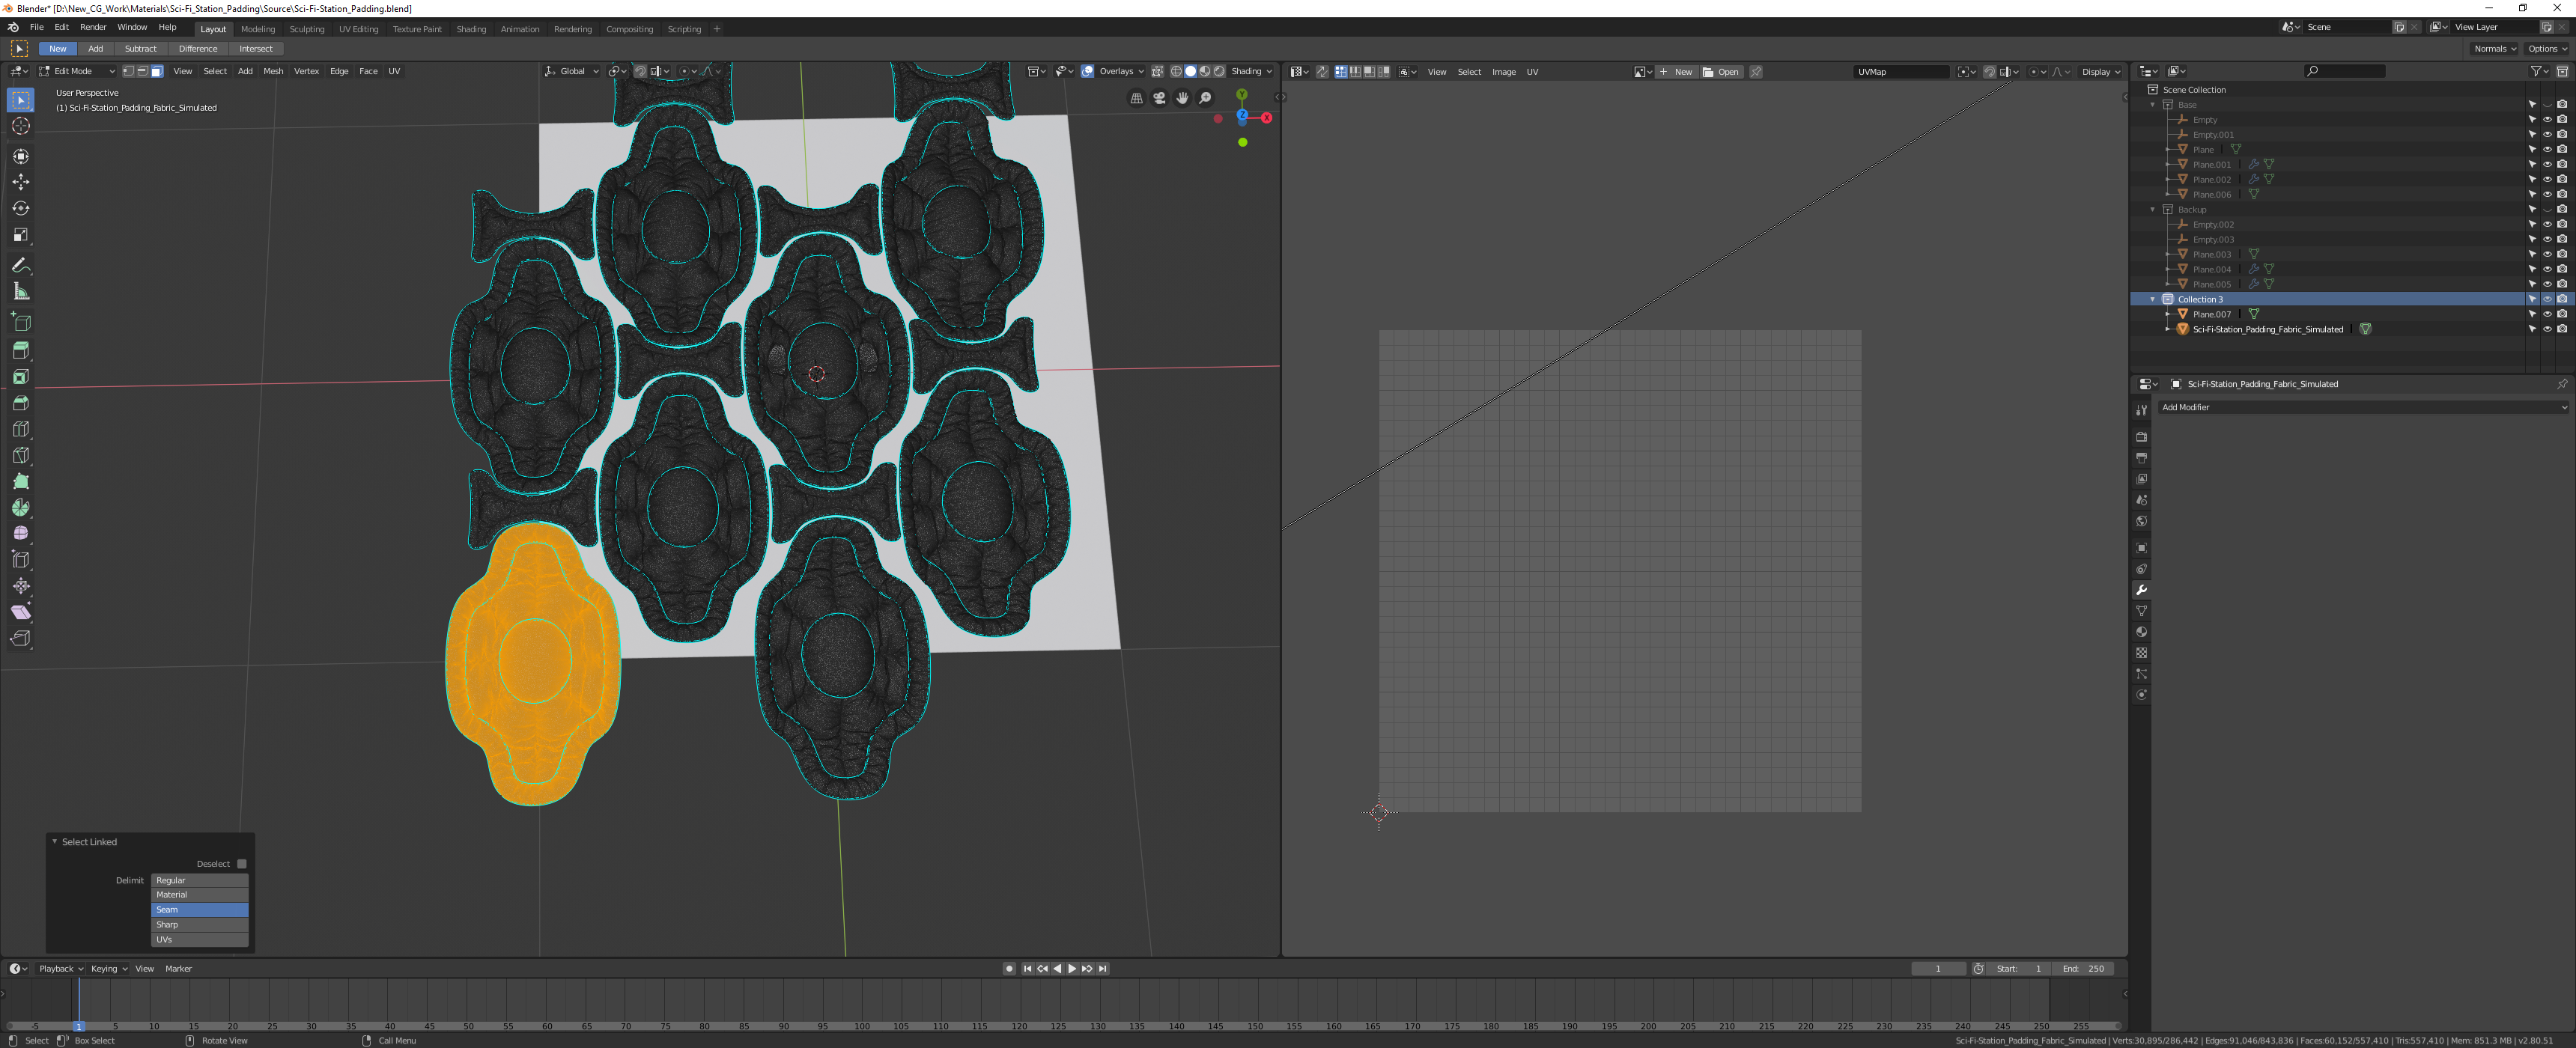
First thing you will want to do is model out your sheets of fabric in the design you want.
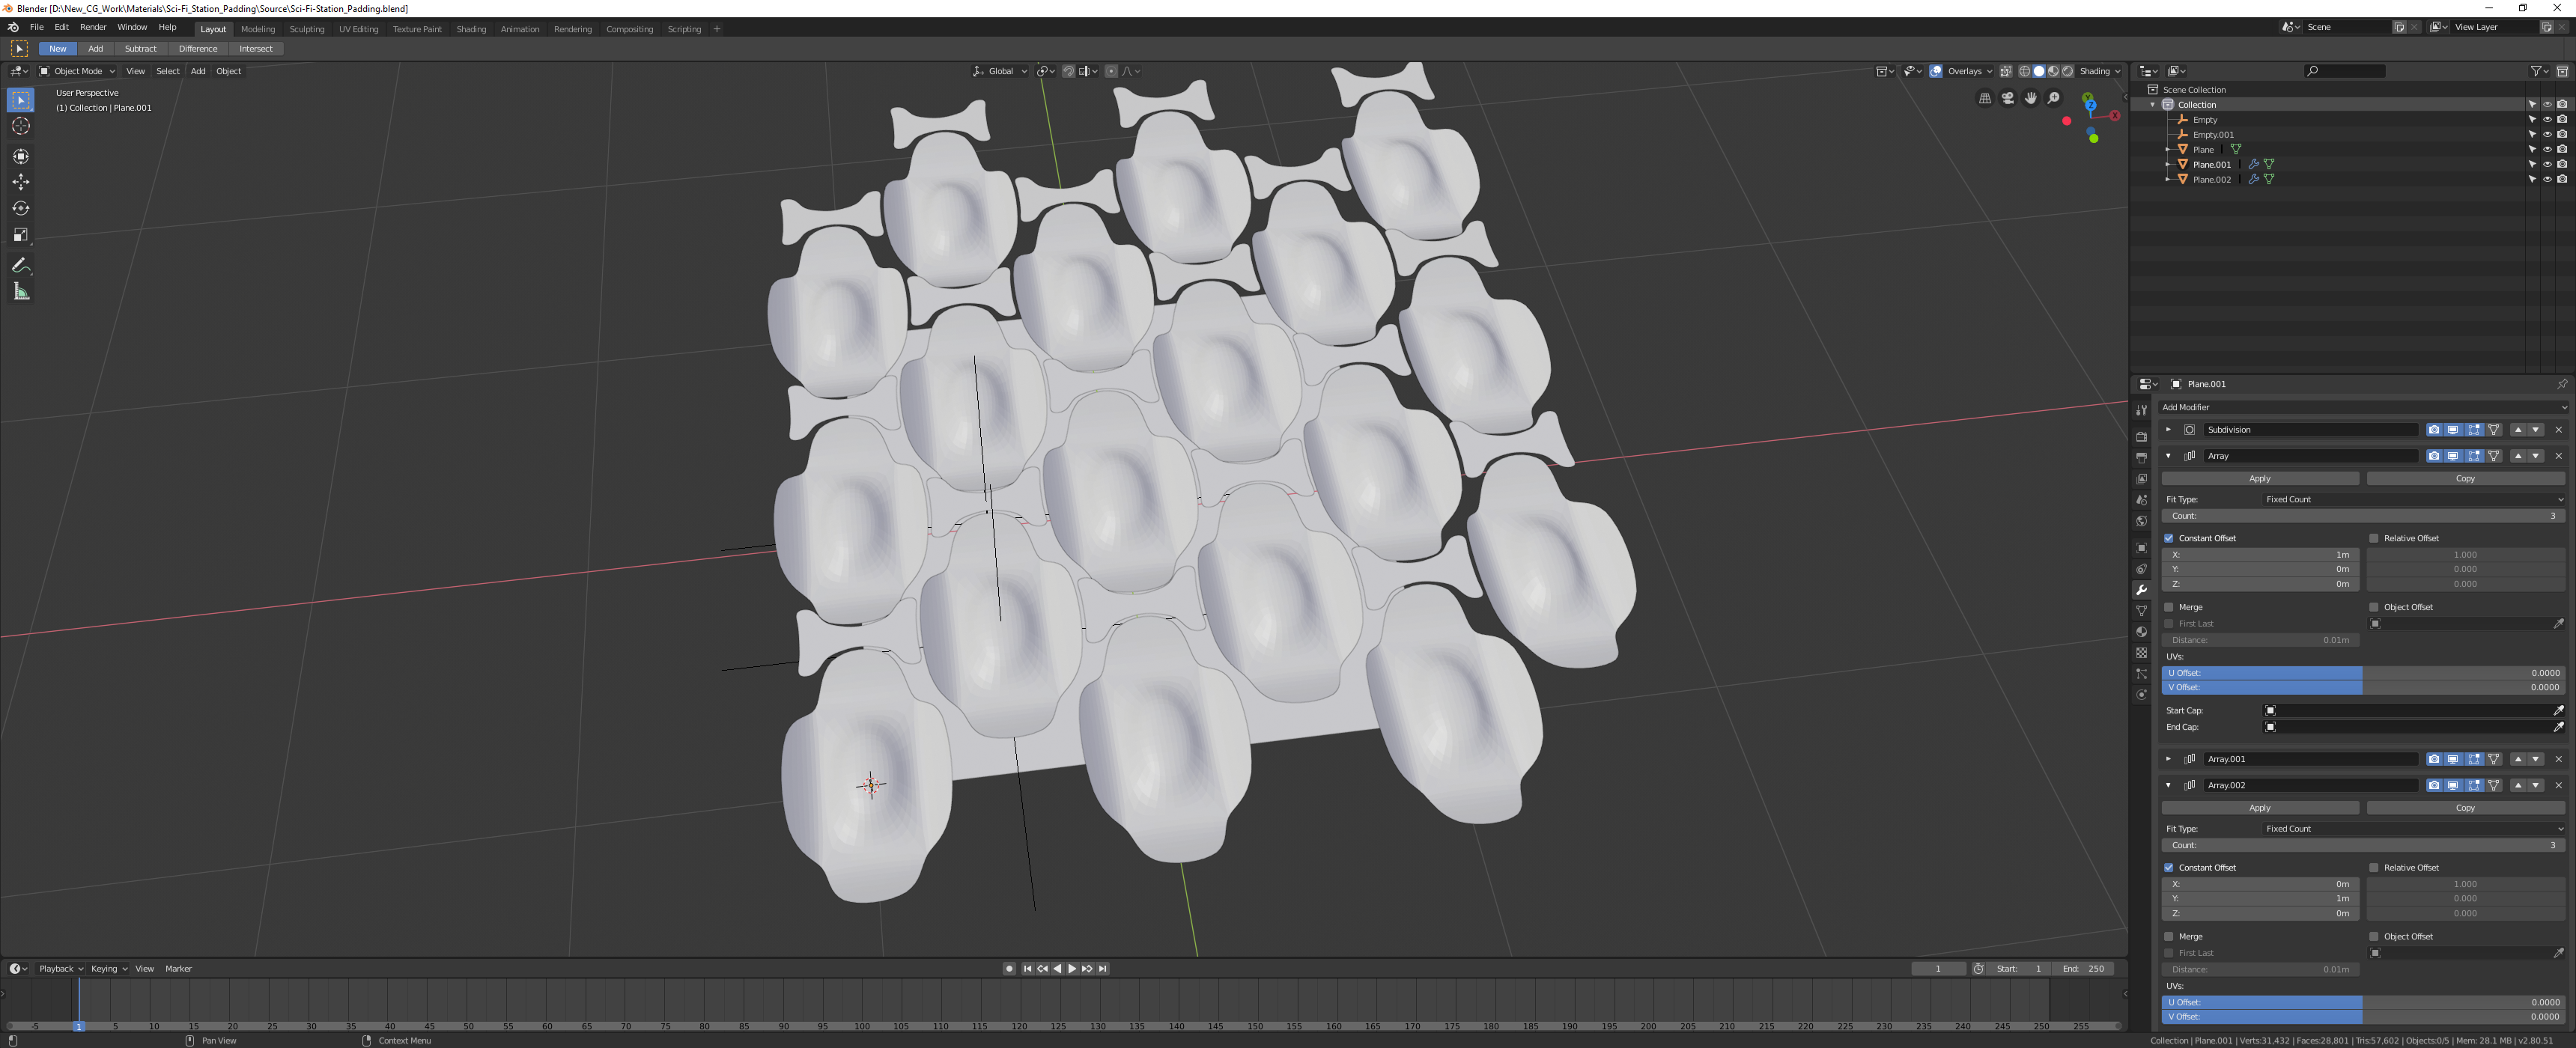
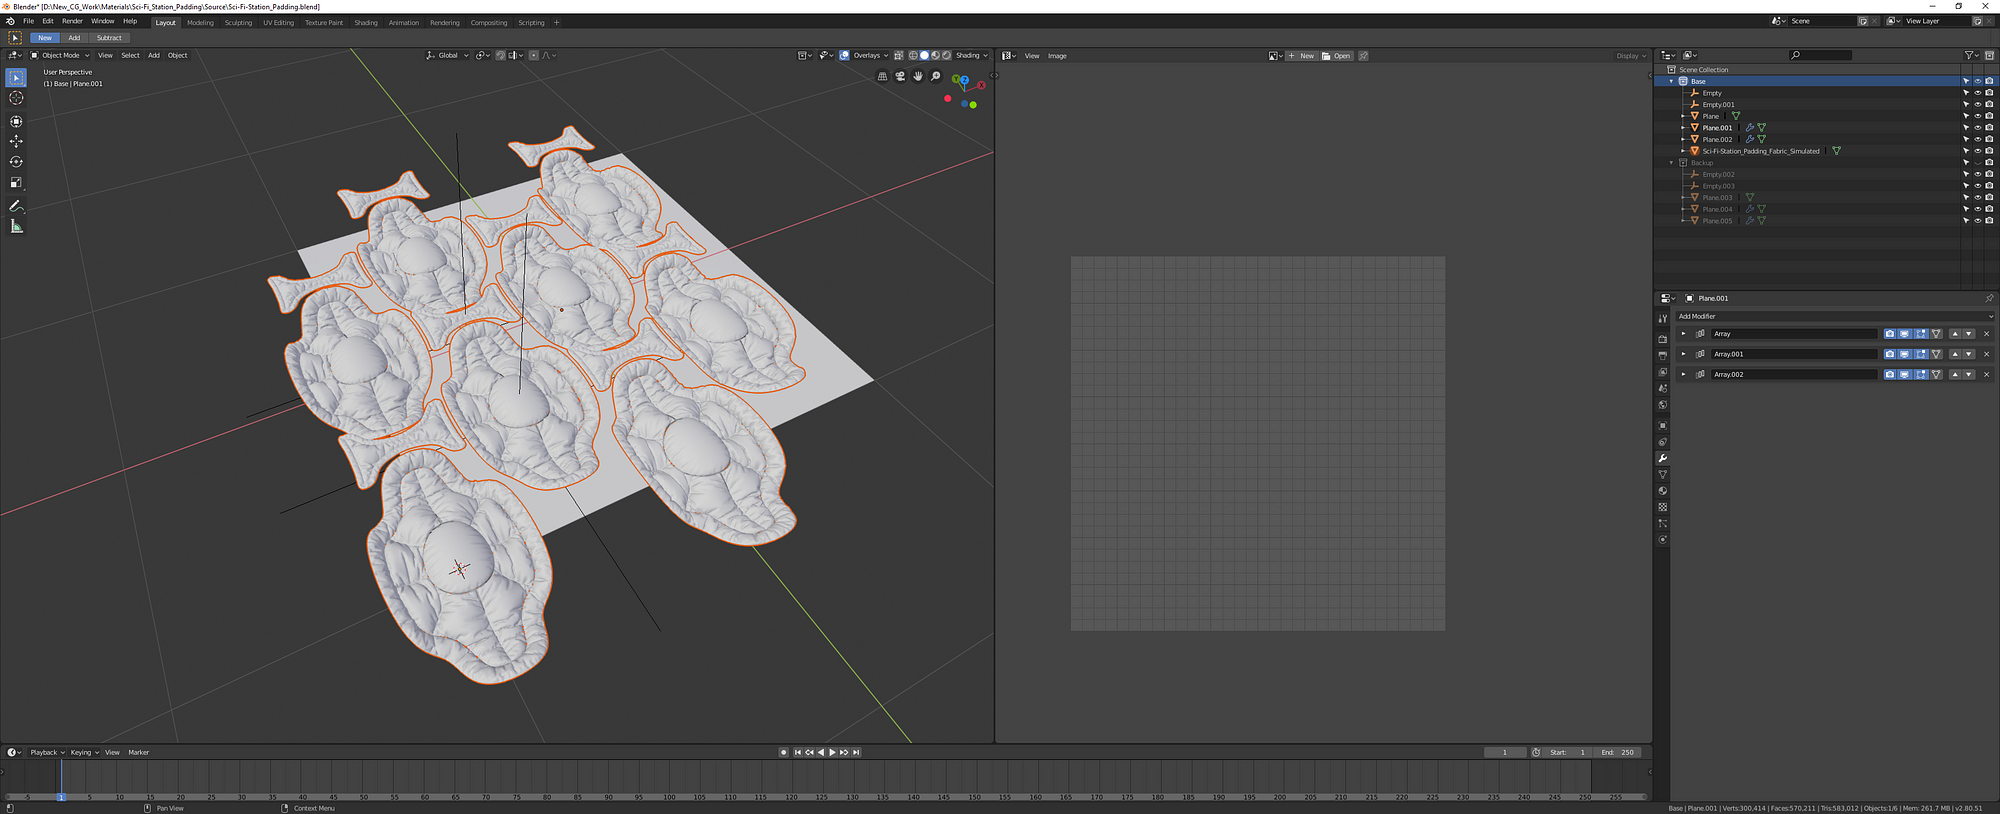
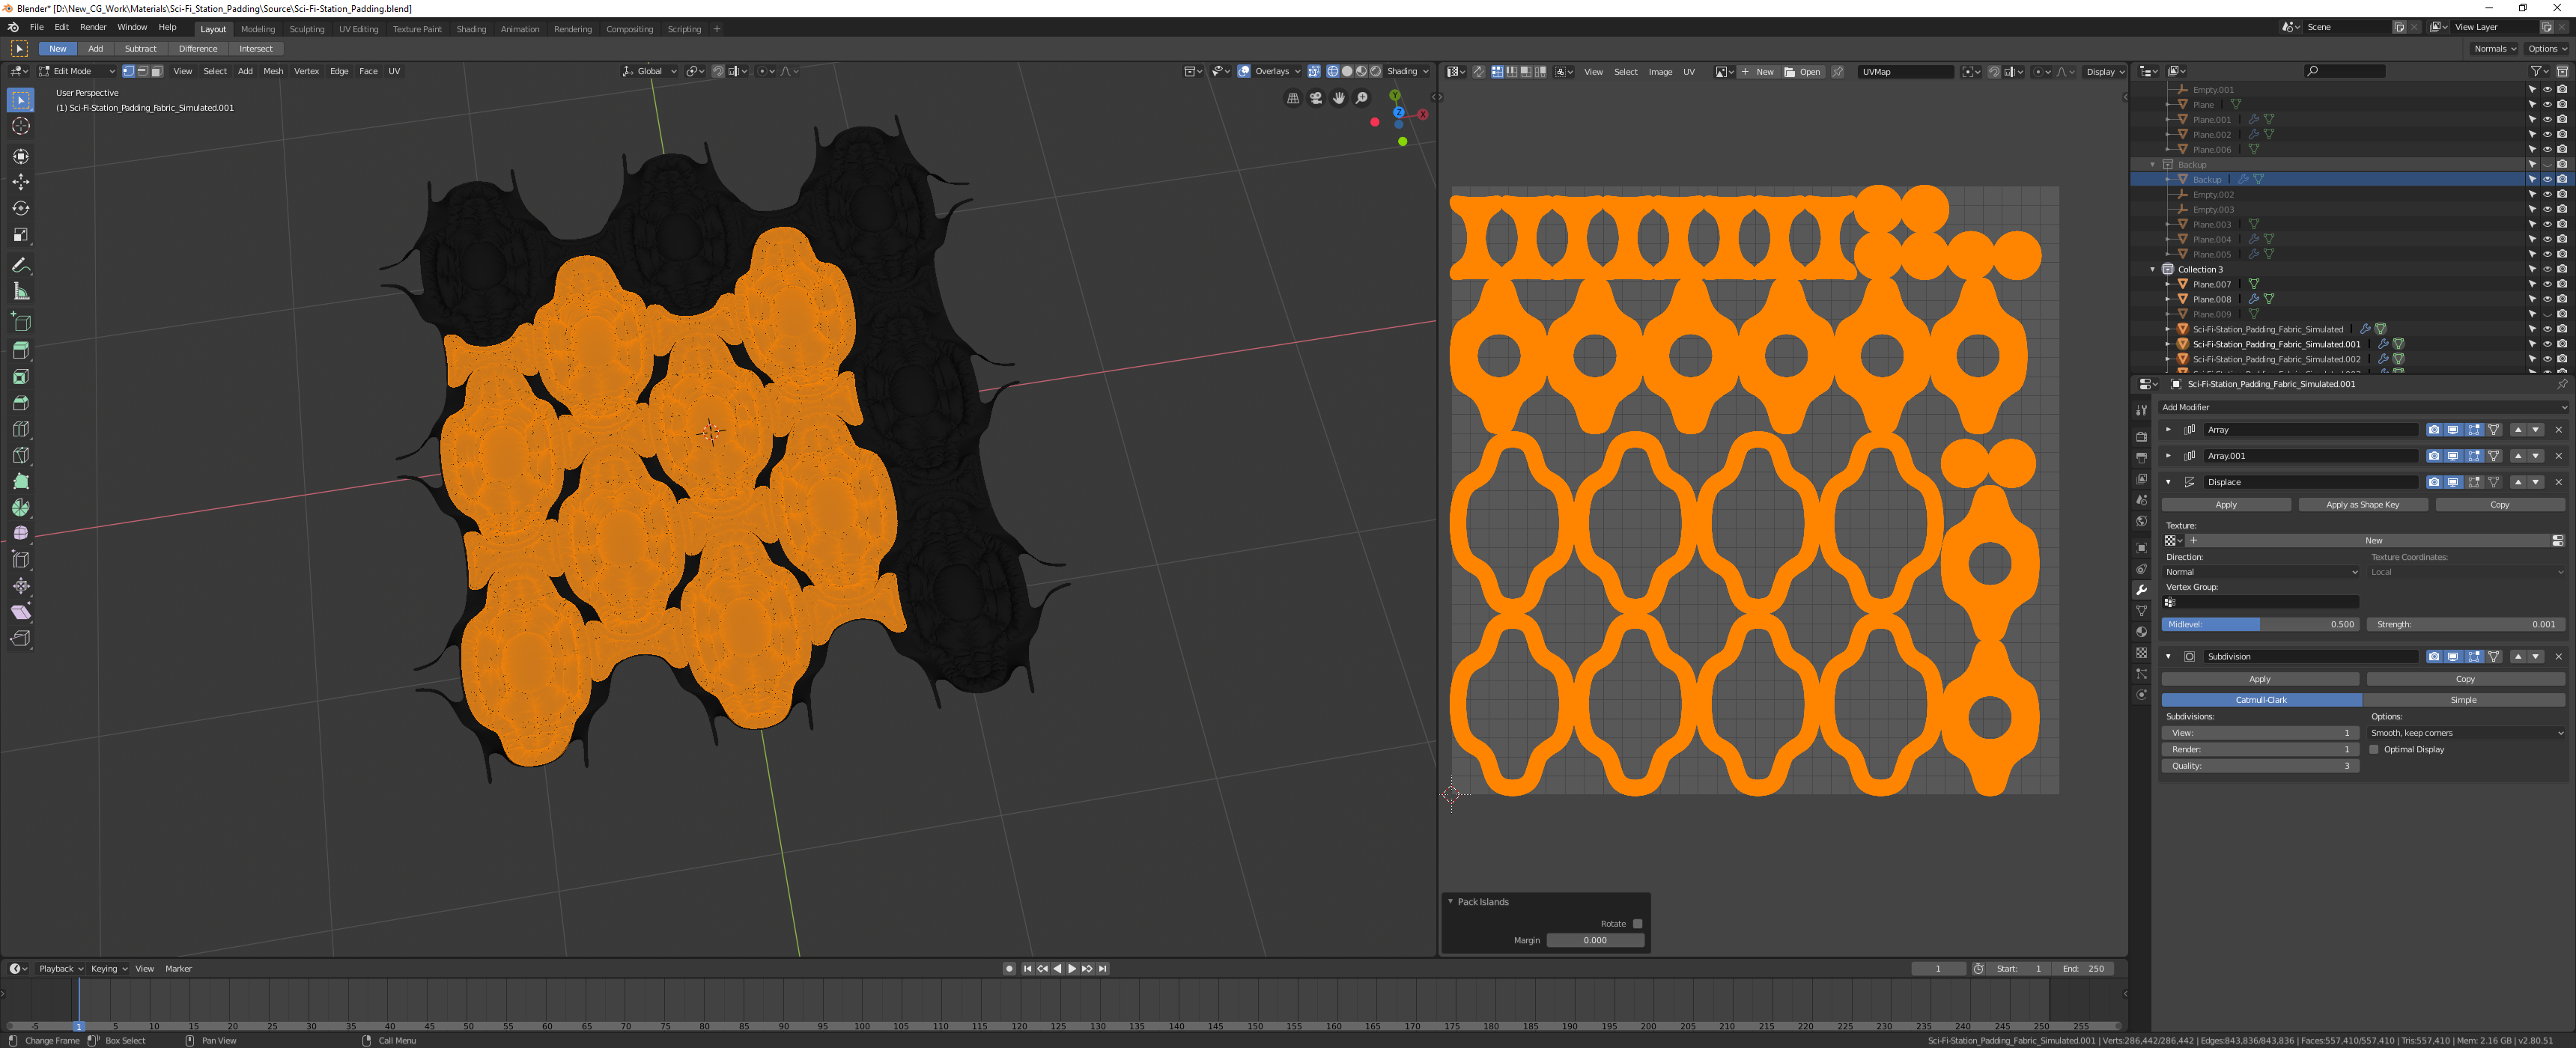
Above you can see the base design I want for my fabric padding. The square plan below represents the 0–1 texture space. Also note that the meshes are clean and subdivided as MD will want some subdivision for the import. Next we need to delete some of these extra pieces that the array modifier I used made. You can model this however you want, my case called for a simple modifier stack.
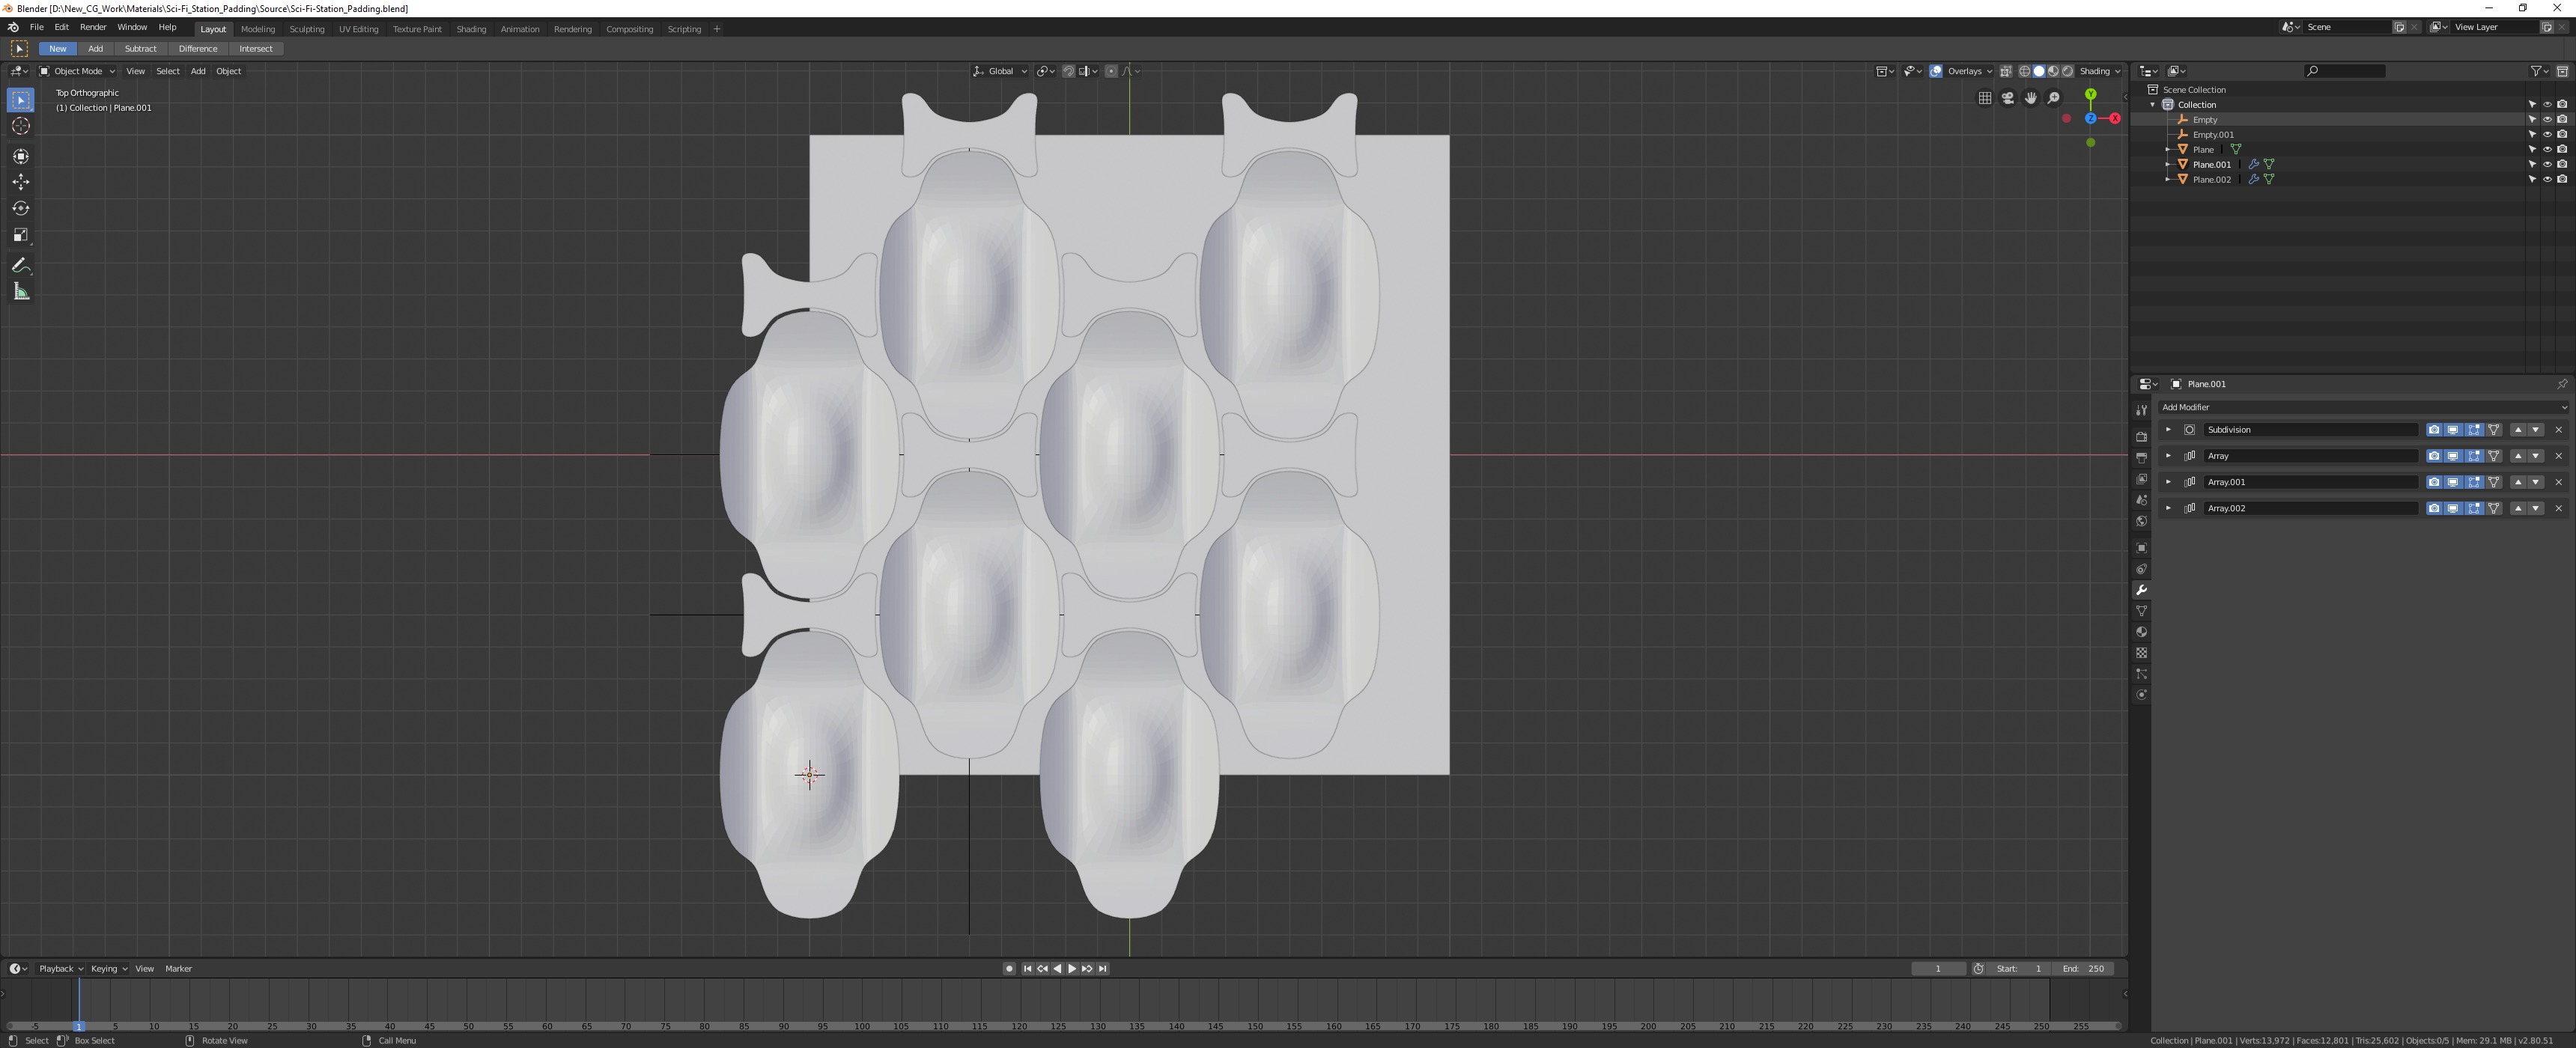
I have now refined my setup so that there are no overlapping elements. Anything that goes off of one side of the square will tile onto the other side so after we simulate cloth we will want to duplicate the meshes that are on the edge and slide them over to the opposite edge so it tiles perfectly.
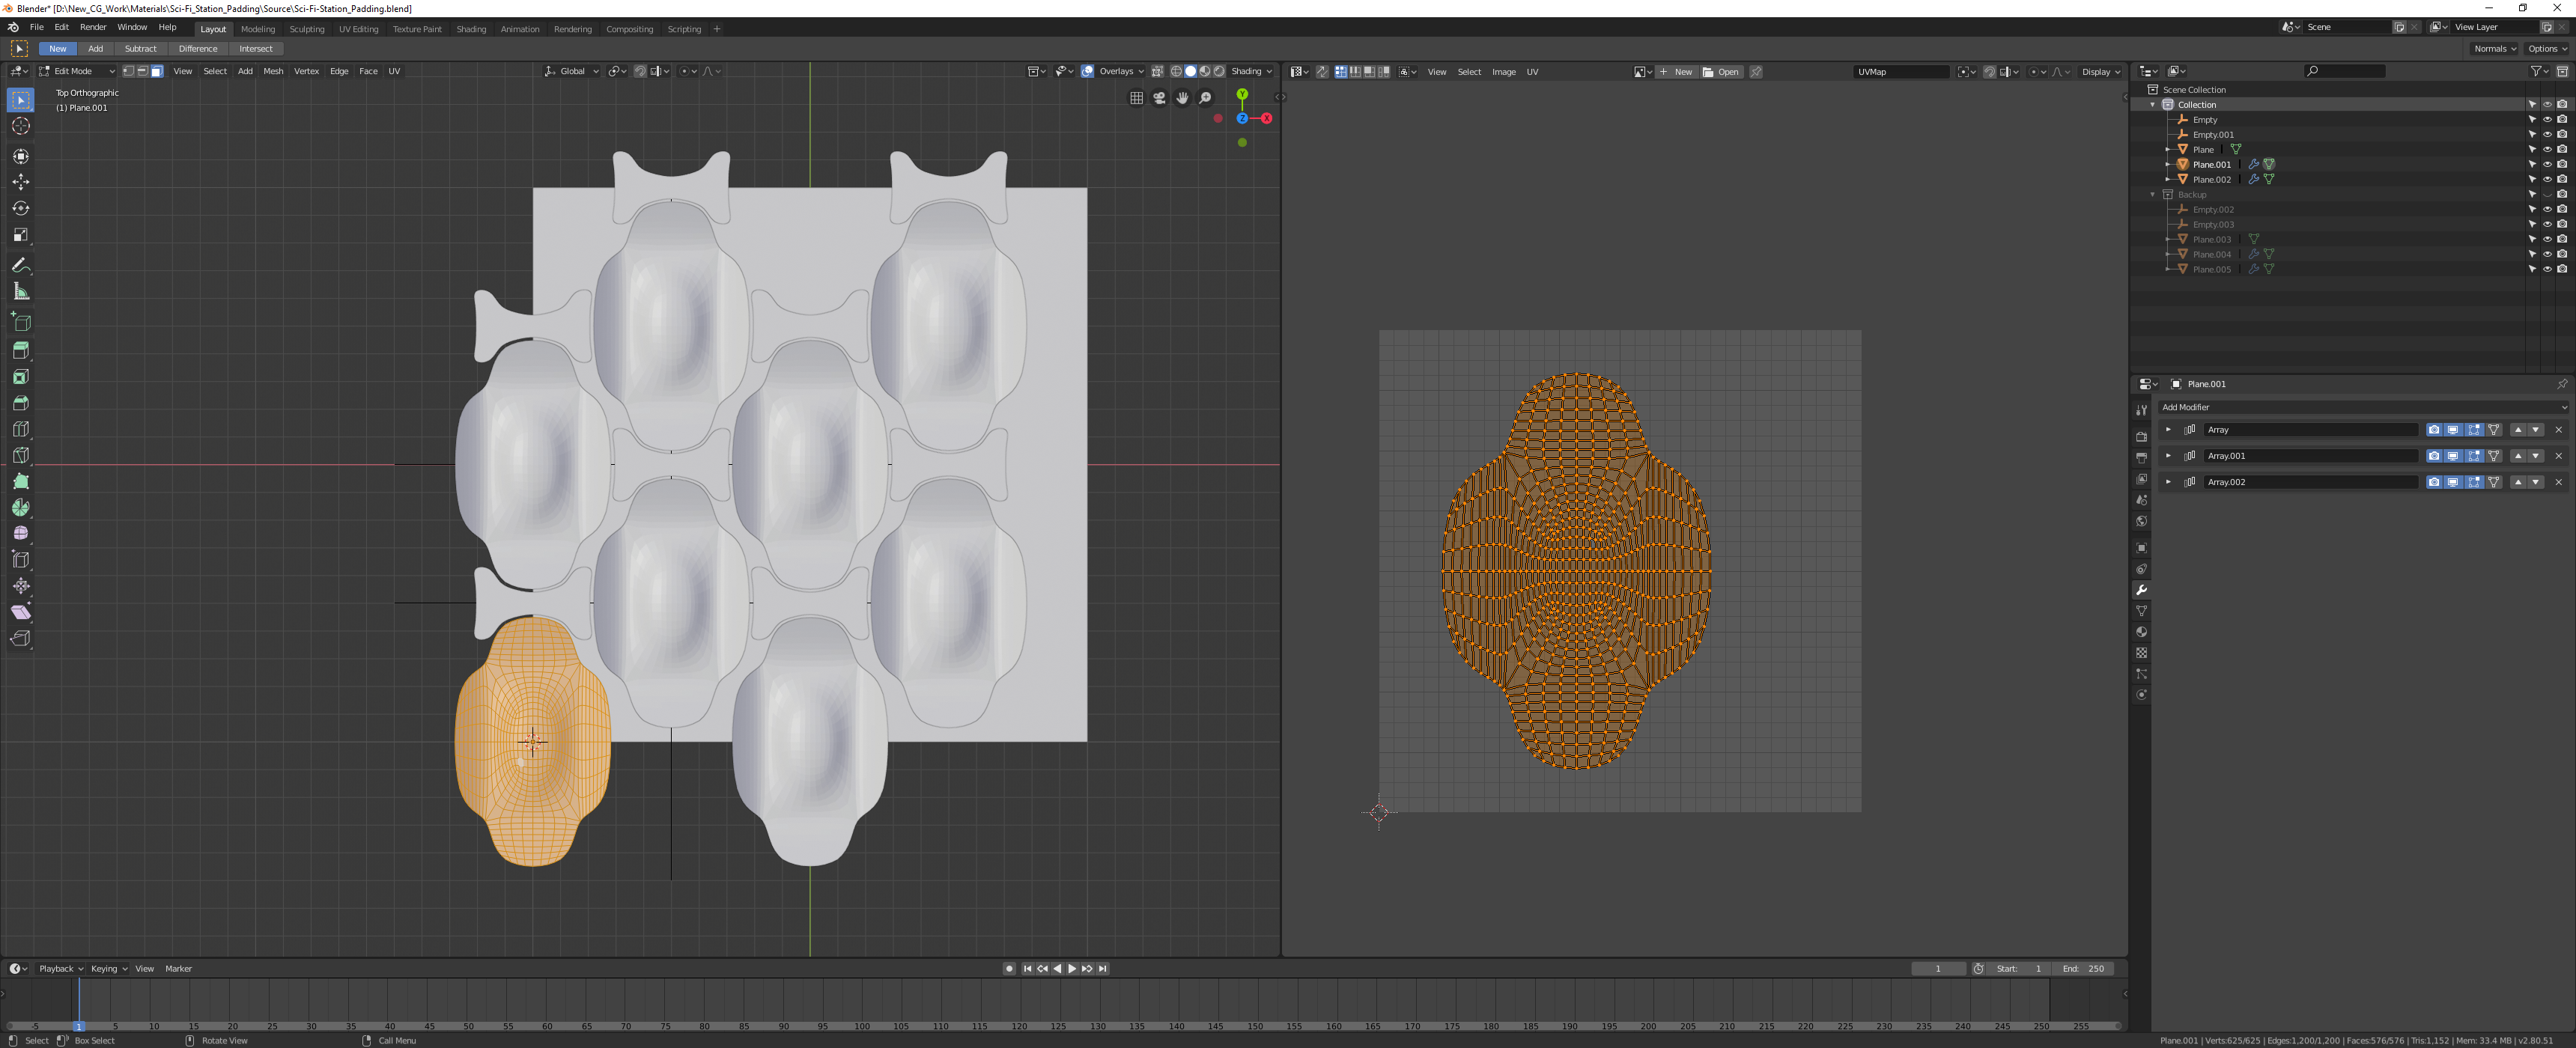
Above you can see I have duplicated the hole setup to save a backup and then I apply the subd modifier. I did this to make sure the UVs are also subdivided and smooth as the UV on the right is what MD will trace to make the cloth patterns.
Go ahead and select all your cloth pieces and export as OBJ with selection only and include UVs. I would export this "cloth base" or something similar.
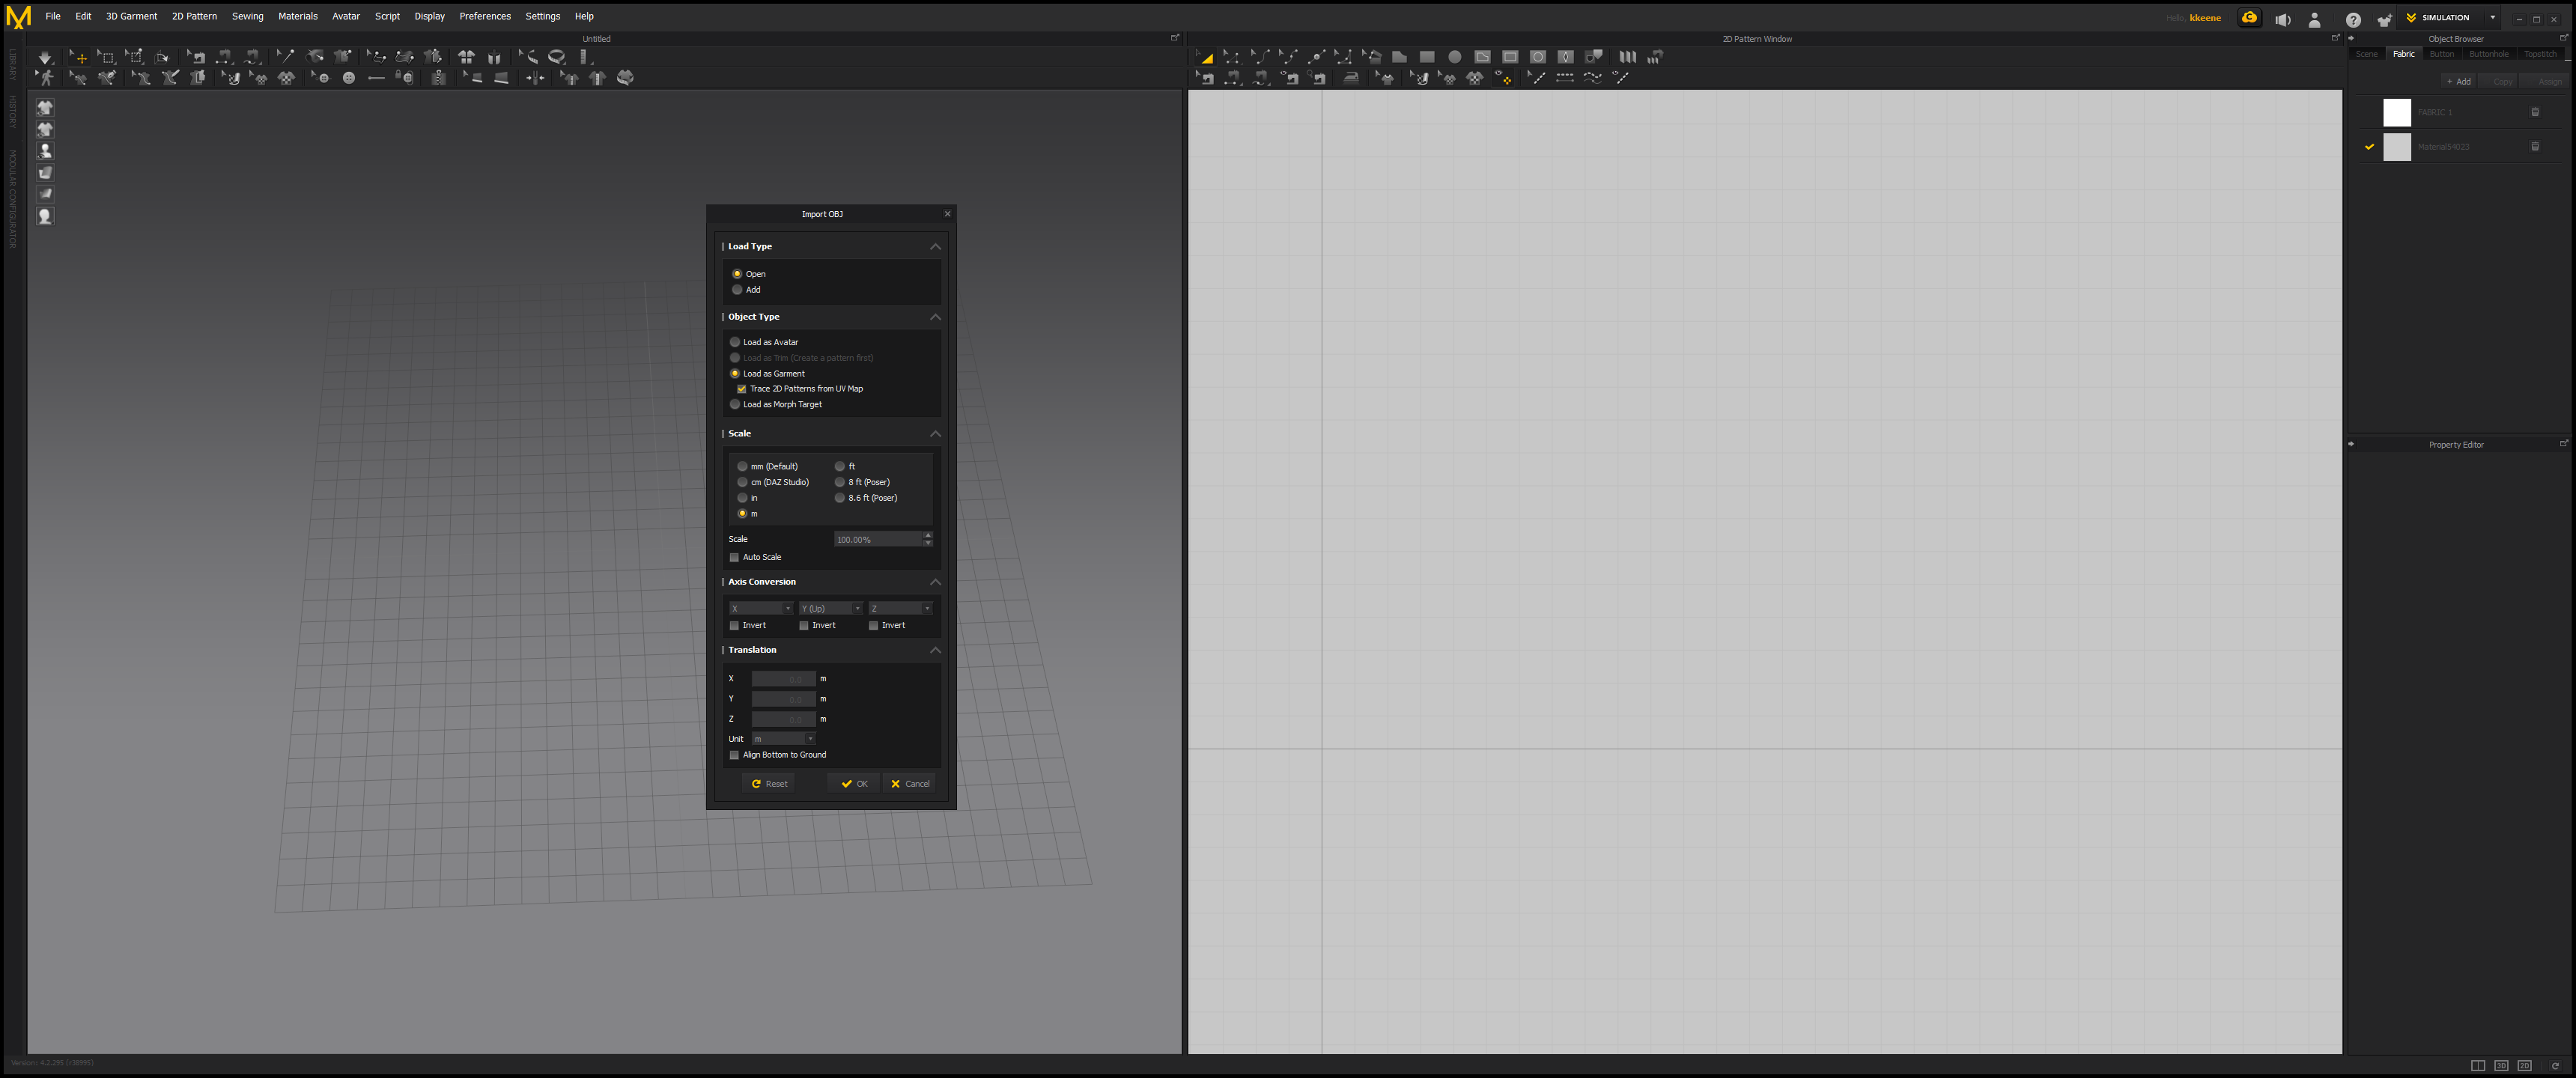
Above I went file>Import OBJ and under object type you will want select "load as garment" and then "Trace 2D Patterns from UV Map." Blender uses meters by default so I have meters checked for scale. Getting the fabrics in at the correct size is important if you want a accurate simulation.
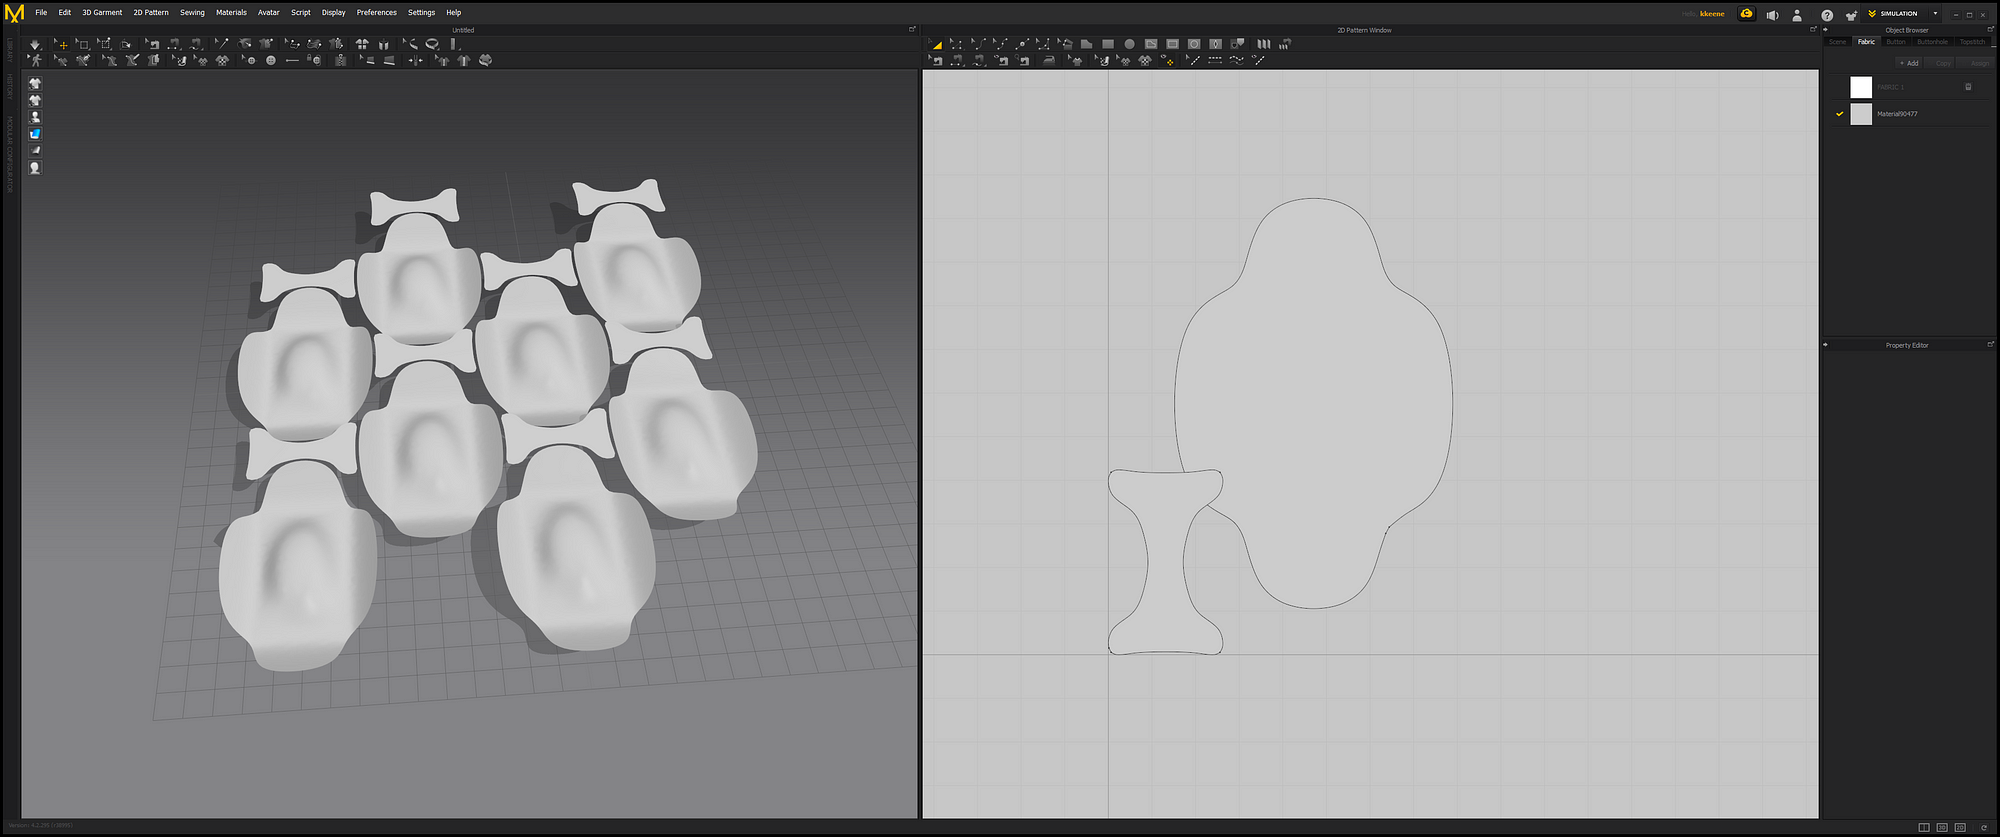
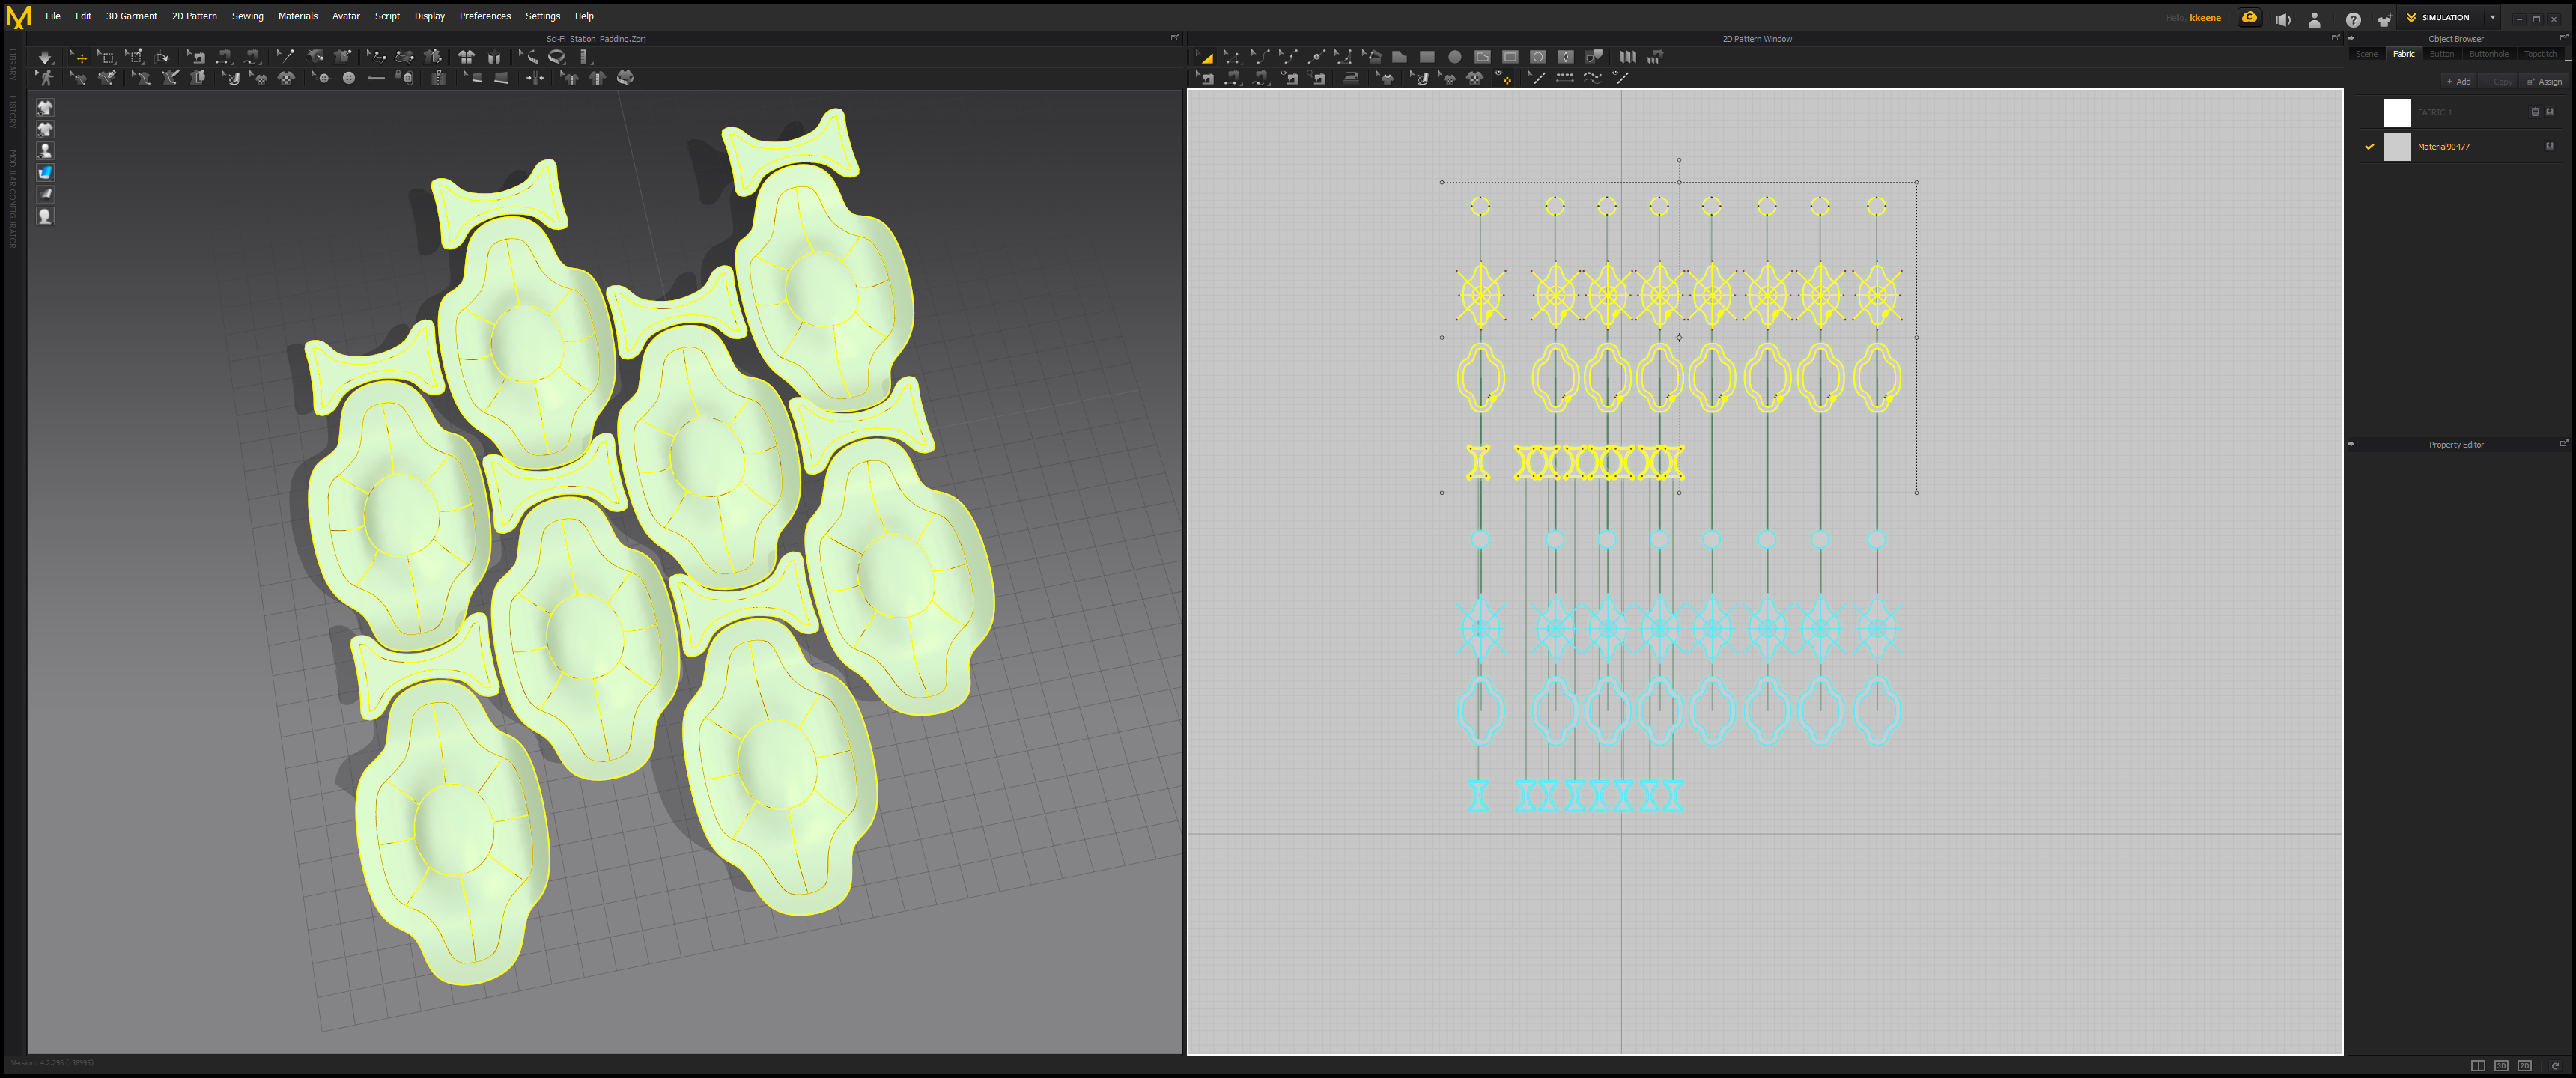
It is in! Your fabrics are on the left and the 2D patterns are on the right. Currently all the 2D patterns are lying on top of eachother so we will want to get them all unstacked so we can work with them.
You can unstack the patterns by left clicking the one on top then drag it off. Once you have done this multiple times you should have them all off and can organize them like I have above.
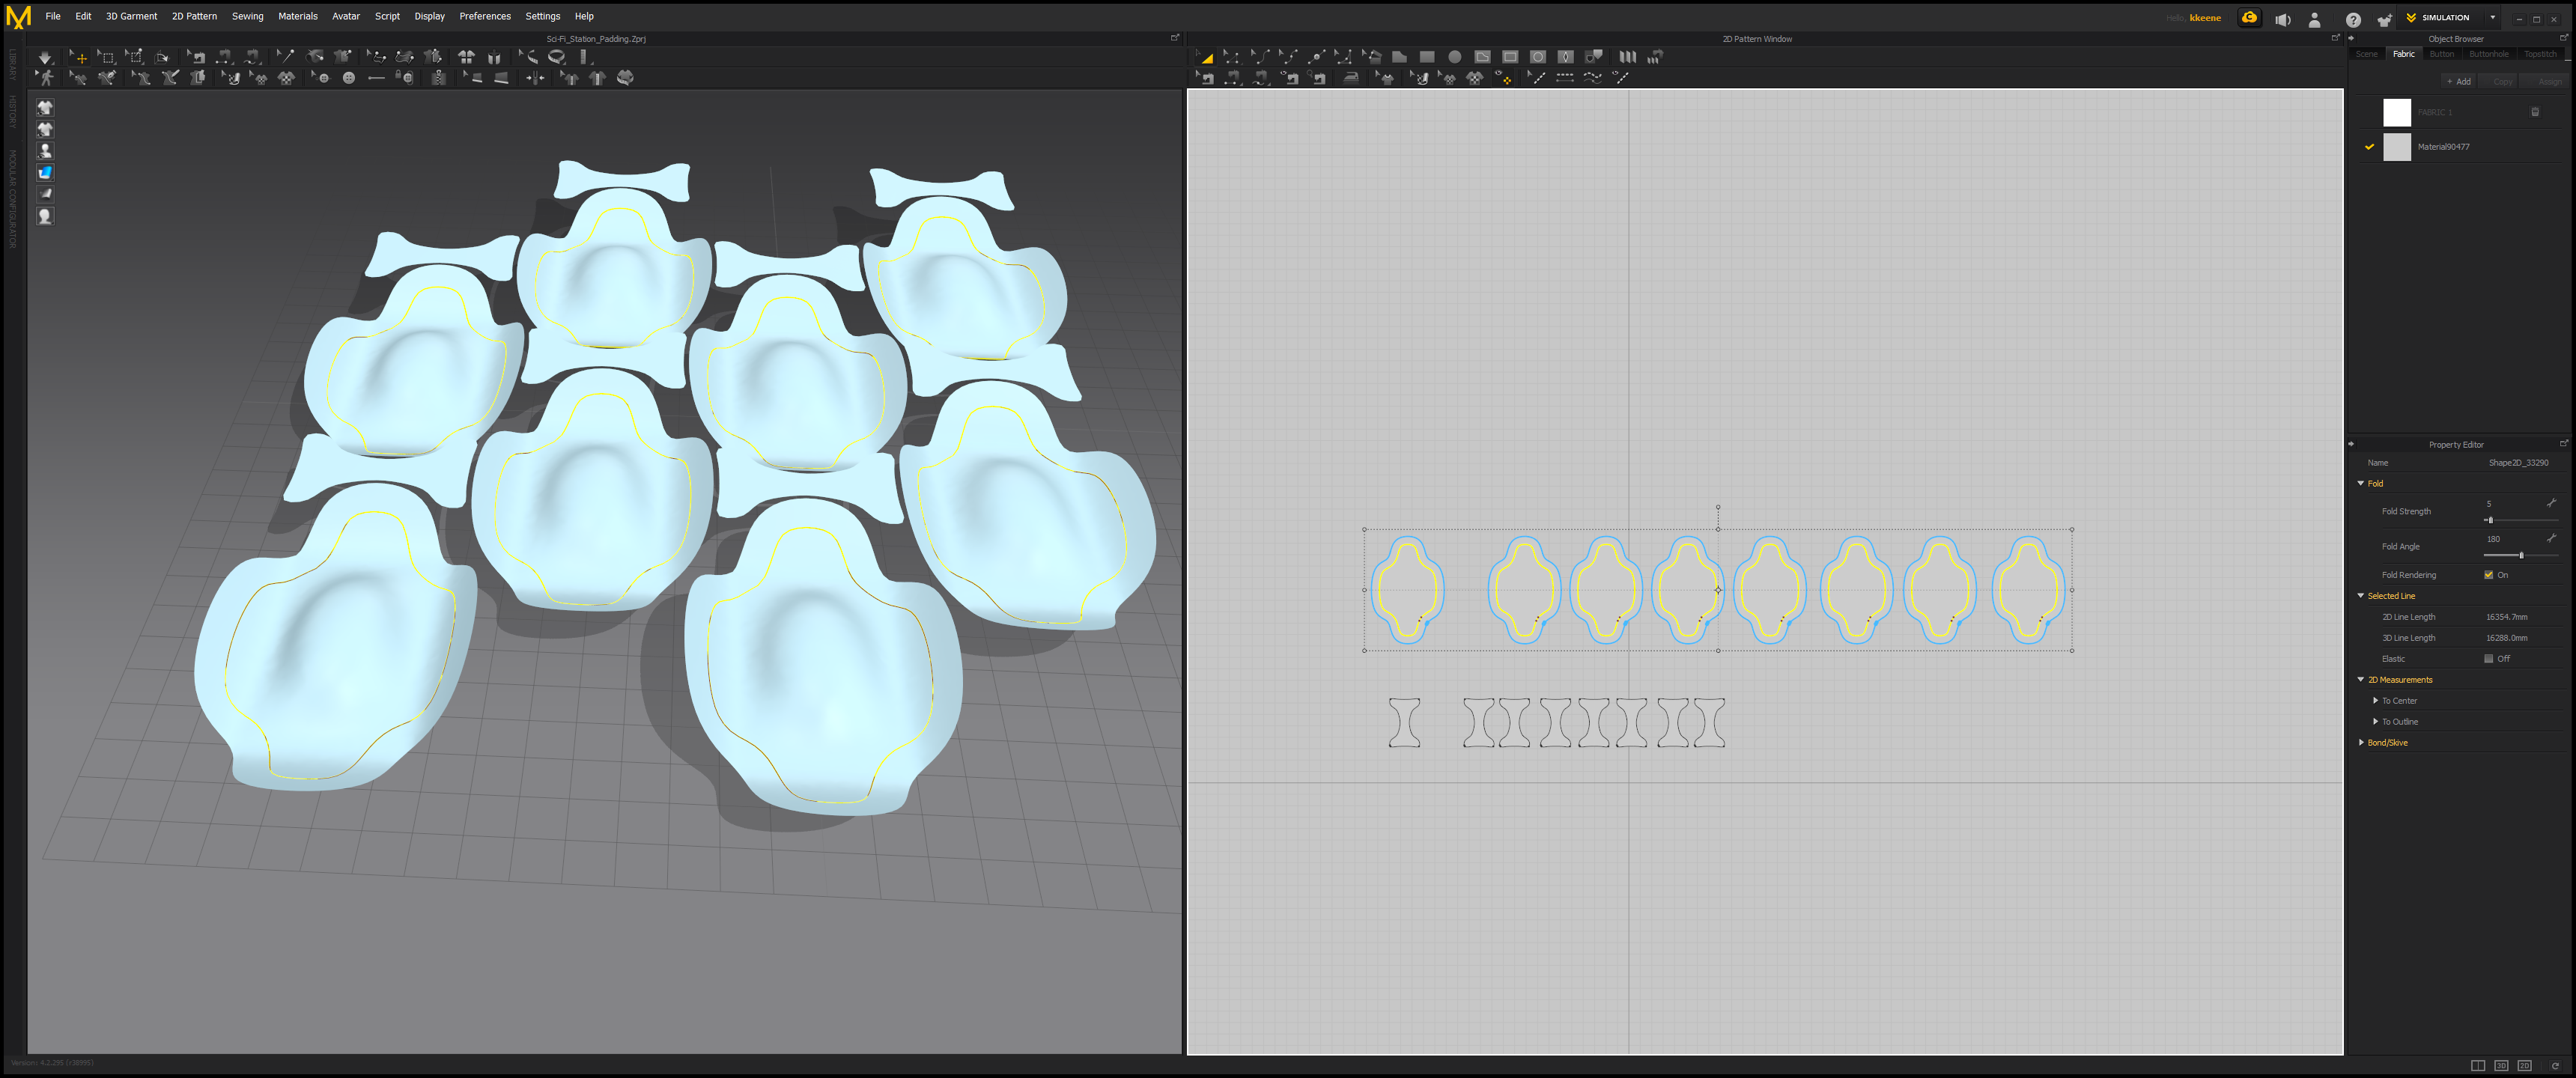
We are ready to start adding in details for the fabric we will simulate. The actual simulation fabric will be a duplicated fabric of the models above directly on top of the bases. Go ahead and select all your garments in the 3D view then freeze them by right clicking one and selecting "freeze."
Above you can see the garments turn blue when frozen. This means they will not simulate when he hit the sim button and will act like solid objects our main garments will be attached to.
Lets add in some internal lines to make seams.
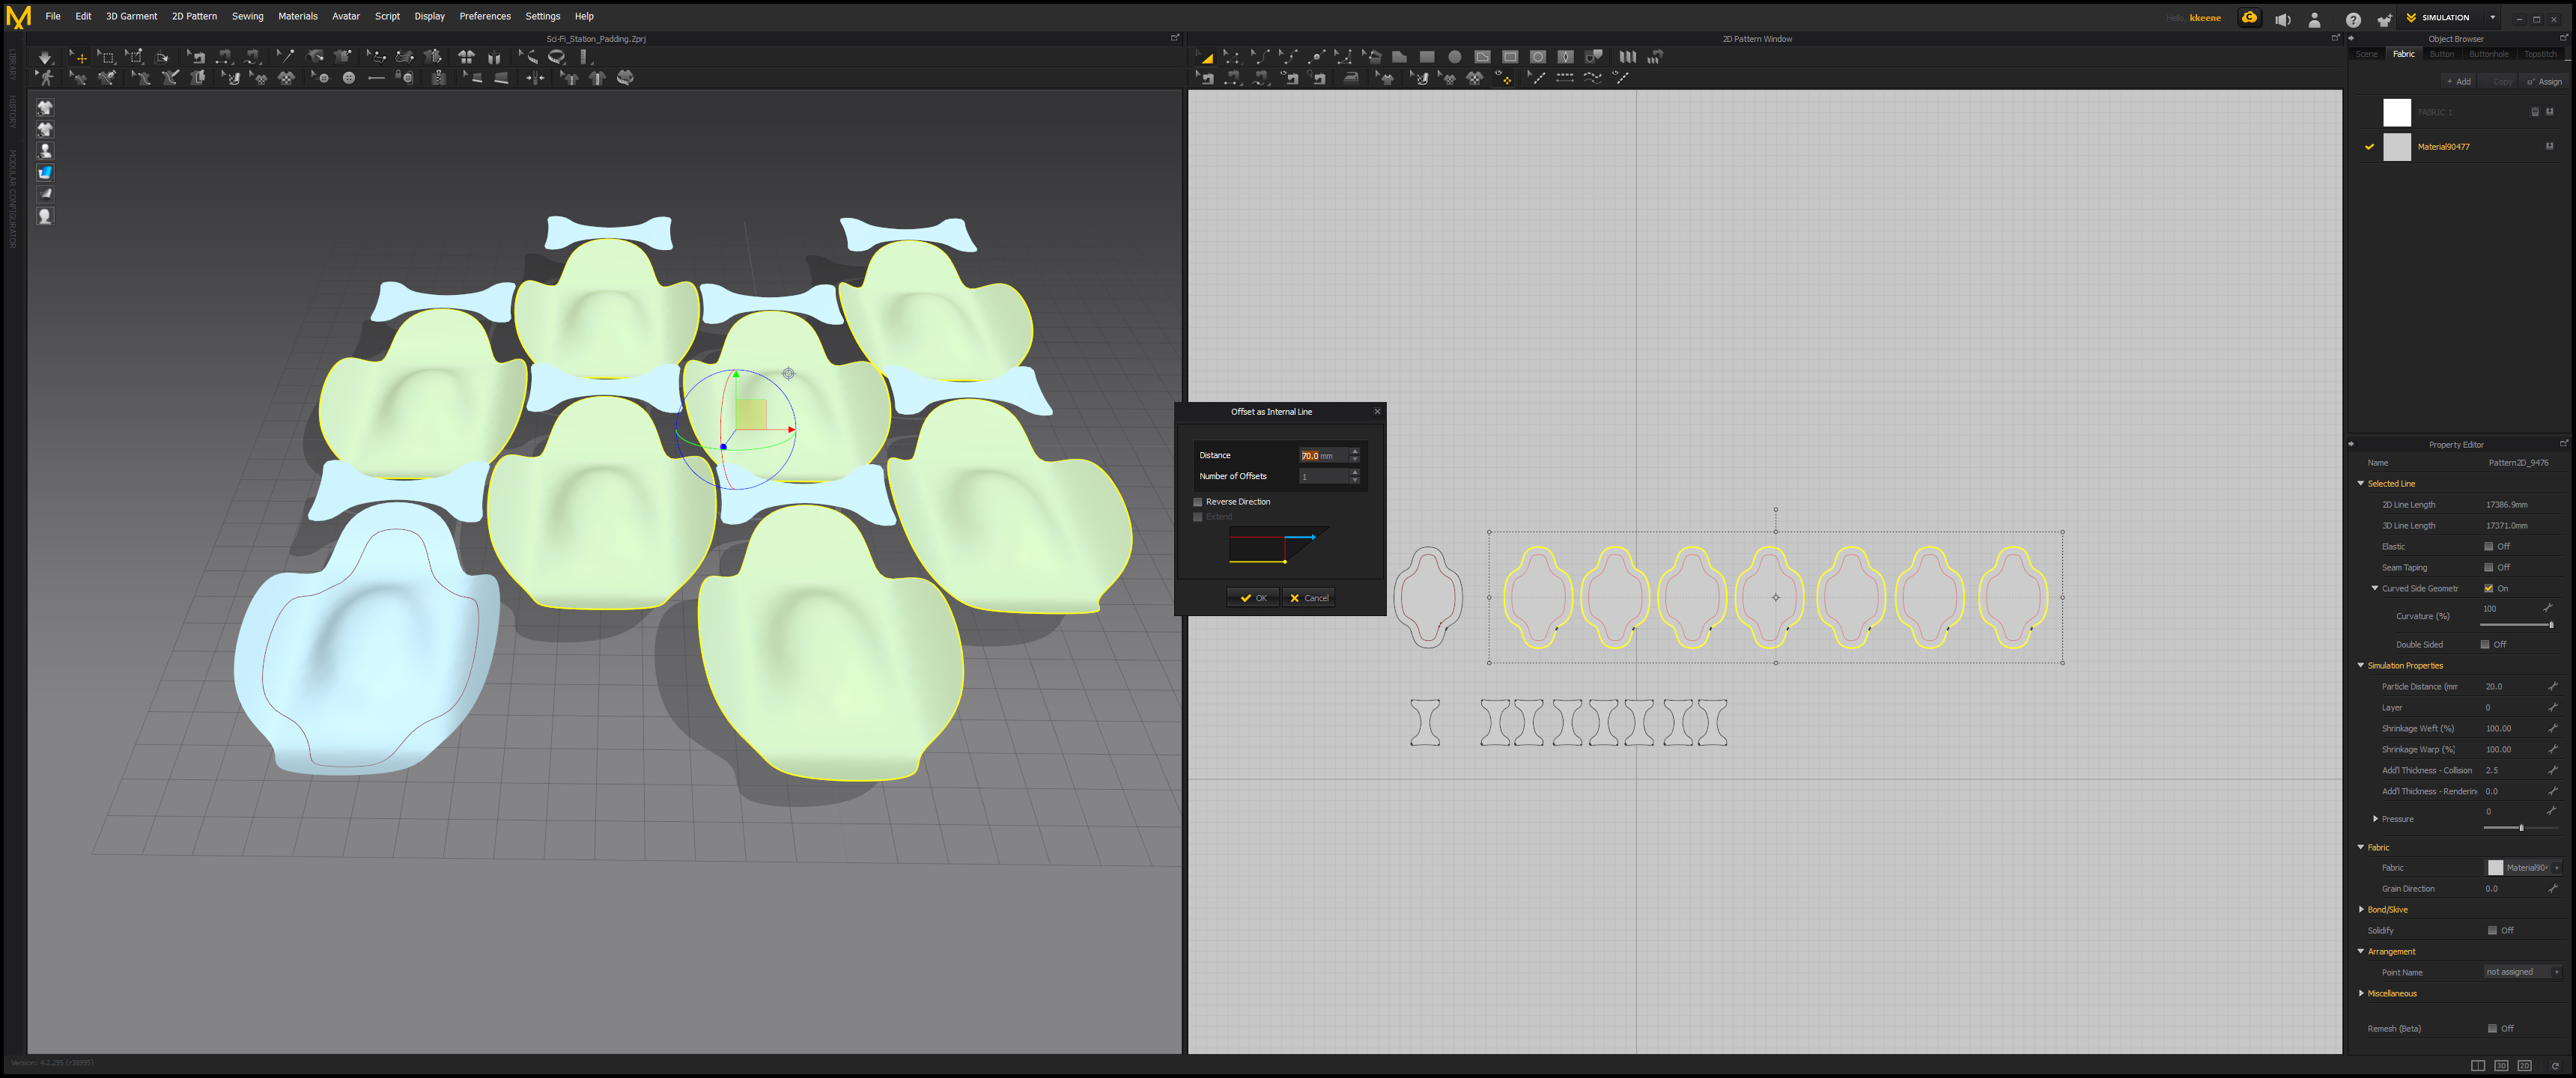
With all of your patterns want to have this internal seam, select them all then with right click choose "Offset as Internal Line." You can see above I did on one already to test distances.
Next we will cut out the inner shape on those patterns to make seperate patterns. This will make it easier to work with internal lines later on and let use do some cool things with UVs ,much later on.
Shift + Left Click all the center parts of the patterns. Just the shape on the inside should be highlighted yellow. After that you can right click then choose "Cut and Sew."
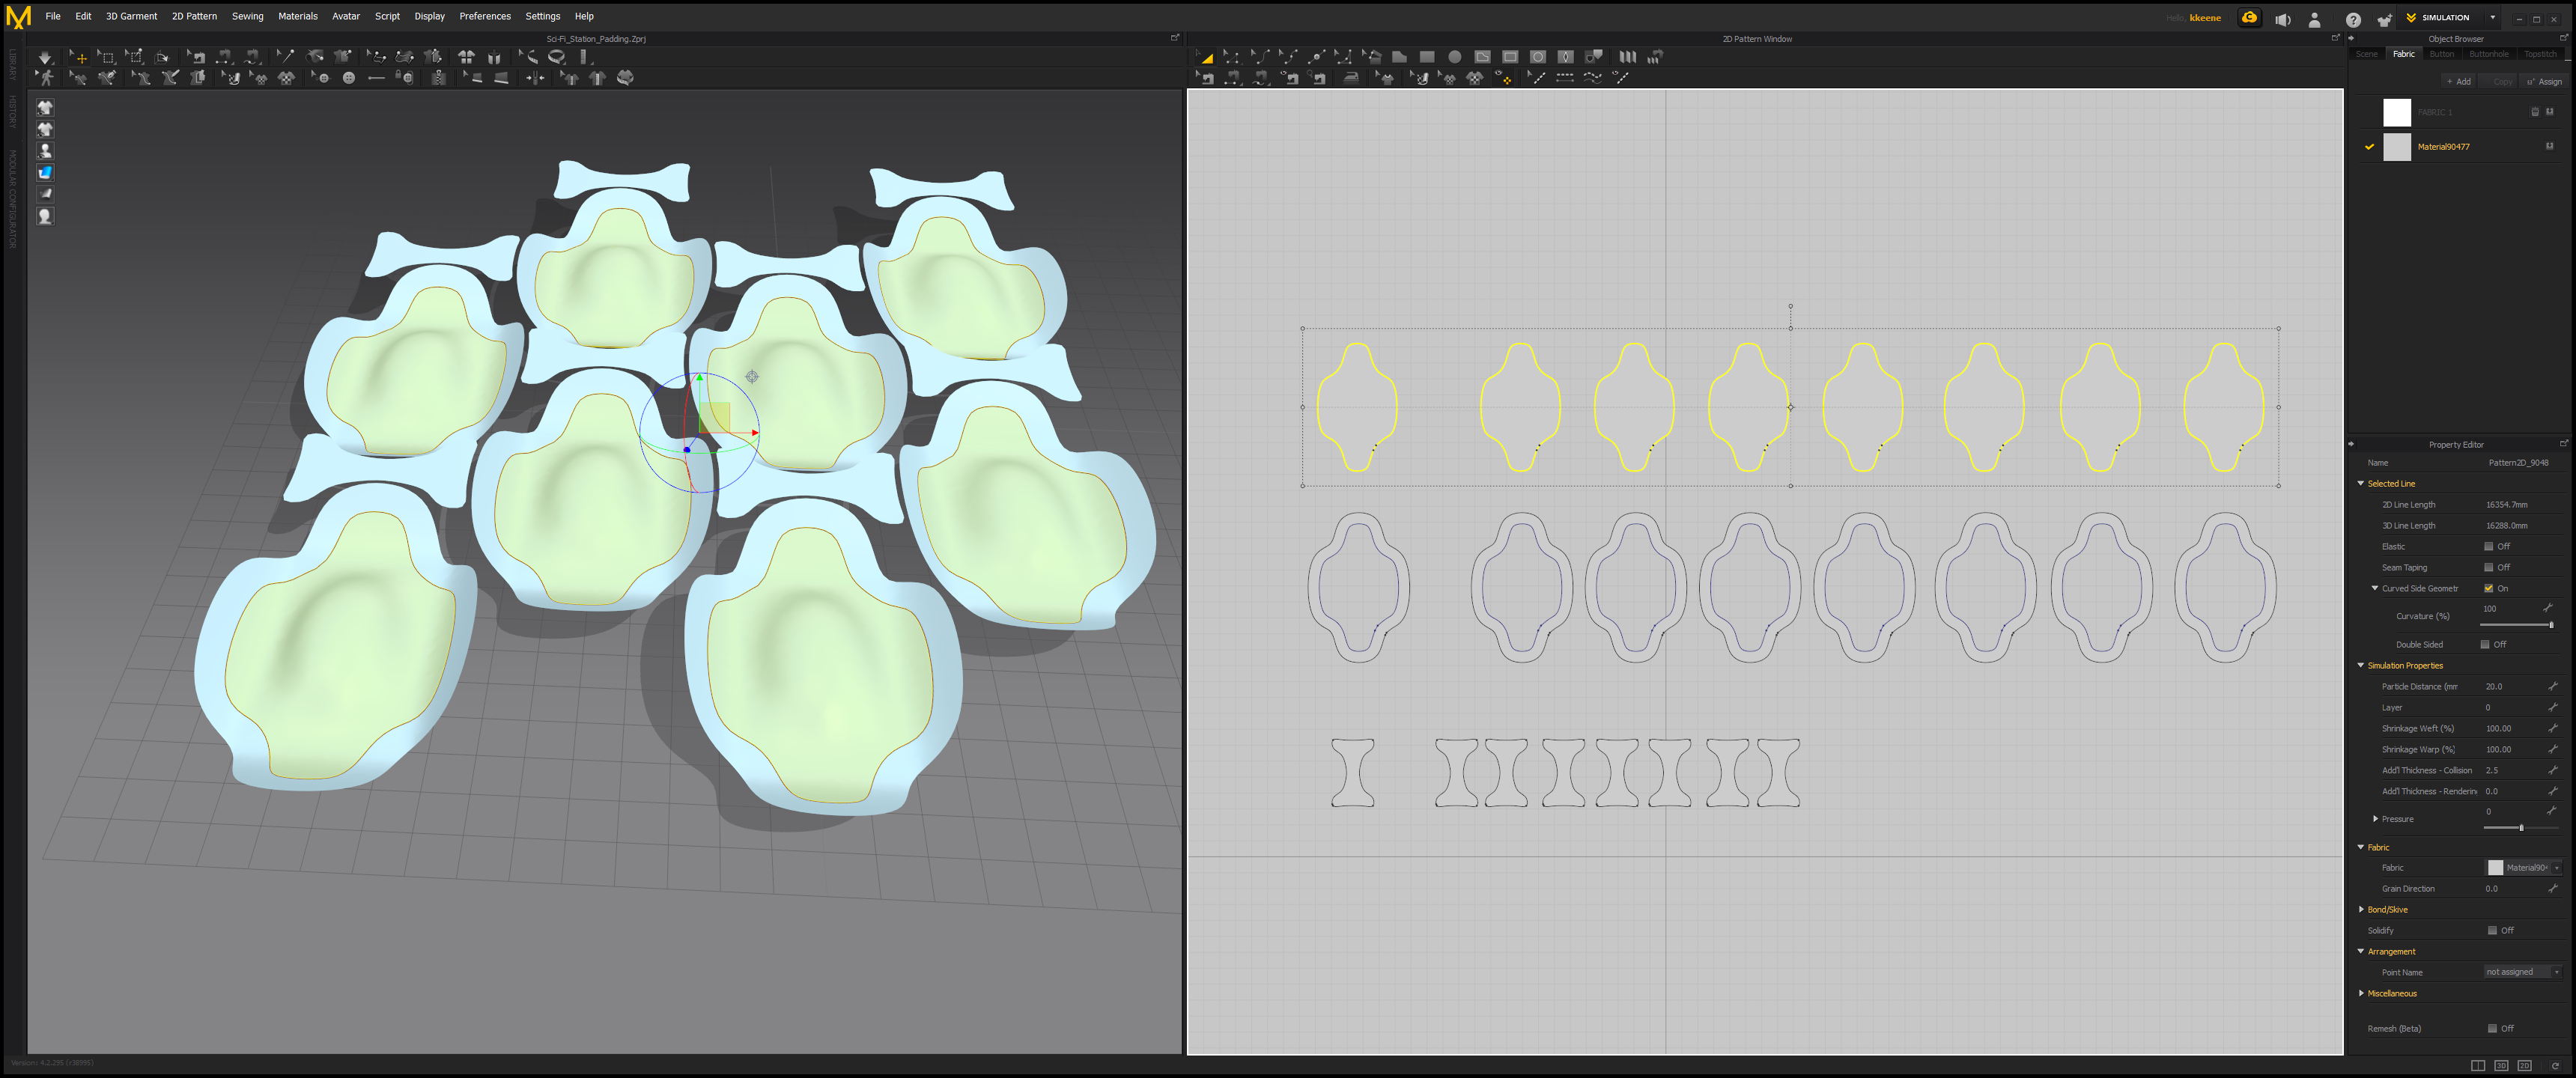
Above you can see the patterns have been slid up in the 2D view. They are still in the same location in 3D, just moved so we can work more easily in 2D. Now I will make a new internal line this time by using the circular internal line tool at the top in 2D view.

With the internal line tool you can put your cursor as close as you can to the center of your pattern as you can and when you left click just once quickly it should pull up a menu to let choose a more exact size for your circle.

Above I have copied and pasted the internal line to the others. Now do as we did before and cut+sew the circles out.
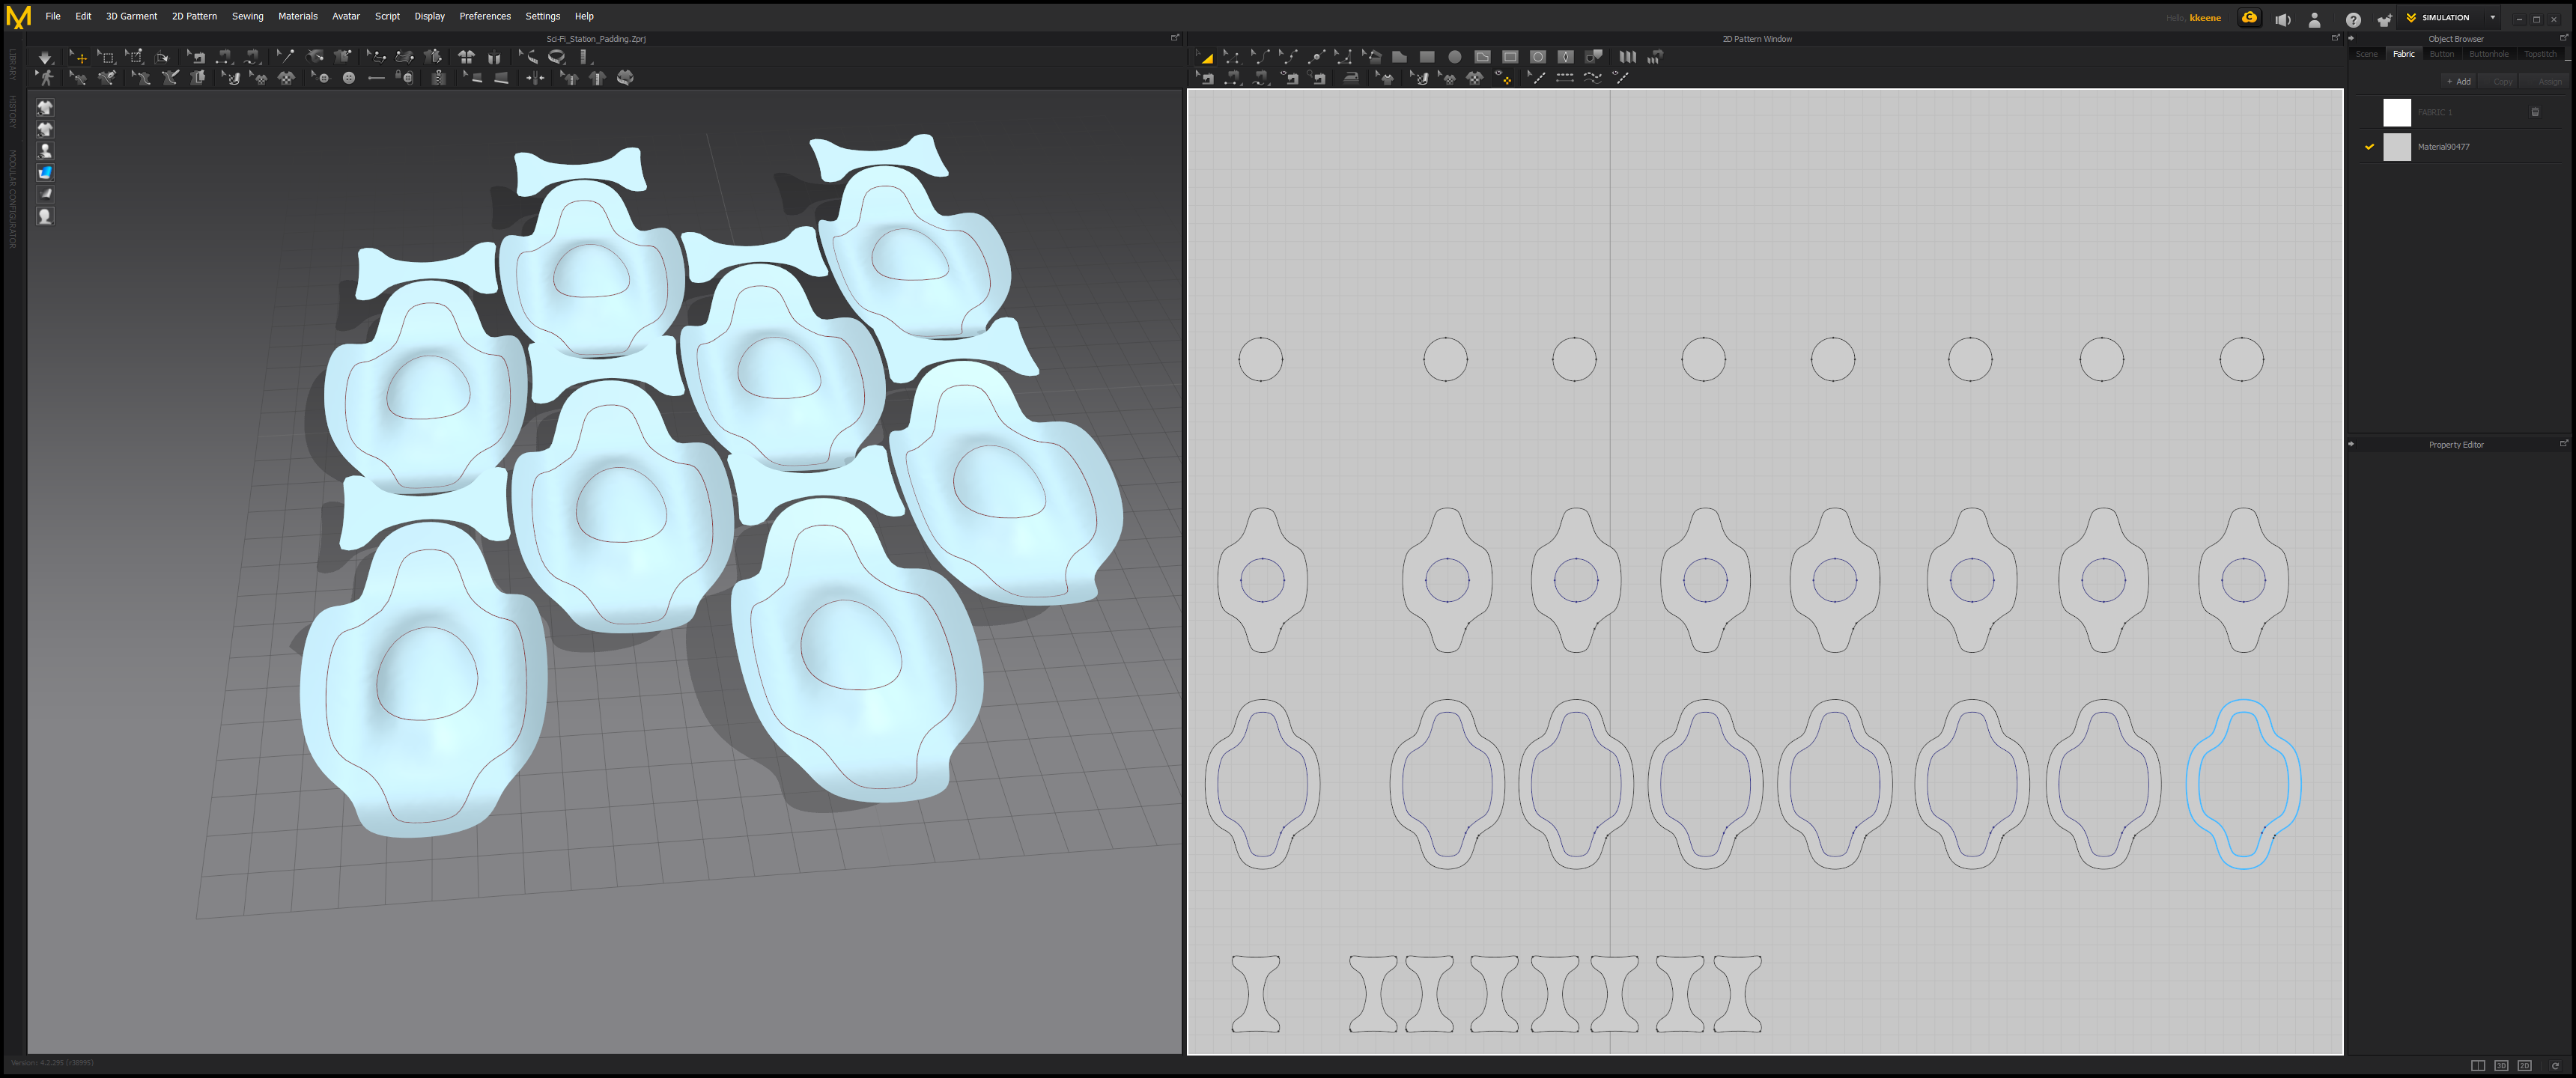
Next we will use the single internal line tool to make a more complex pattern.
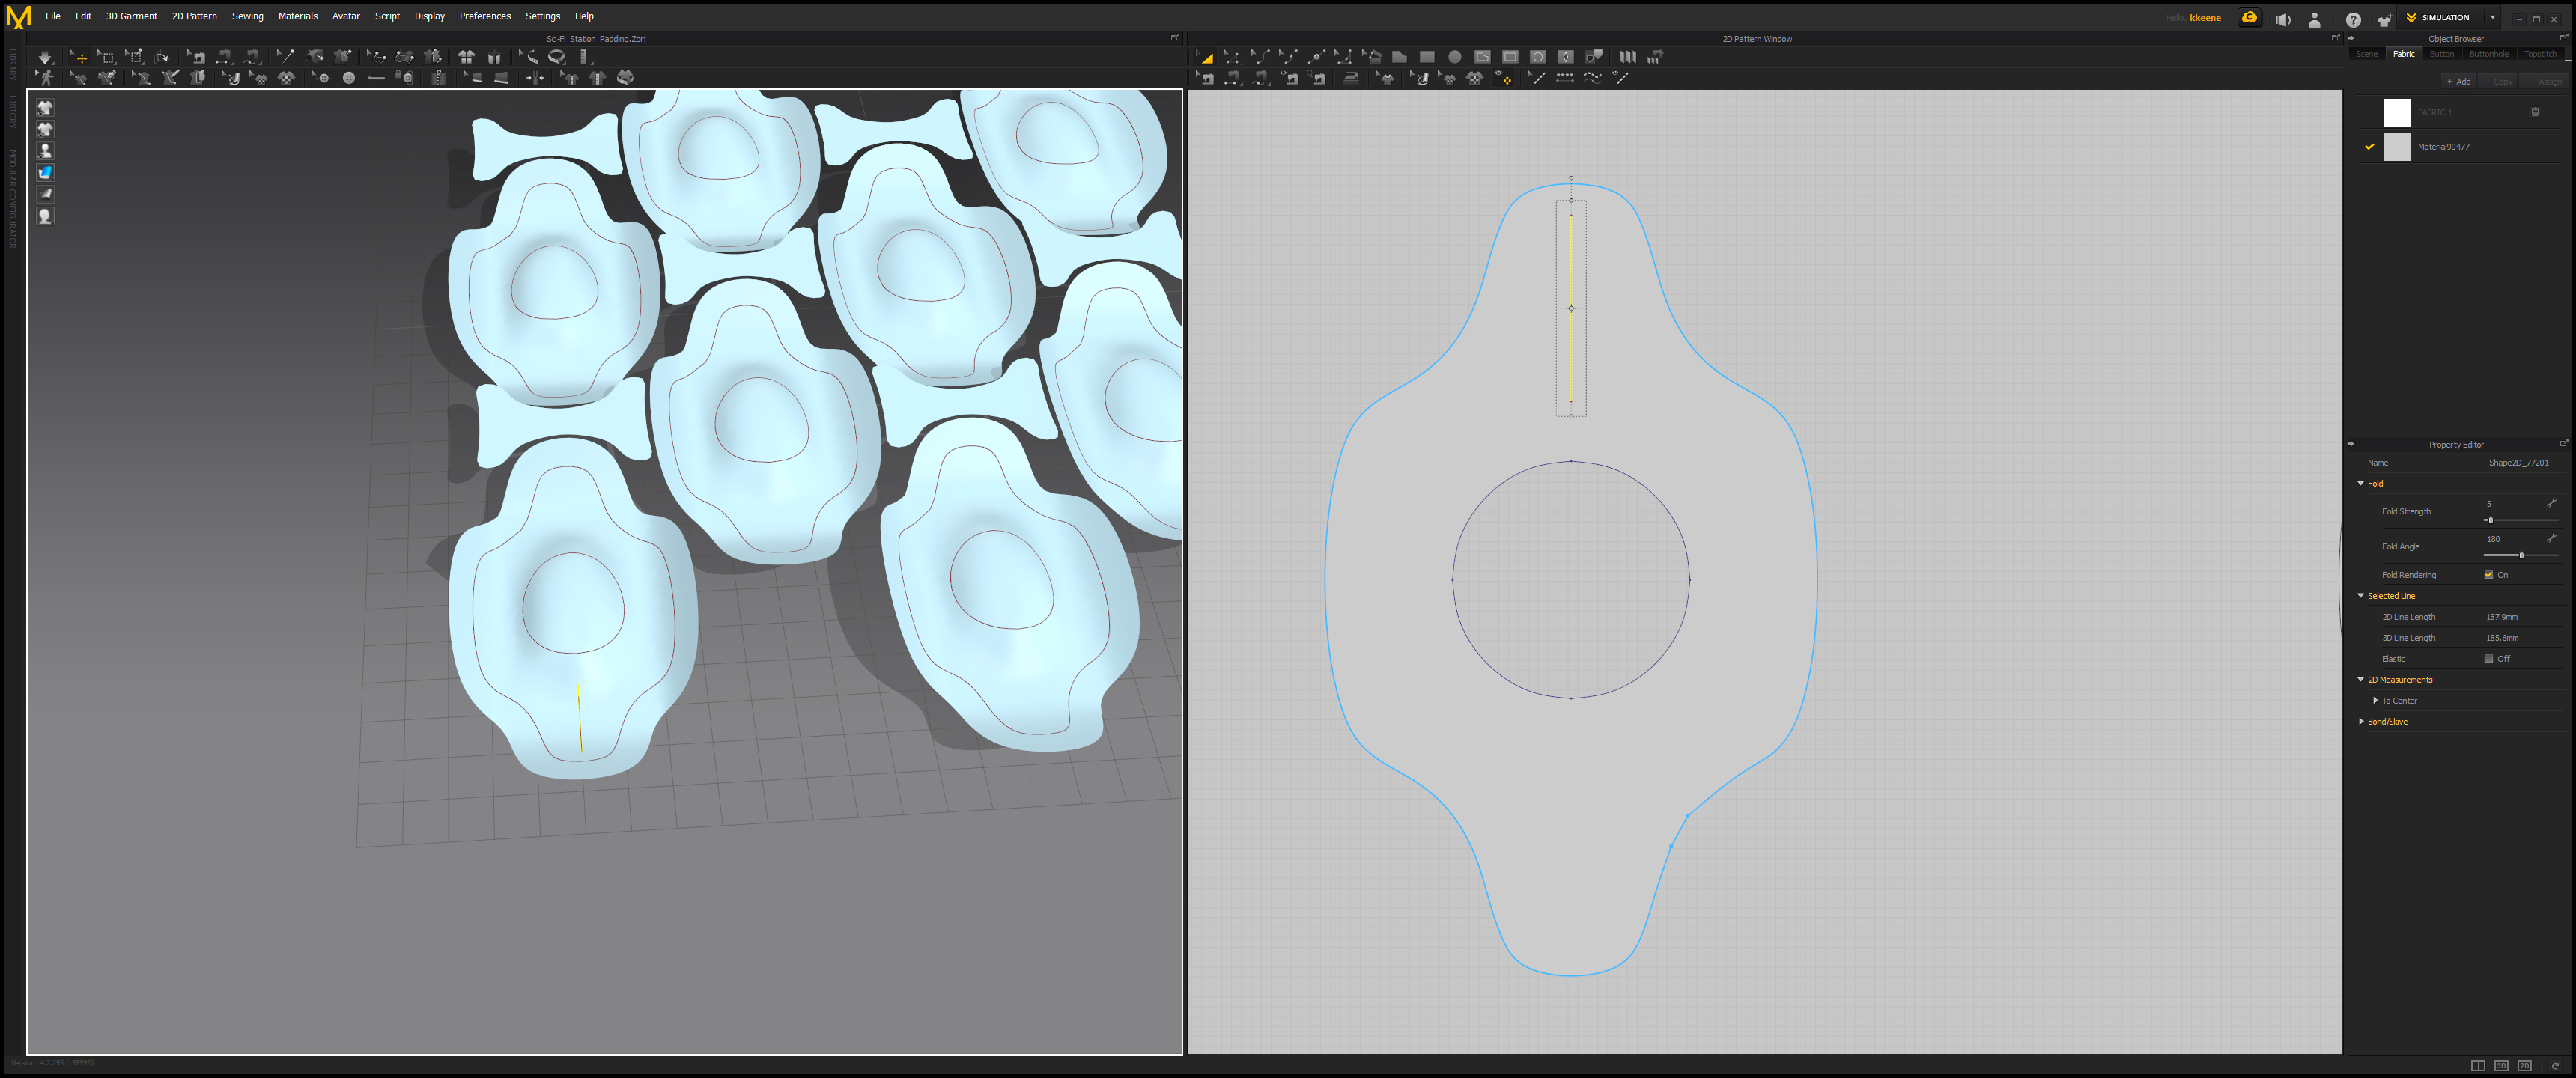
First I draw just one line. Once you is drawn you will want to make it centered. Next we will scale this line using the transform box on it to span across the whole pattern.
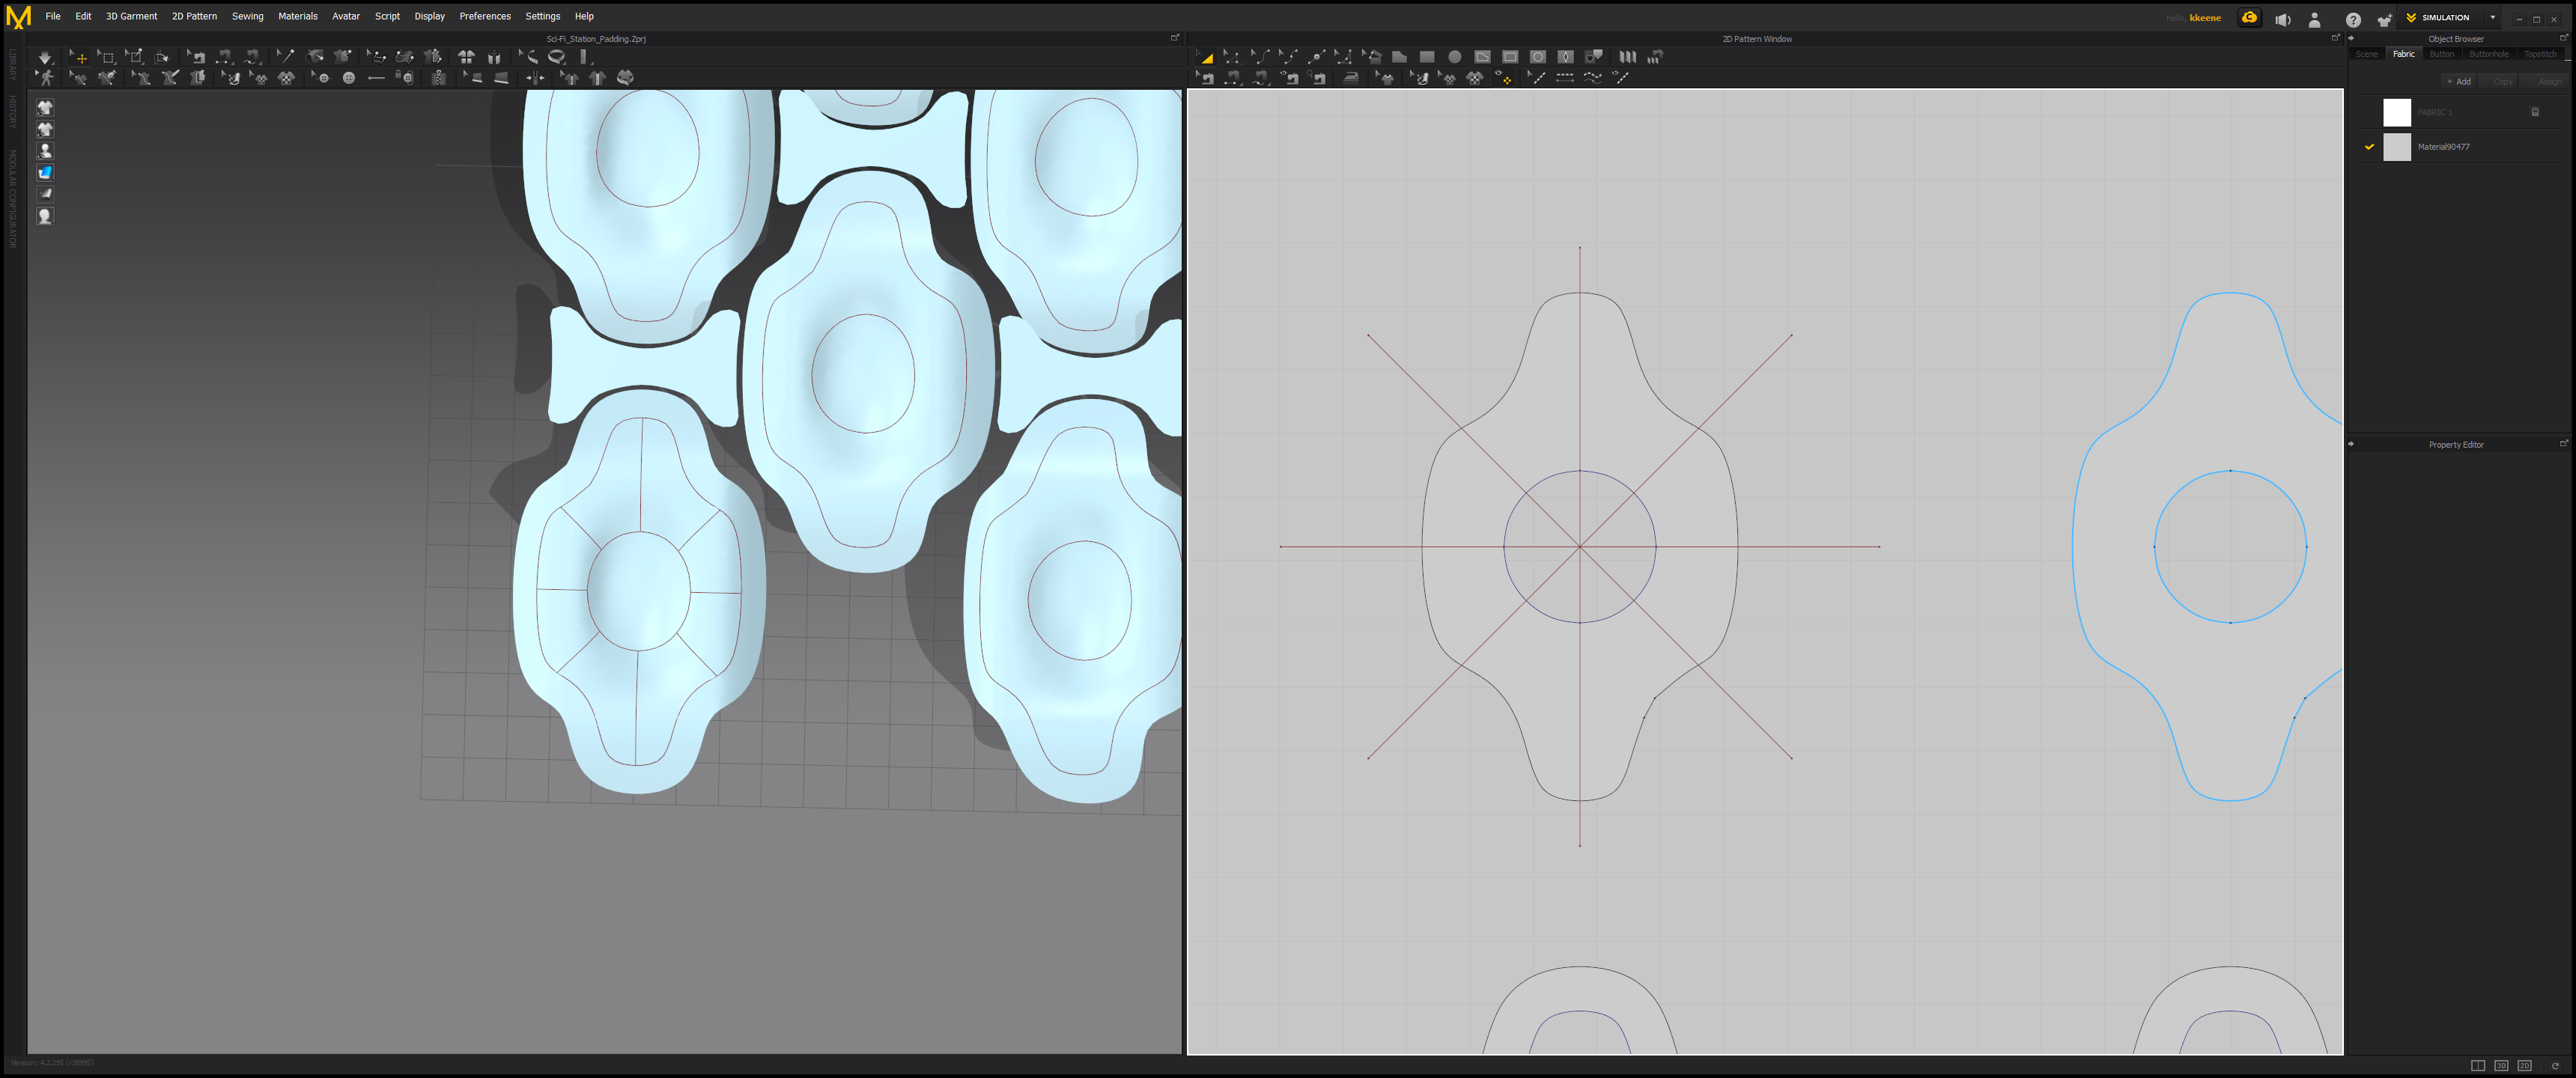
Above I scaled up one line, then I copy pasted and rotated several times to make that pattern above. Now to just copy and paste this to the others.
Finally we are about ready to simulate this.
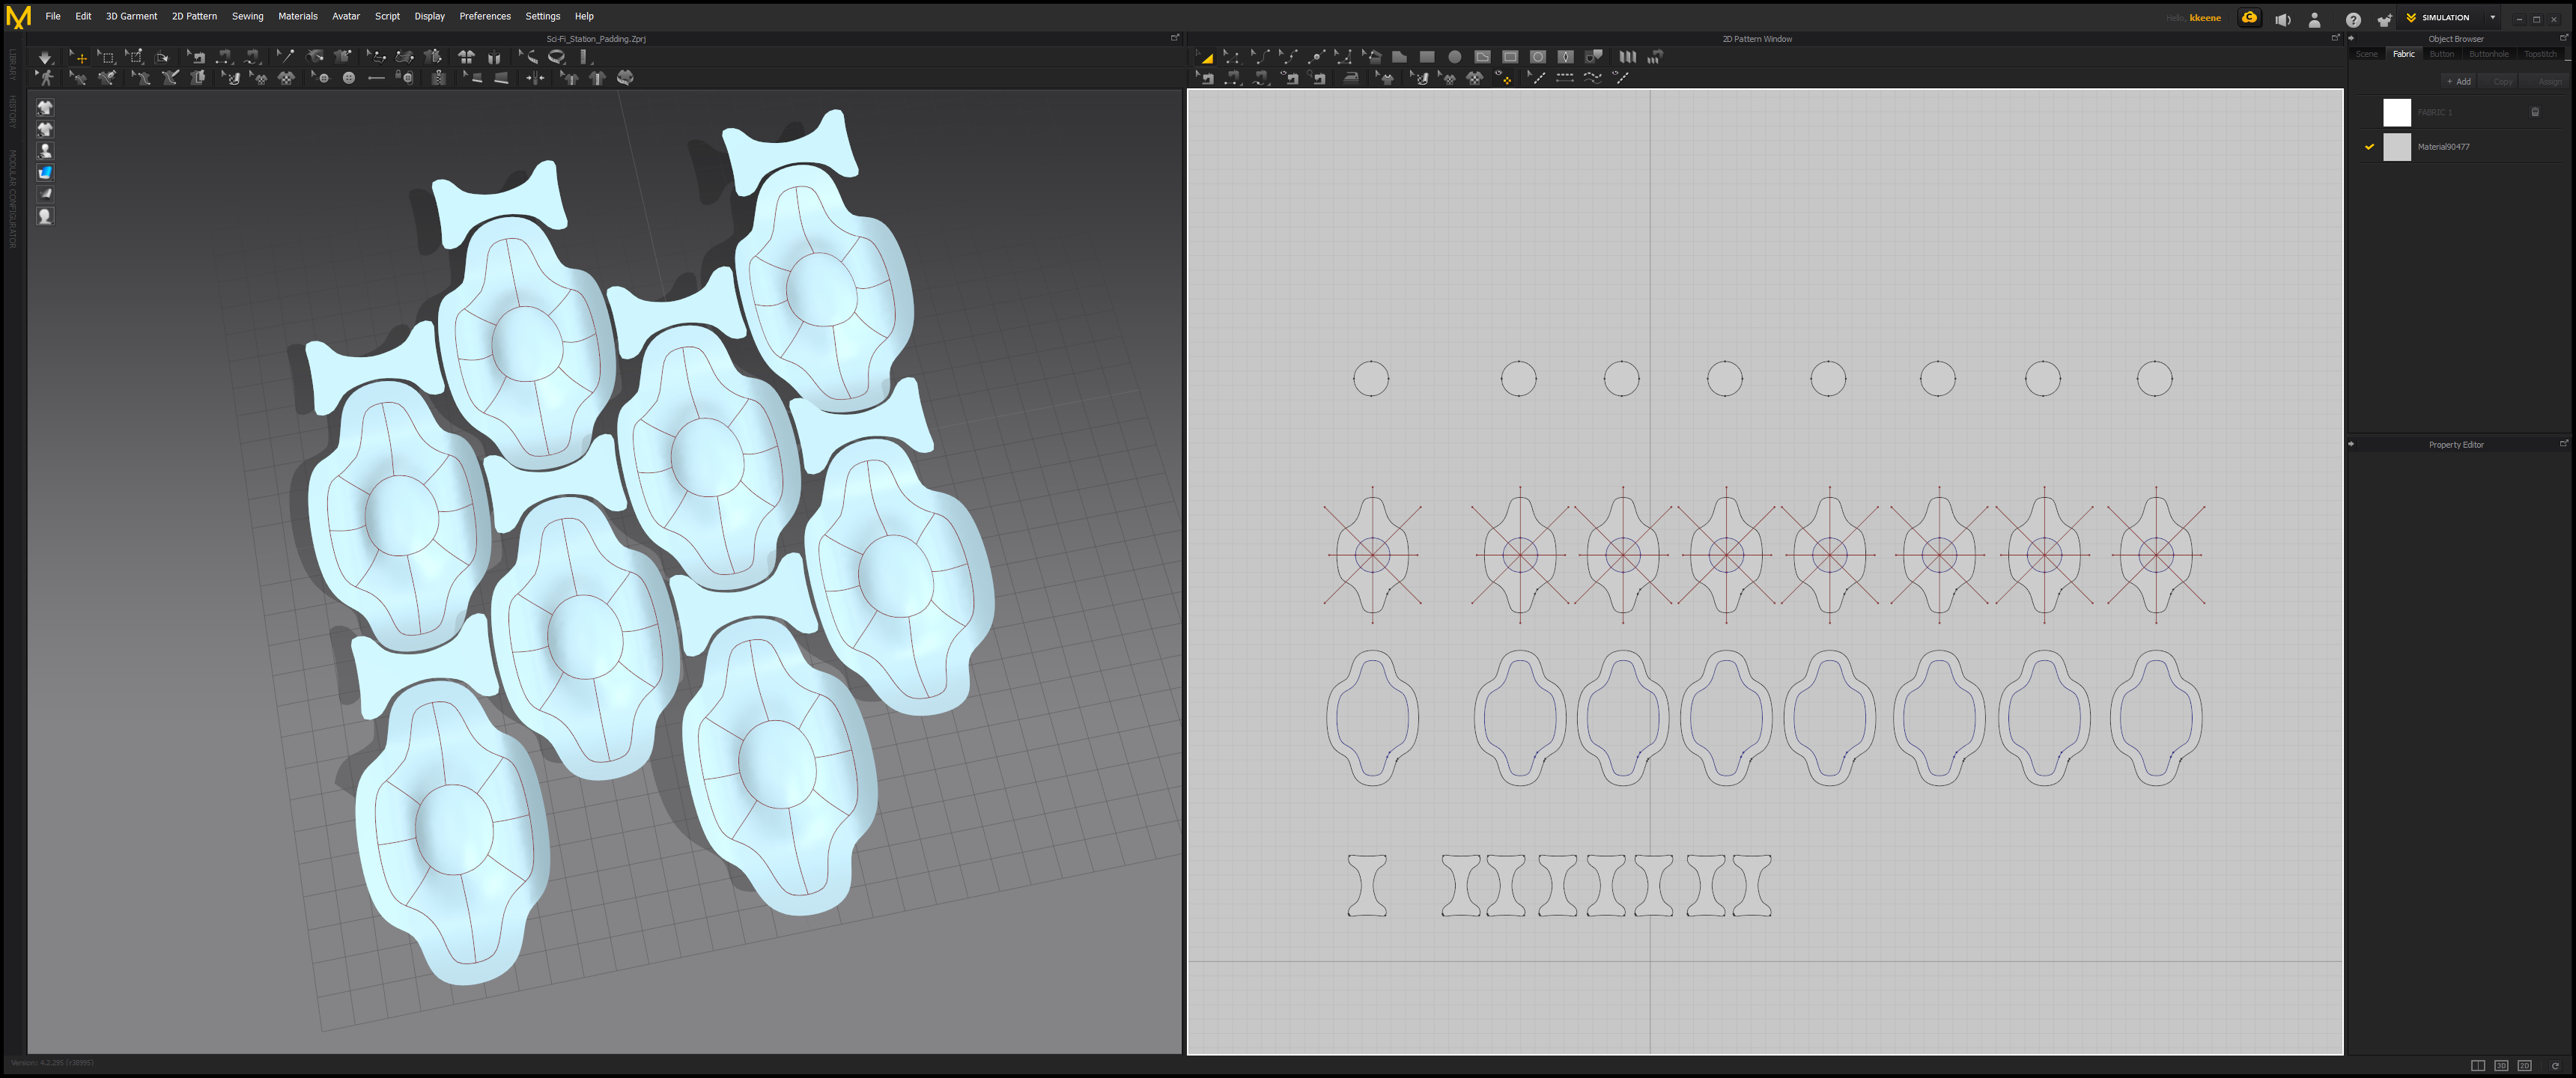
Above you can see I added a new internal line to my small shapes but I did not cut and sew these out because I am not doing anything complex inside them.
Now select everything then right click and choose "layer clone (over)"
I slid these new cloned pieces straight up. These new ones are right on top of our base shape and sewn together where there are internal lines and edges. Go ahead and unfreeze ONLY the top patterns. You will want to keep the bottom original ones frozen.
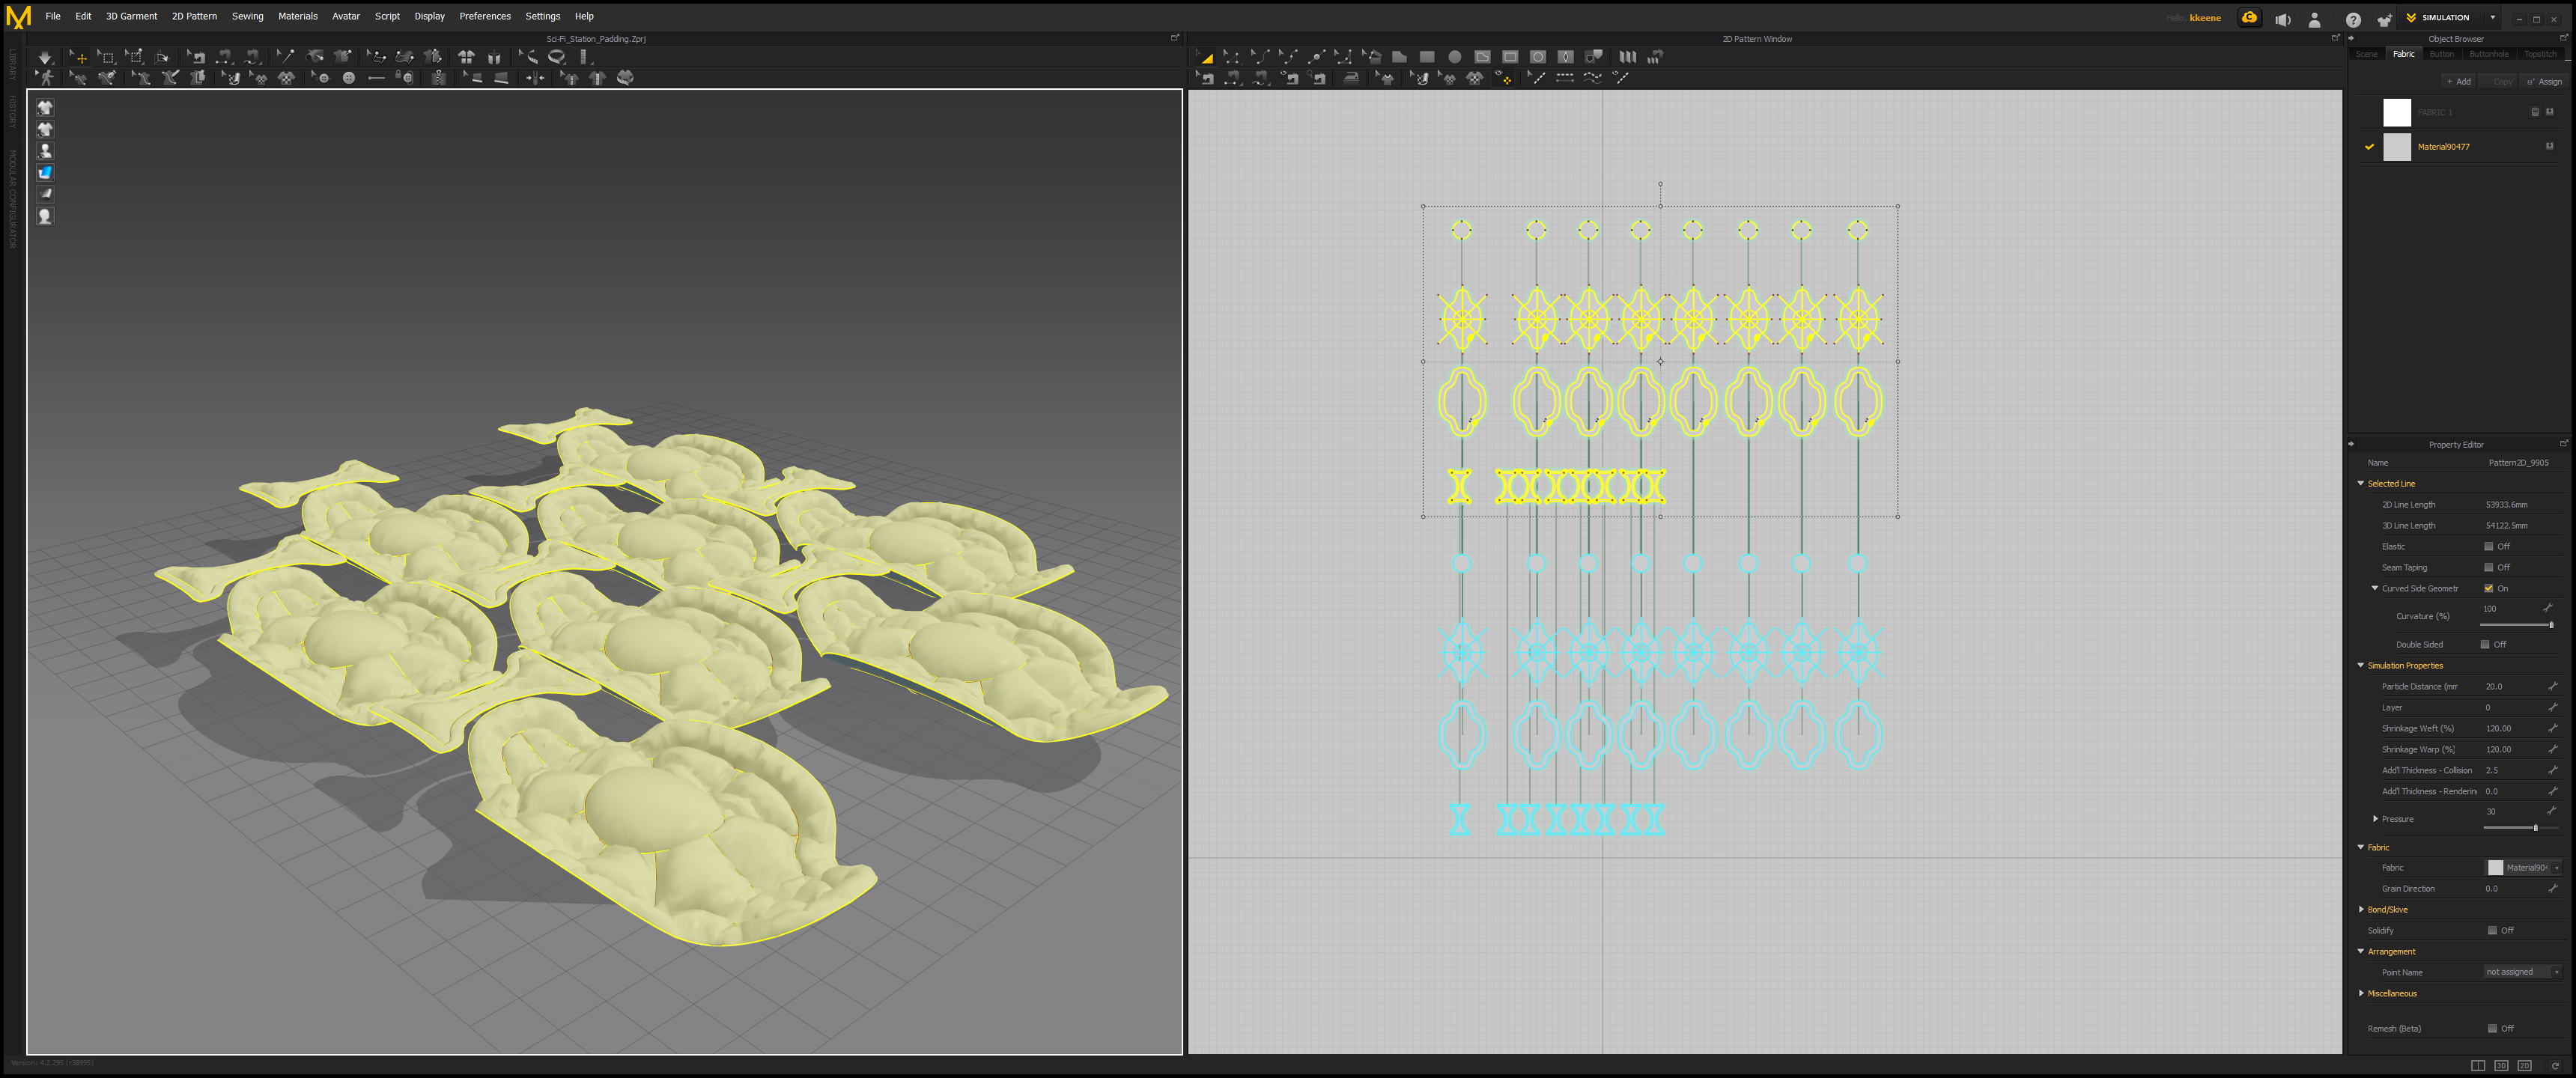
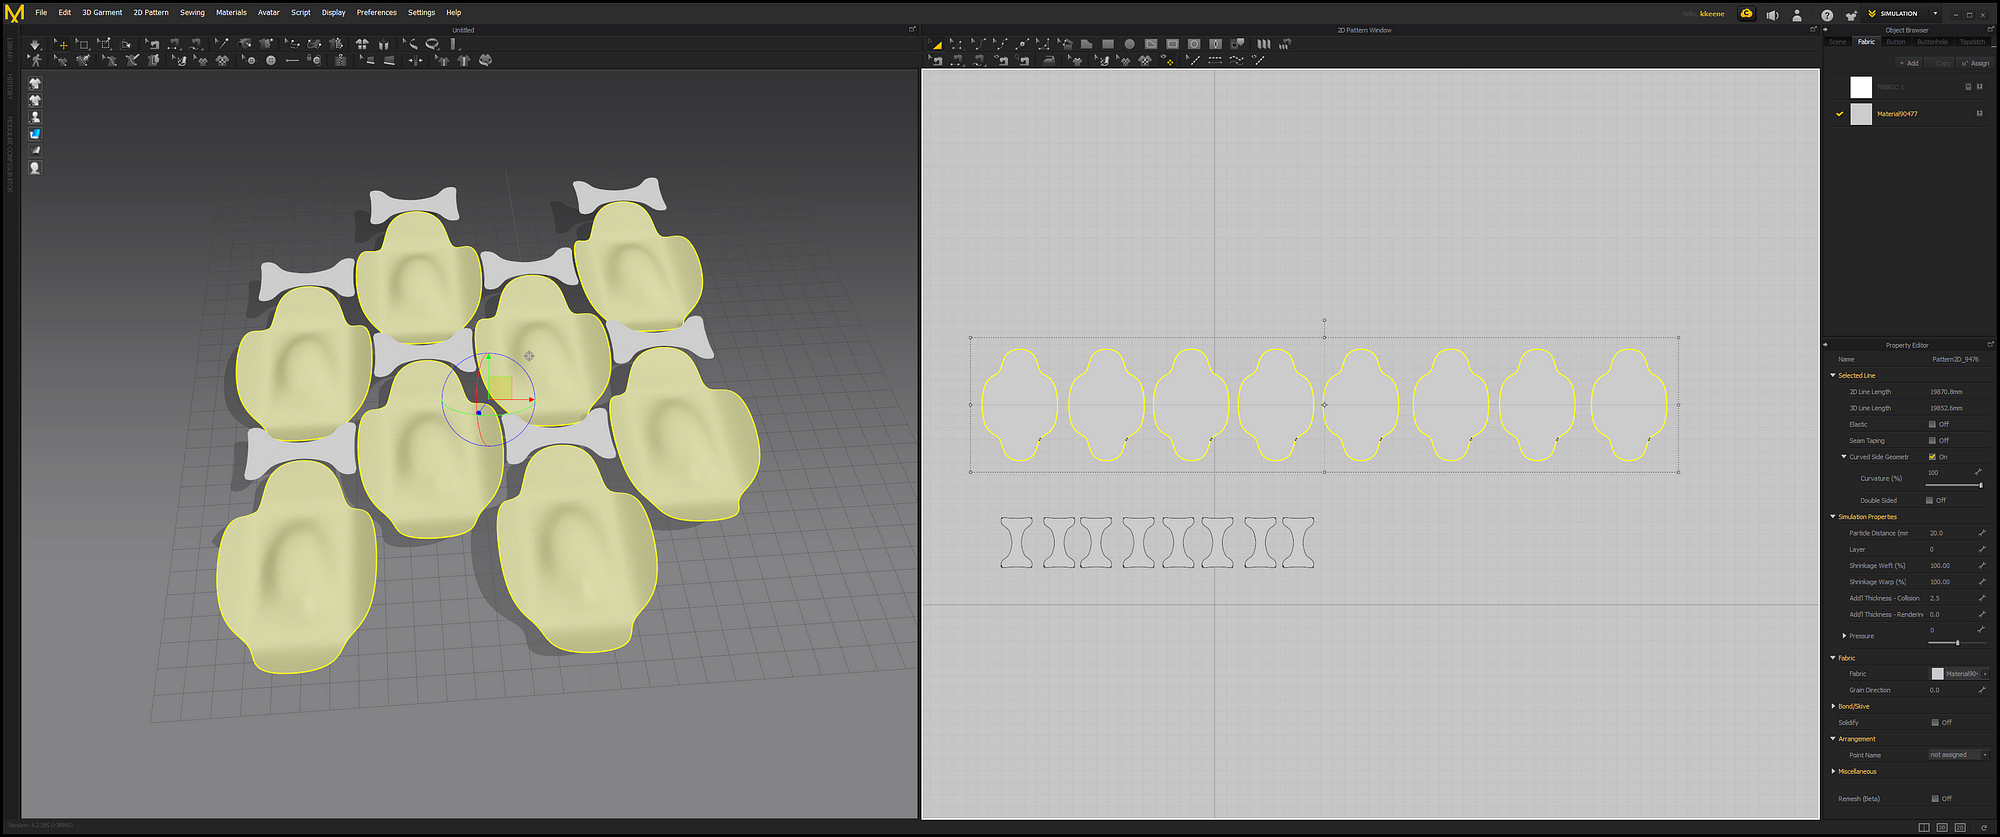
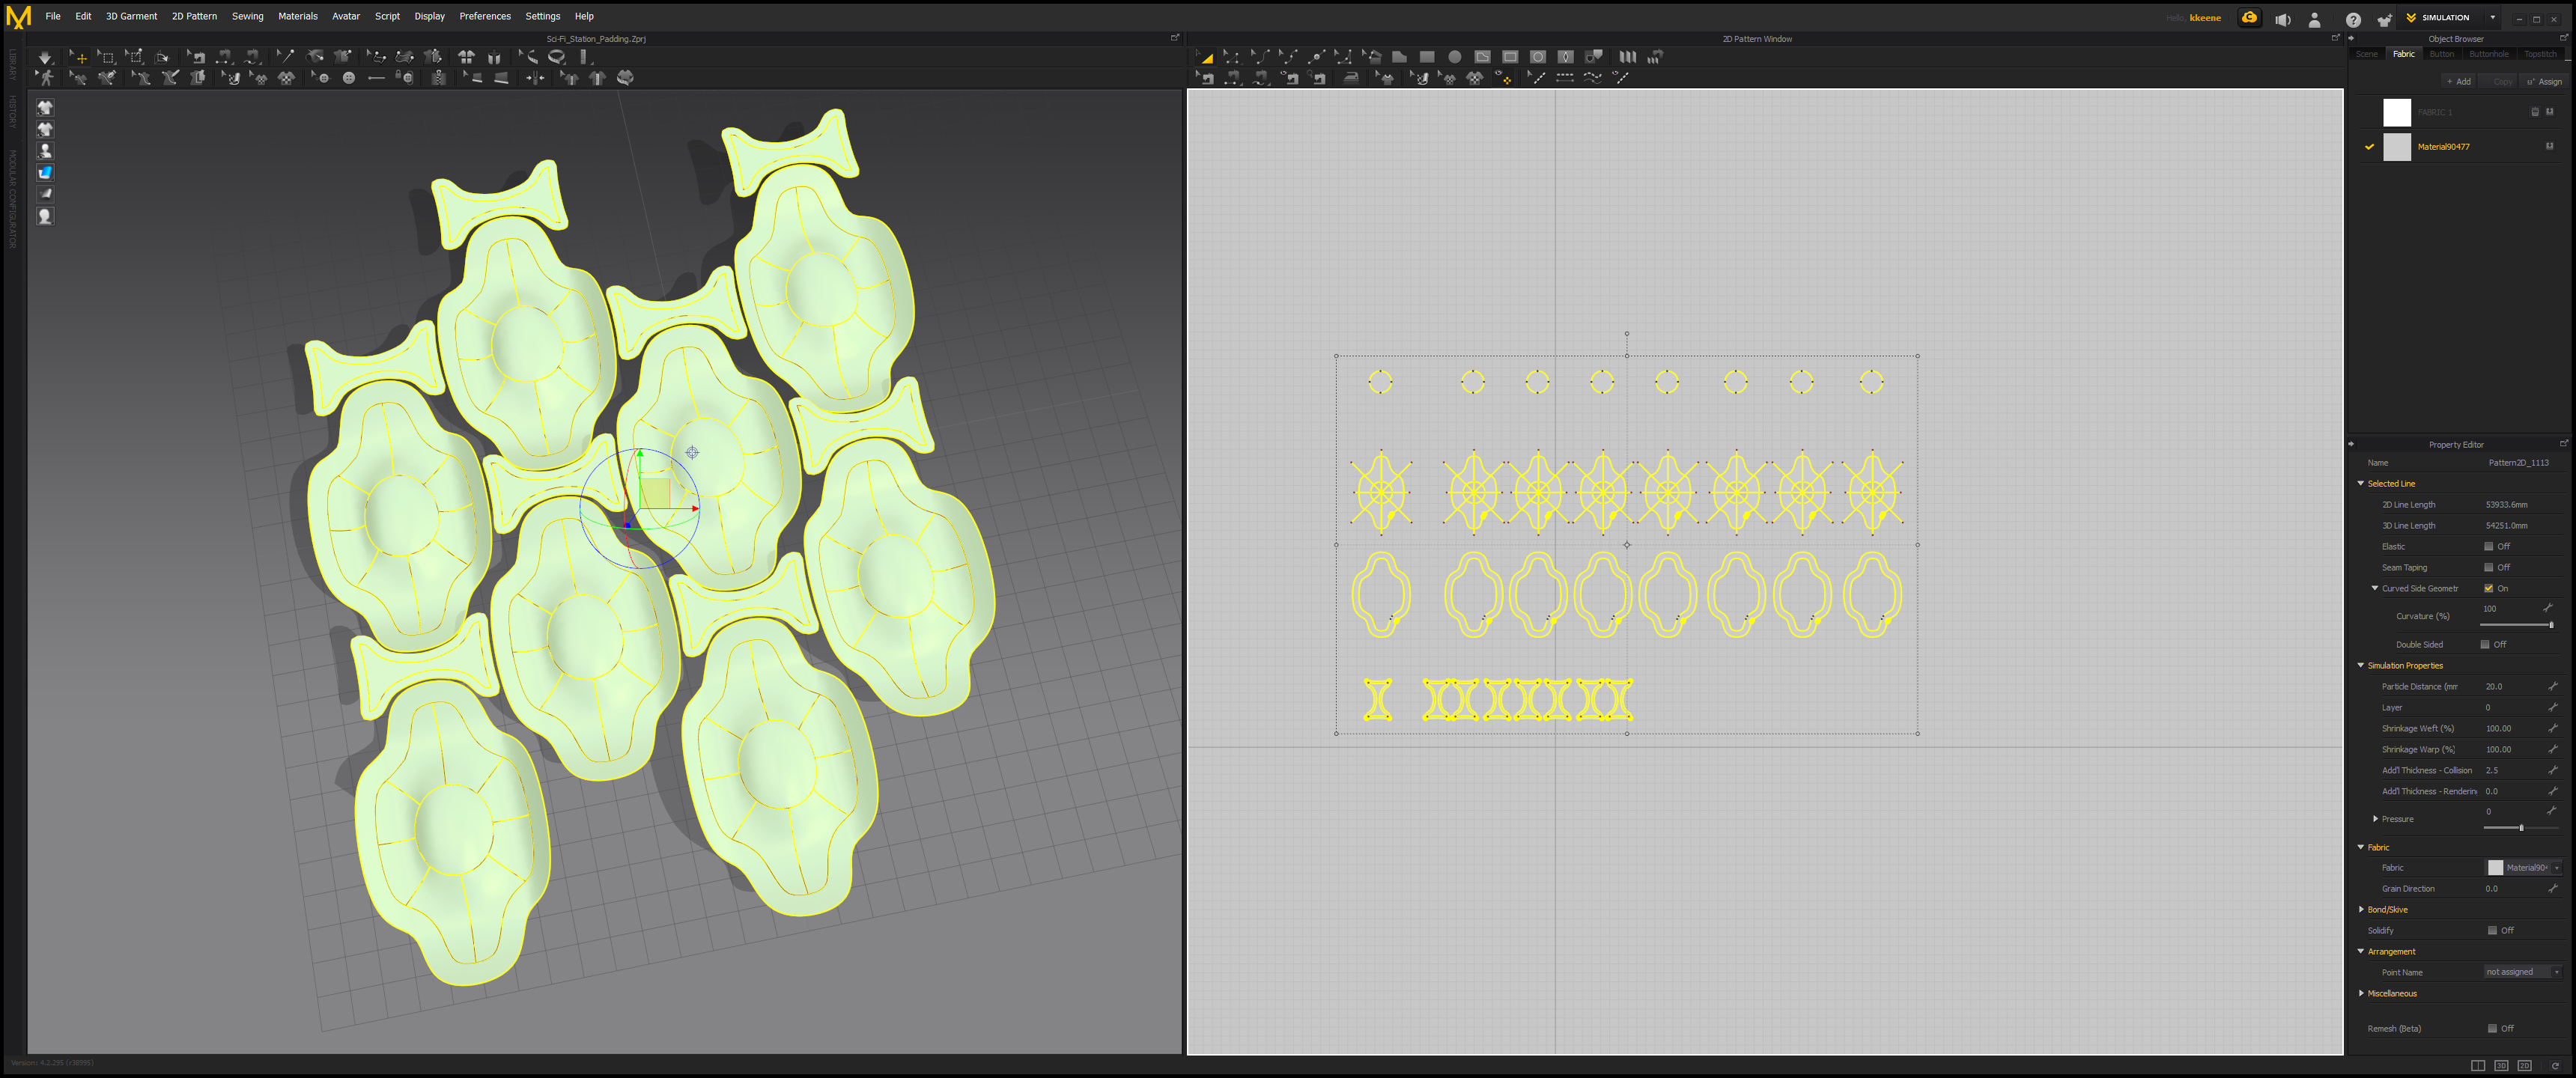
In order to simulate, have the garments selected in the 2D view like above then on the right under "simulation properties" change the pressure to 30 which is what will inflate it. To add some more warping and wrinkling I changed the shrinkage weft and skrinkage warp to 120. These options are some of the main settings you mess with for your simulation. Go ahead and hit the simulation button in the upper left and you should get something similar to mine.
Note the location of "Particle Distance" at the top of simulation properties as we will change this next.
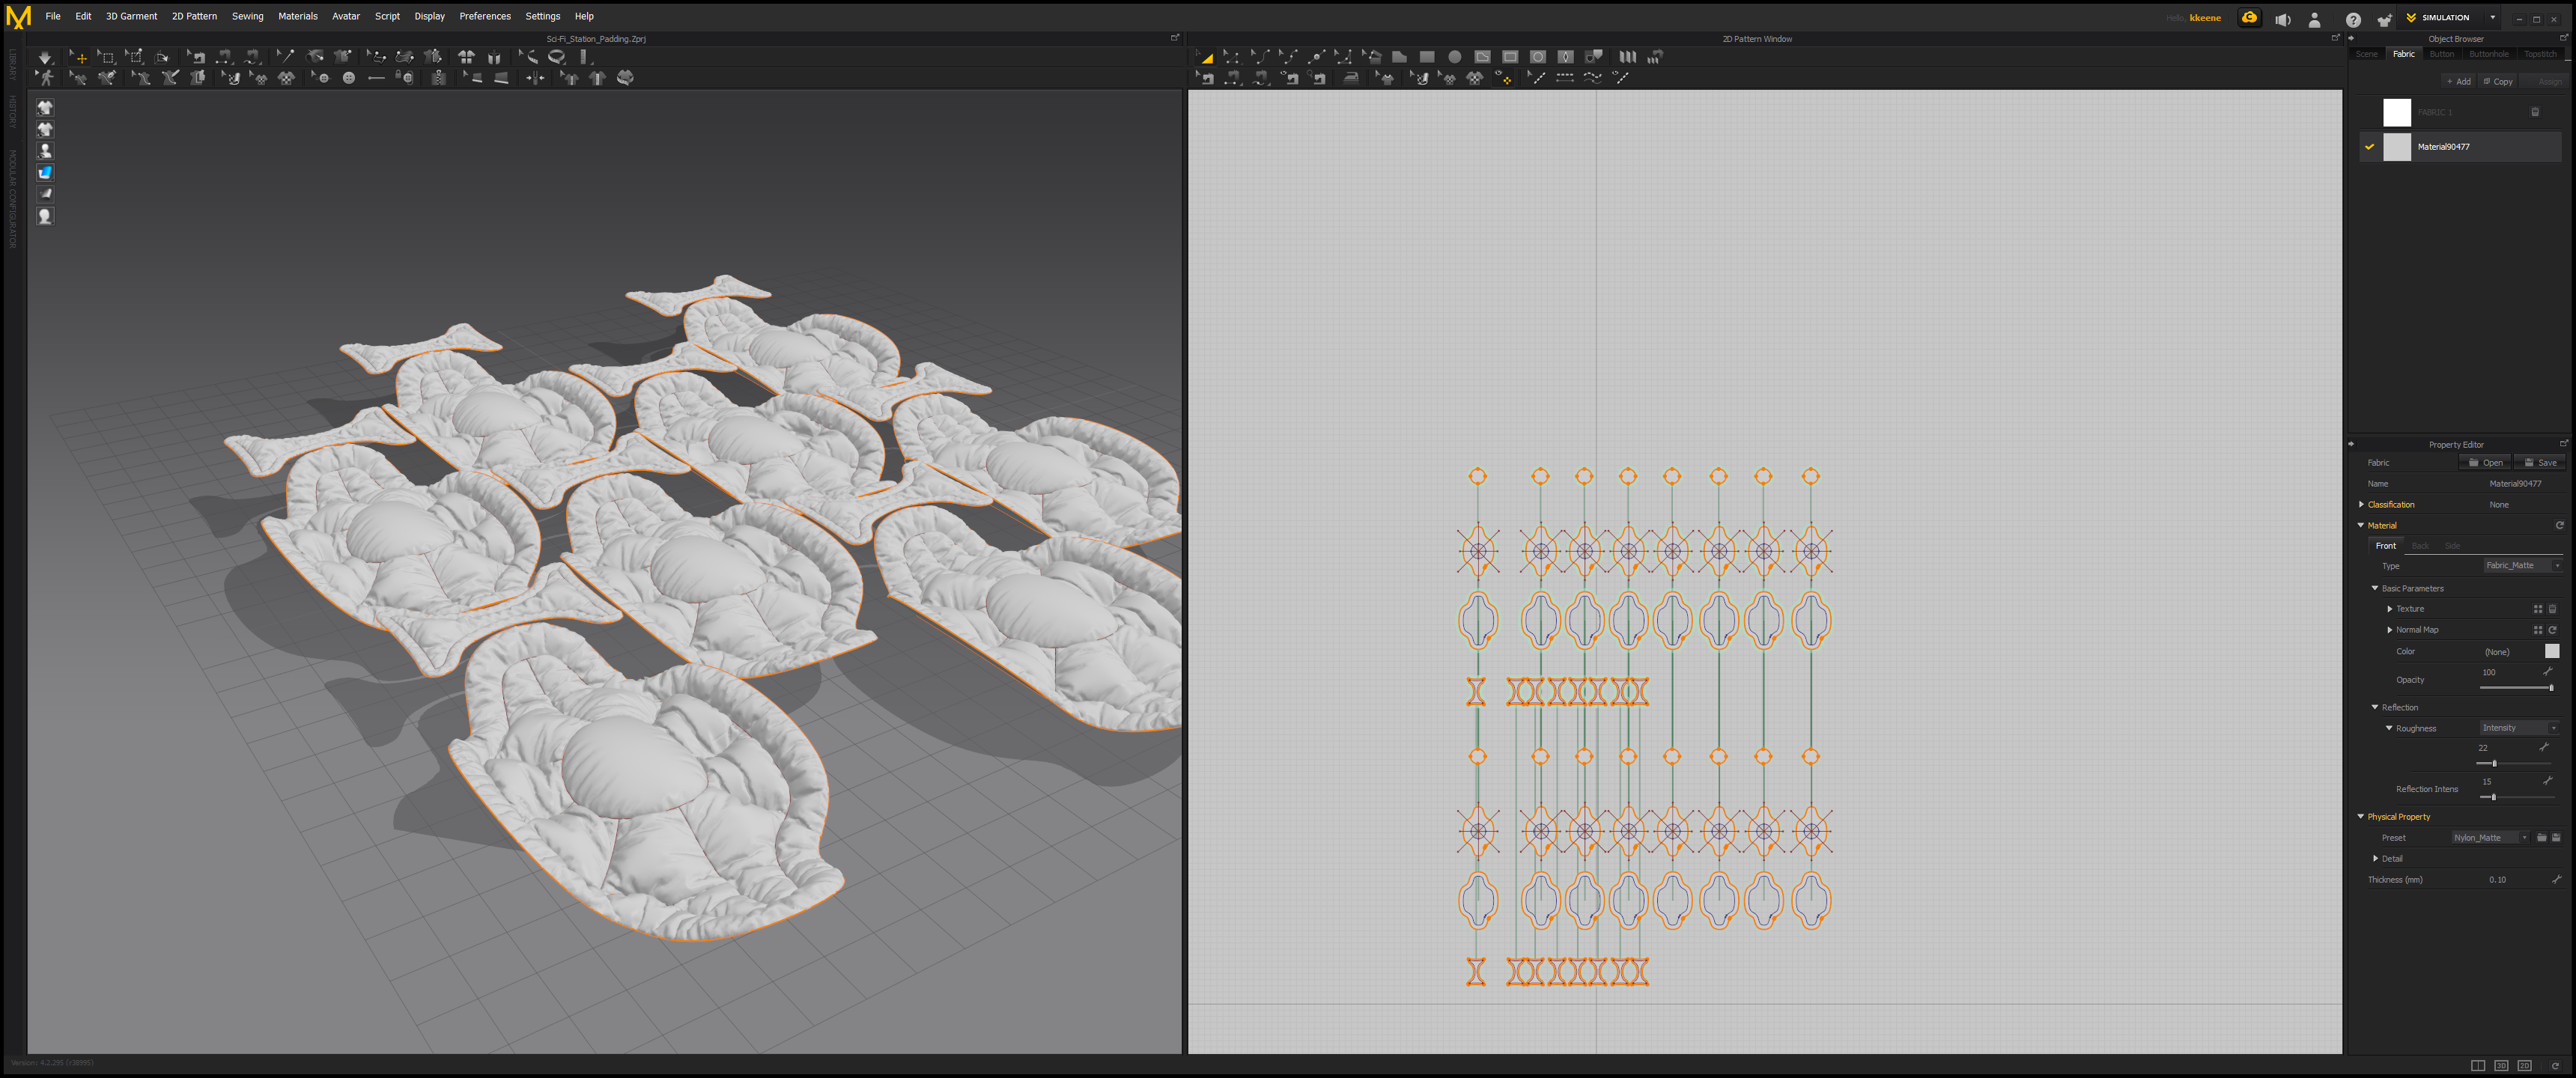
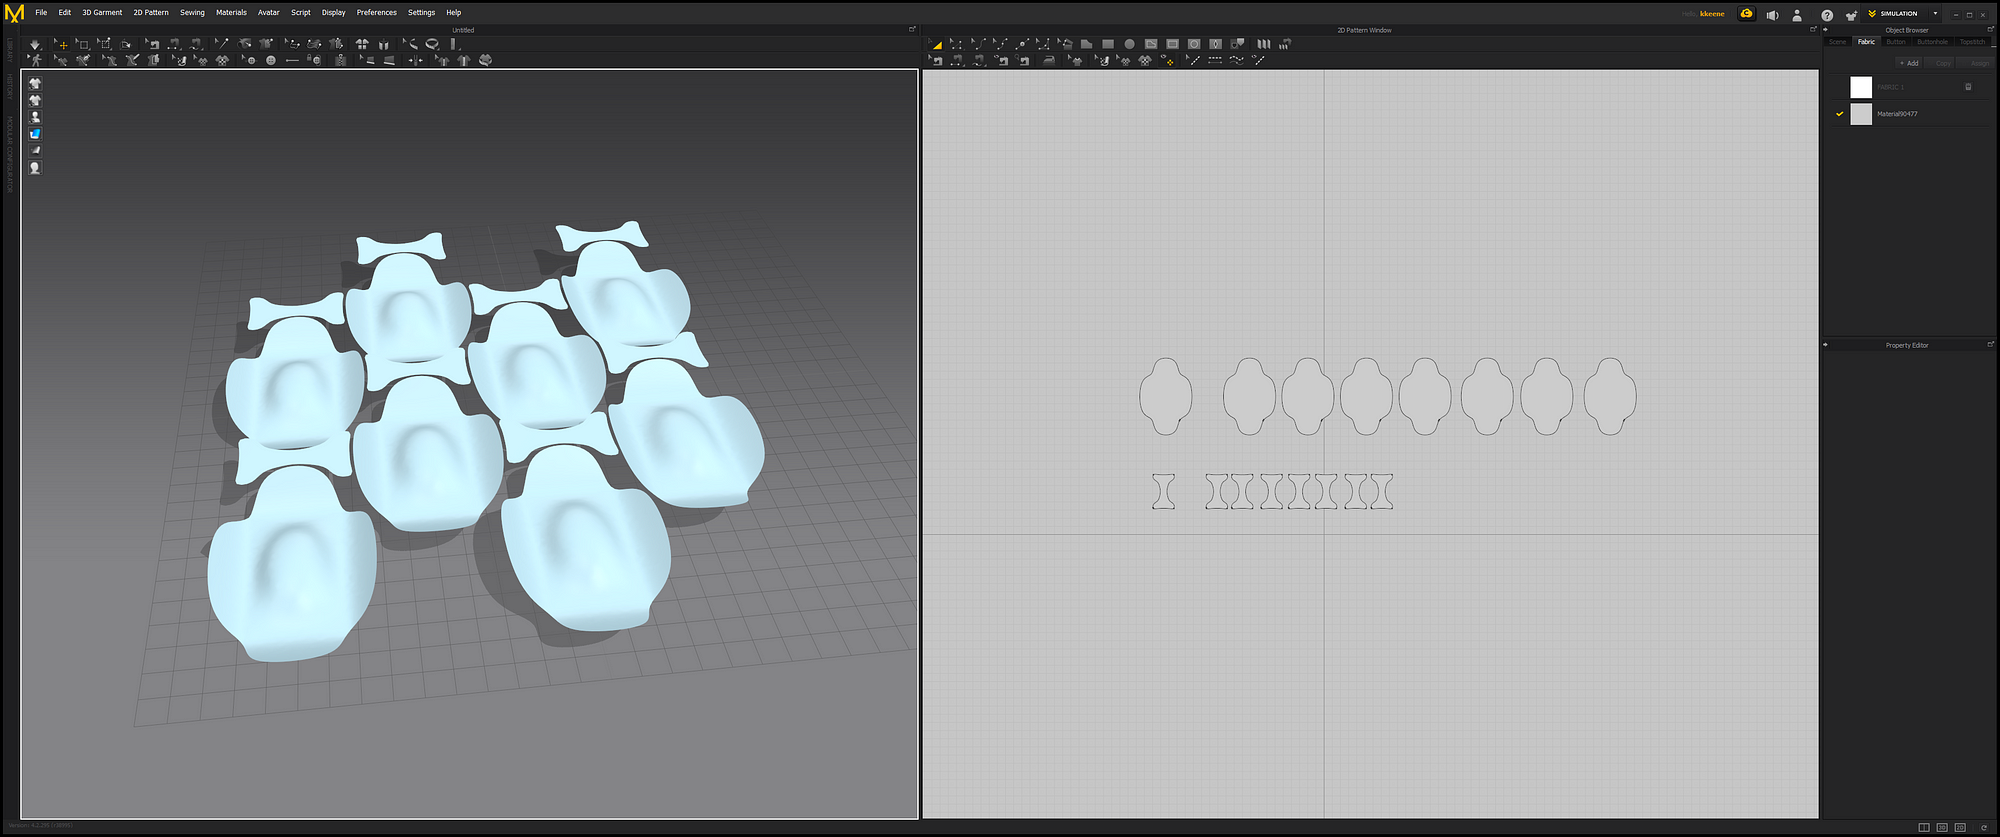
Change your particle distance under simulation properties to something lower like 10. The smaller that number the more polygons there will be for more detail but at the cost of simulation times. I like to work at about 10 and when I get close go down to 5. Above I clicked on the material in the upper right that is on all the garments and at the bottom I changed the physical property preset to Nylon_Matte. Try out a few different presets and your simulation will try to behave like that material.
Once you are happy select just the top garments and export as an OBJ to re-import to your 3D program.
After importing go into edit mode. It is all one mesh and will want to separate specific ones we want to array to the other side for tiling. Select the meshes you want to separate into their own model with "L" then hit "P" and choose to separate by selection.

Above you can see everything nice and tiled.
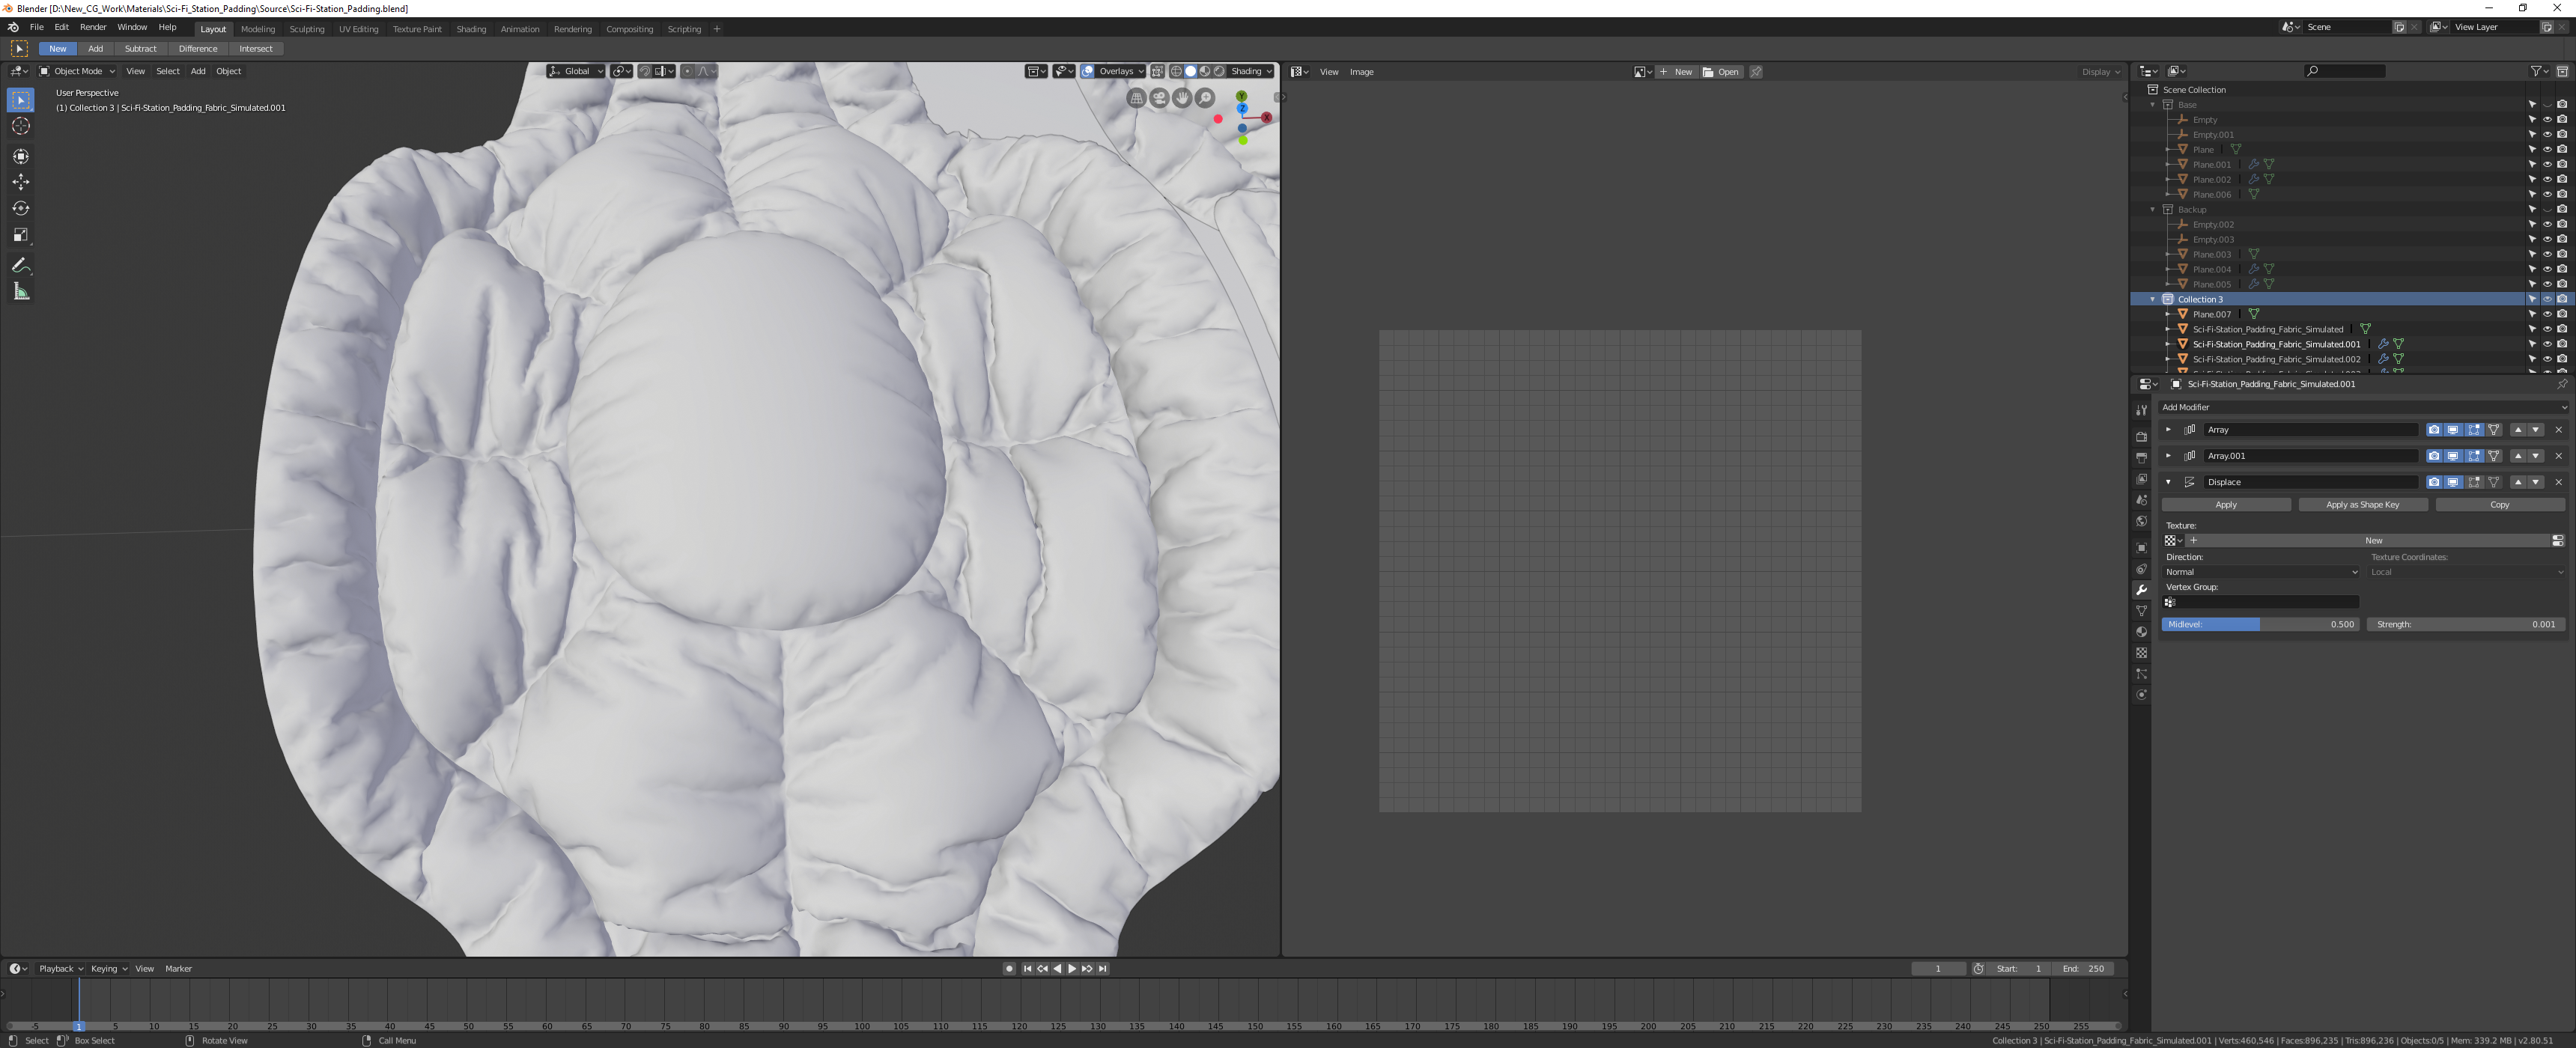
Next we need to remove these small seams that are in between where we had our simulation cut and sewn. To do this I add a displace mod at .001 strength to have the mesh out over the seams as you can see in the next image.
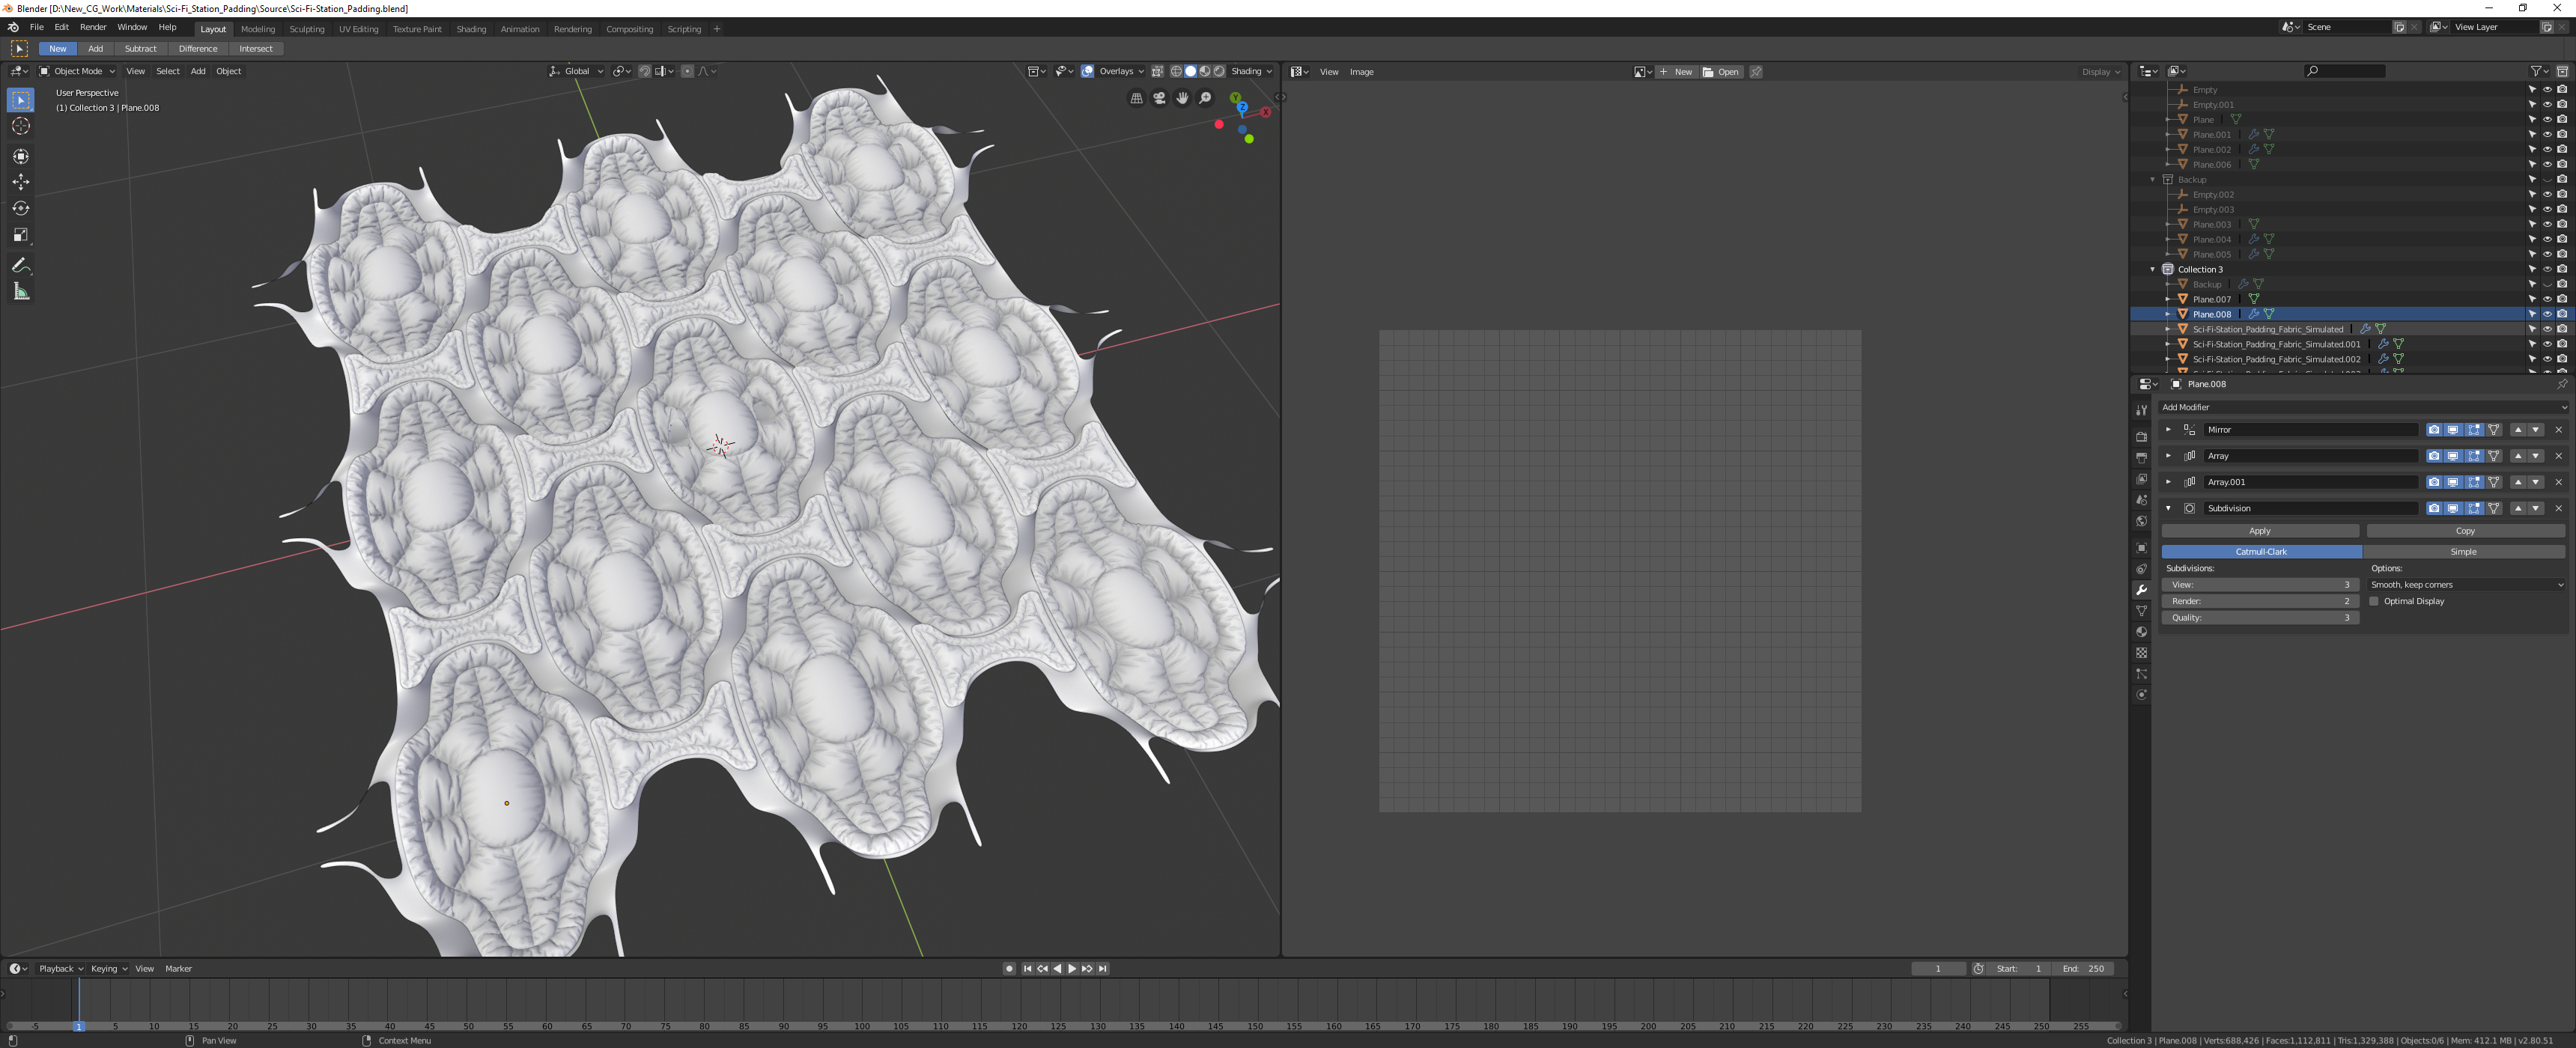
Go ahead and model whatever else you would like for your texture. After that apply different materials to each major part. For the fabrics I would go into edit and and assign a different mat to each section. These different mats will be for baking out a matID mask foe easy masking. Make sure you color them to be unique colors. Export this whole structure as your HP then use that square plane as your LP. Be sure to unwrap your LP first to the 0–1 space and make sure the margin is at 0.
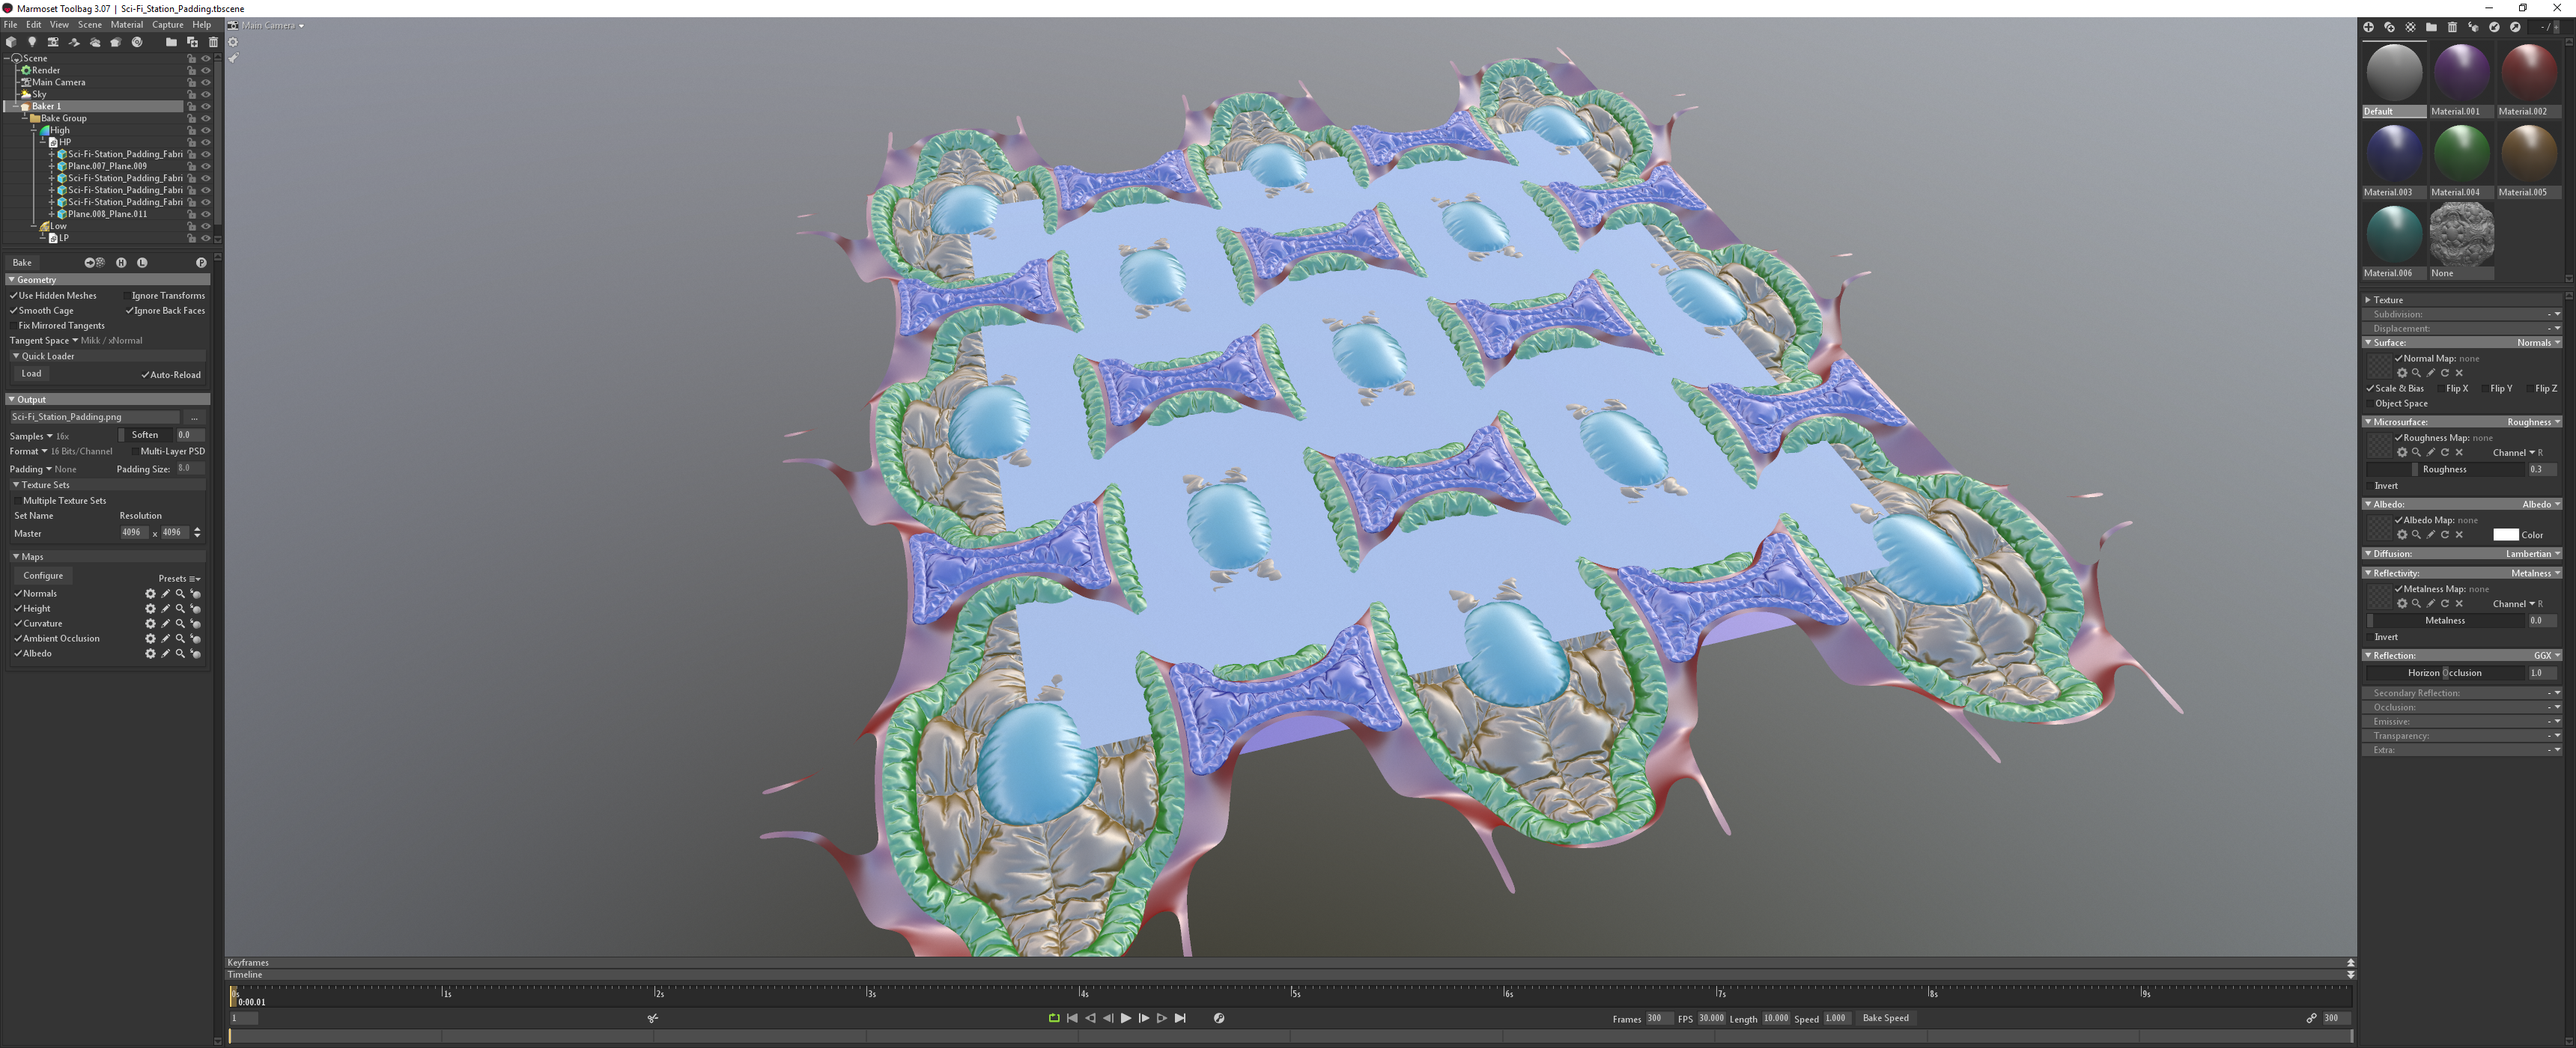
Above I am using Marmoset Toolbag to bake but feel free to use whatever. Note the materials I did in Blender have imported and are the colors I chose. Toolbag as an option to bake a matID but I prefer to bake and albedo from the mat color so I can choose what my ID colors are; otherwise it is just random.
On the left you can see my HP and LP are in the correct bake groups in the hierarchy and you can see the settings below I am using to bake. I also adjusted the cage offset some by selecting the "low" in the bake group and increasing it so it goes past the HP. On your normals flip the Y on the cog wheel then on the height lower the range quite a bit. TB does not autolevel the height range sadly so just try to get close without going too little and clipping off and we can auto level in SD.
In the end I decided to not use AO. Because I will be adding other parts into the height in SD I figured I would just generate AO in SD. I also did not use the curvature I baked much and opted to generate more custom curvature in SD.
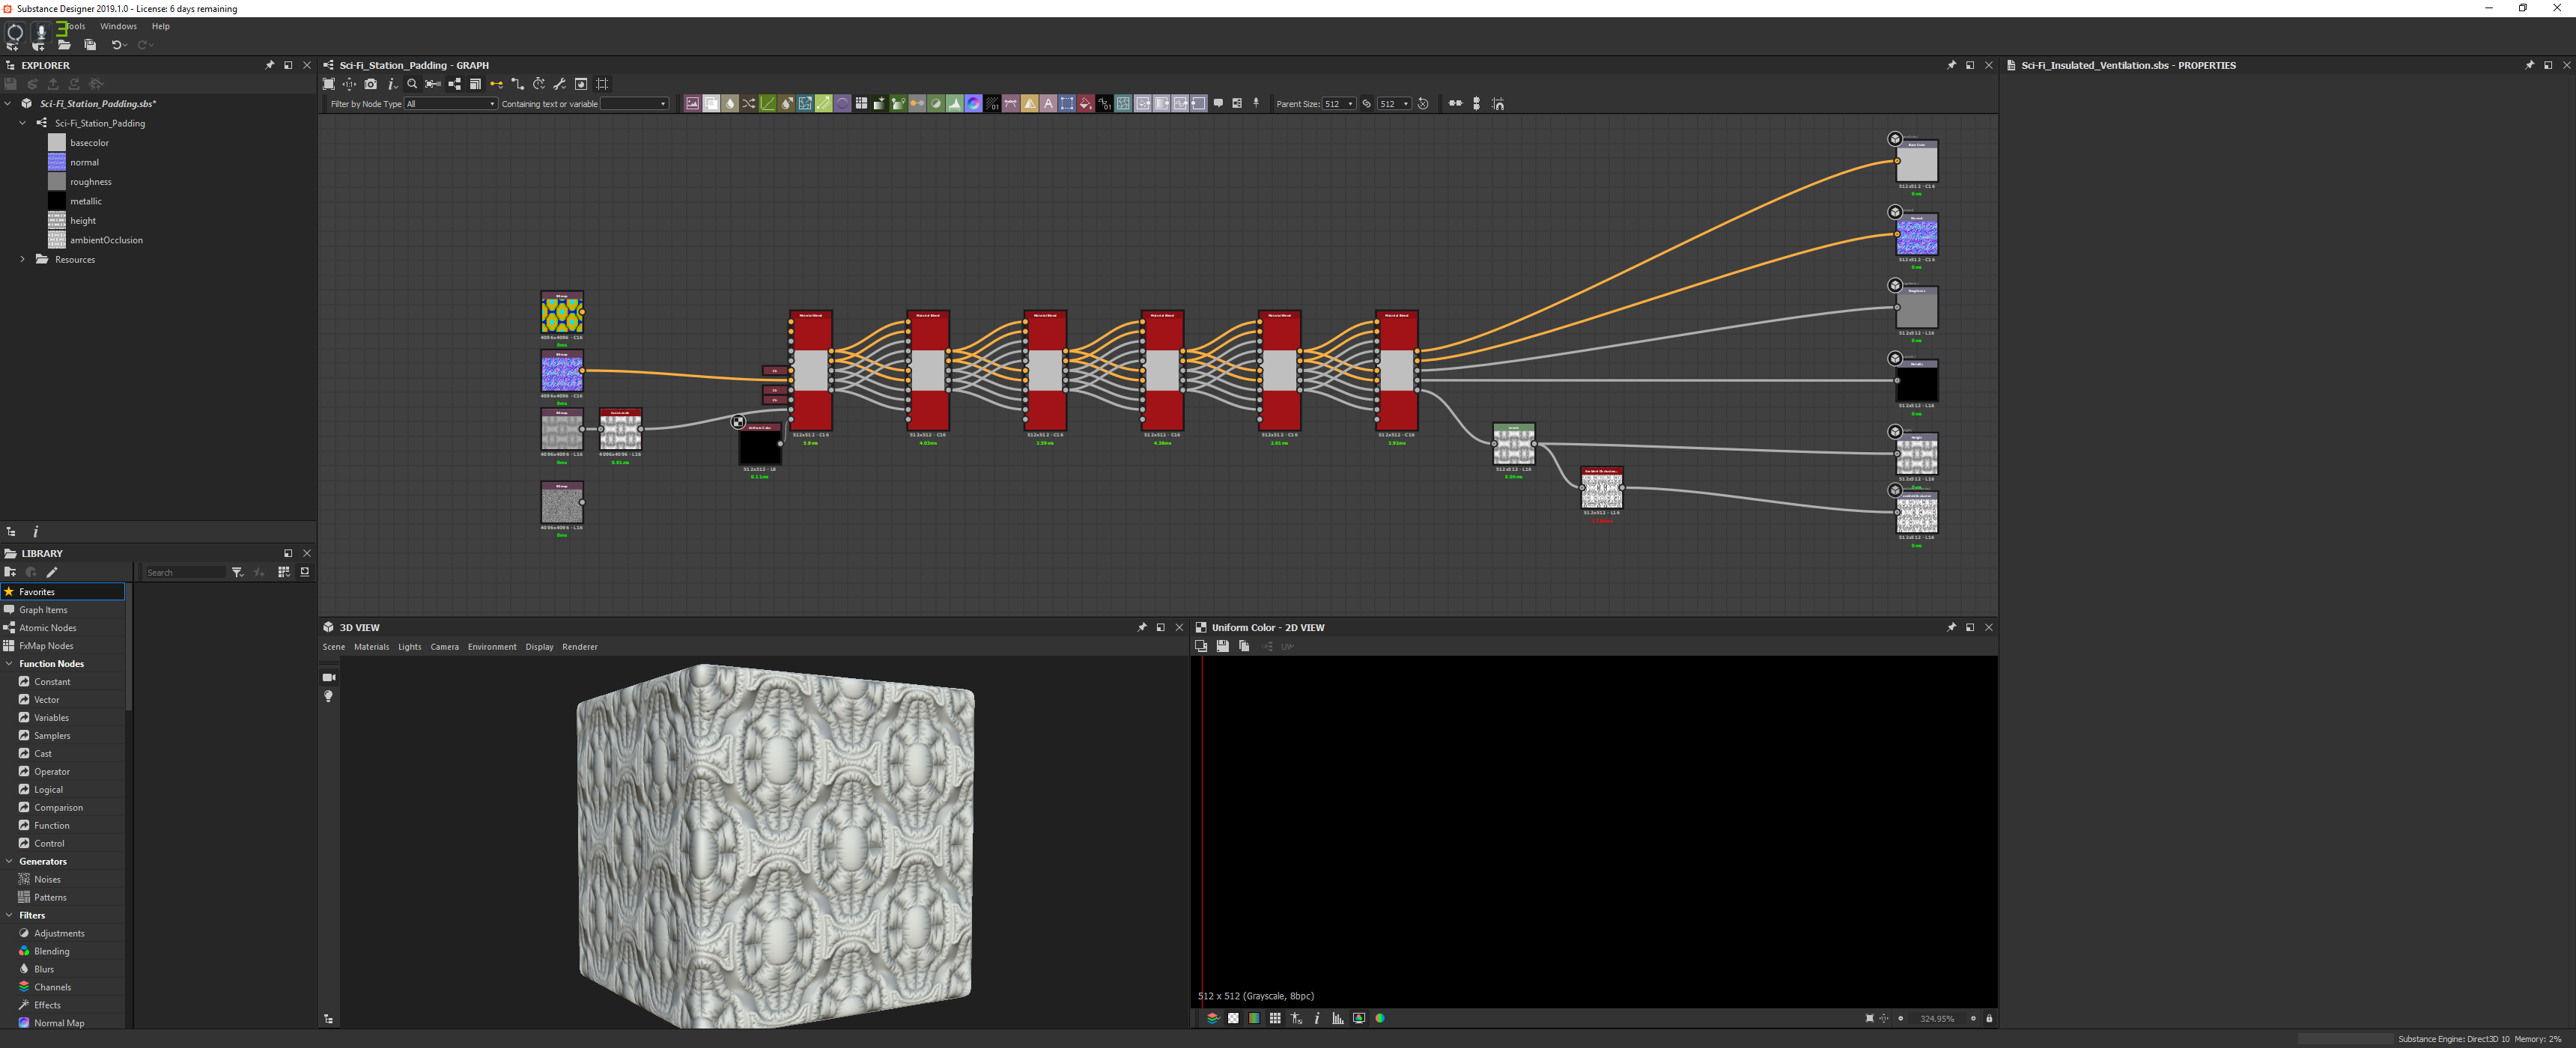
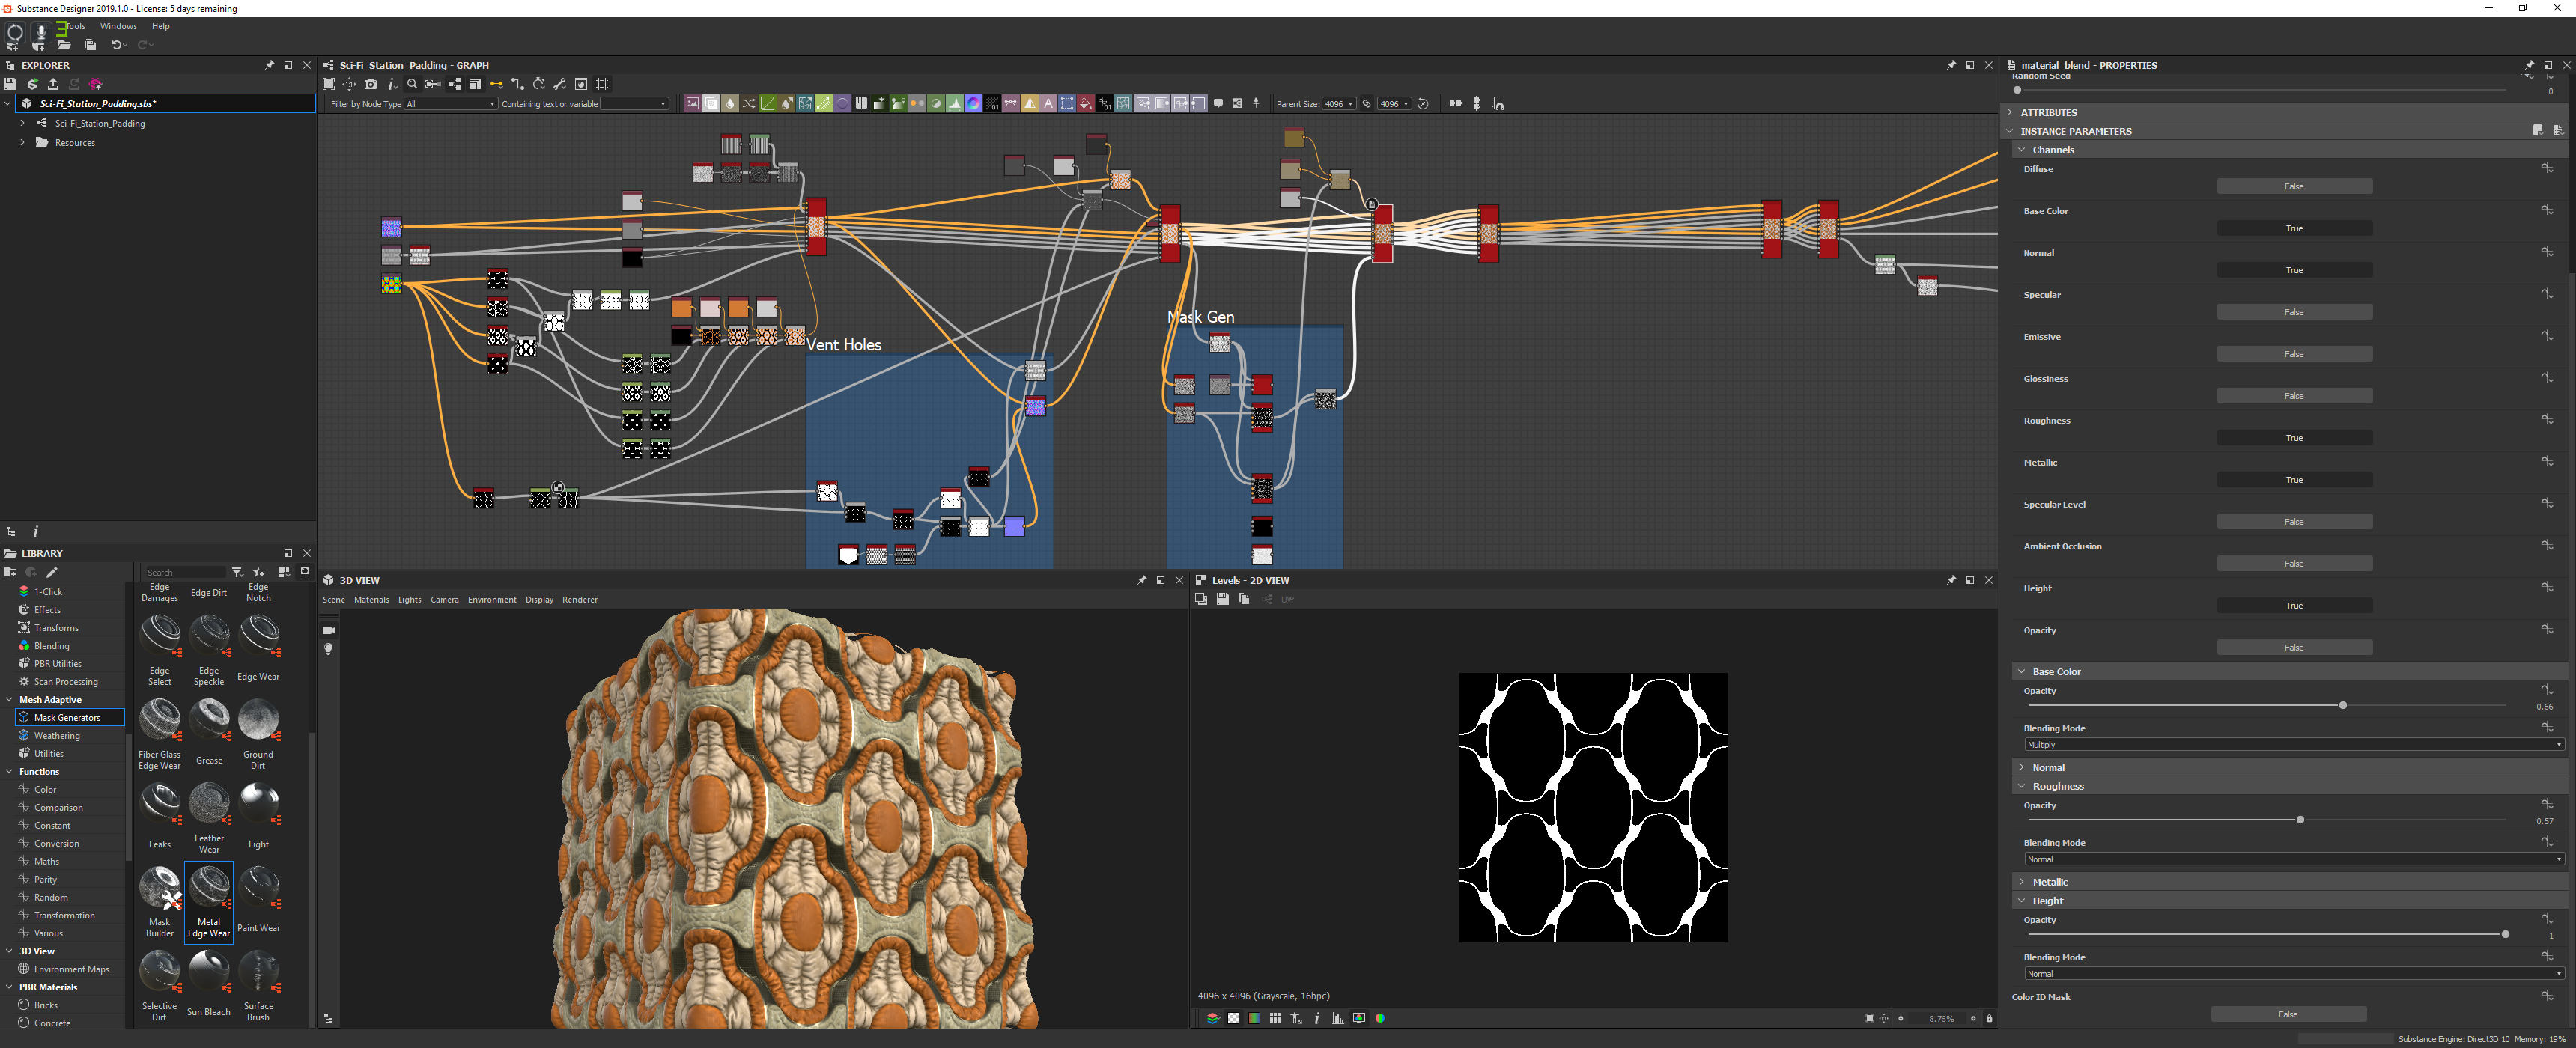
Above you see the bakes feeding into a series of material blends that have just the PBR metallic roughness maps enabled. Basically anytime I want to add in a new material I use one of those material blends to add in just the new elements while keeping the previous.
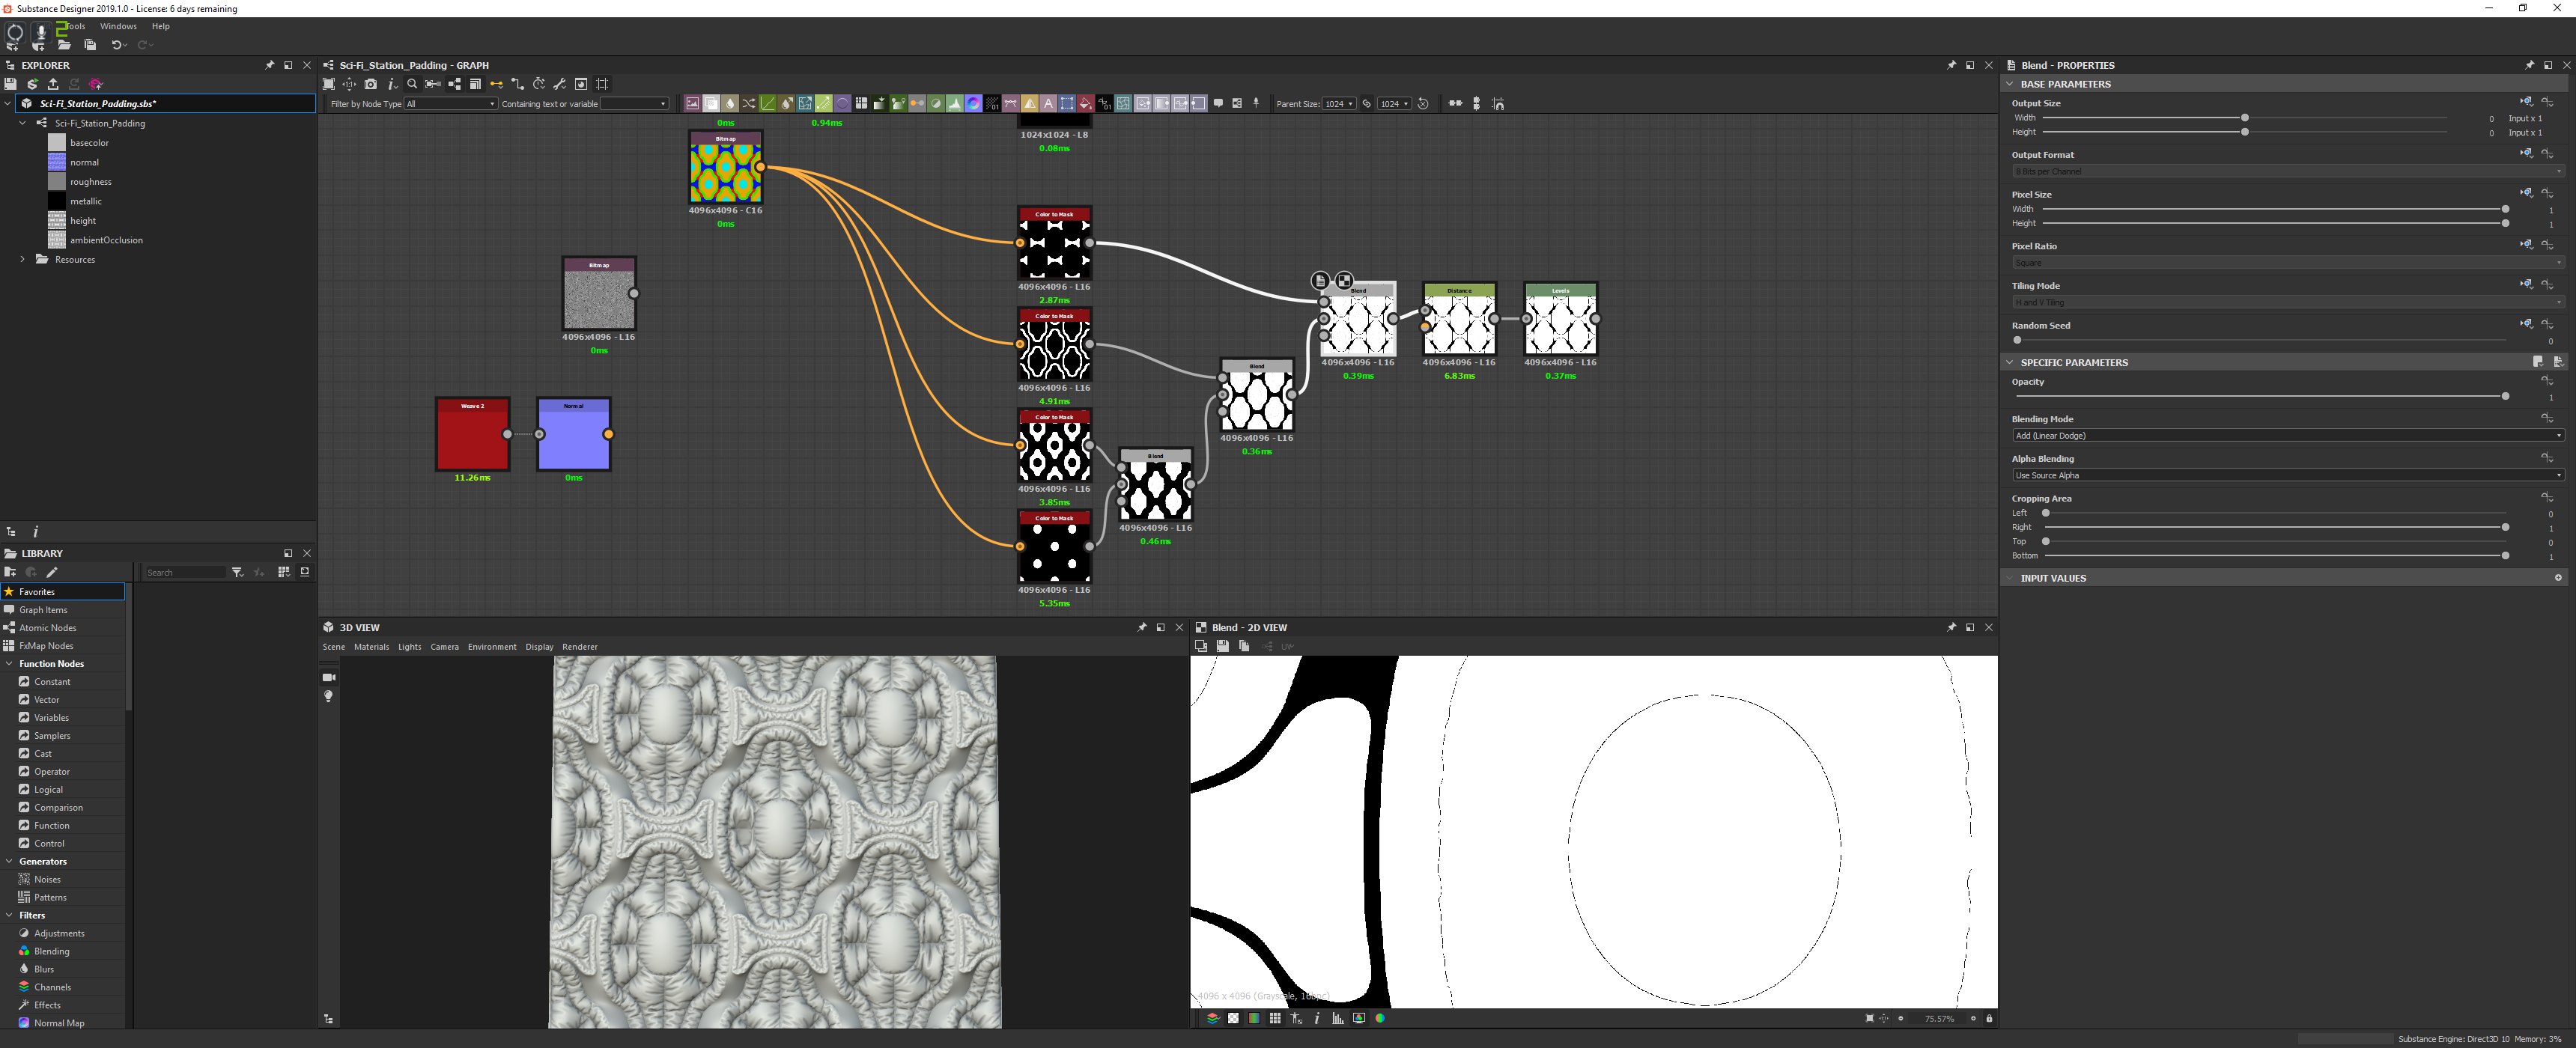
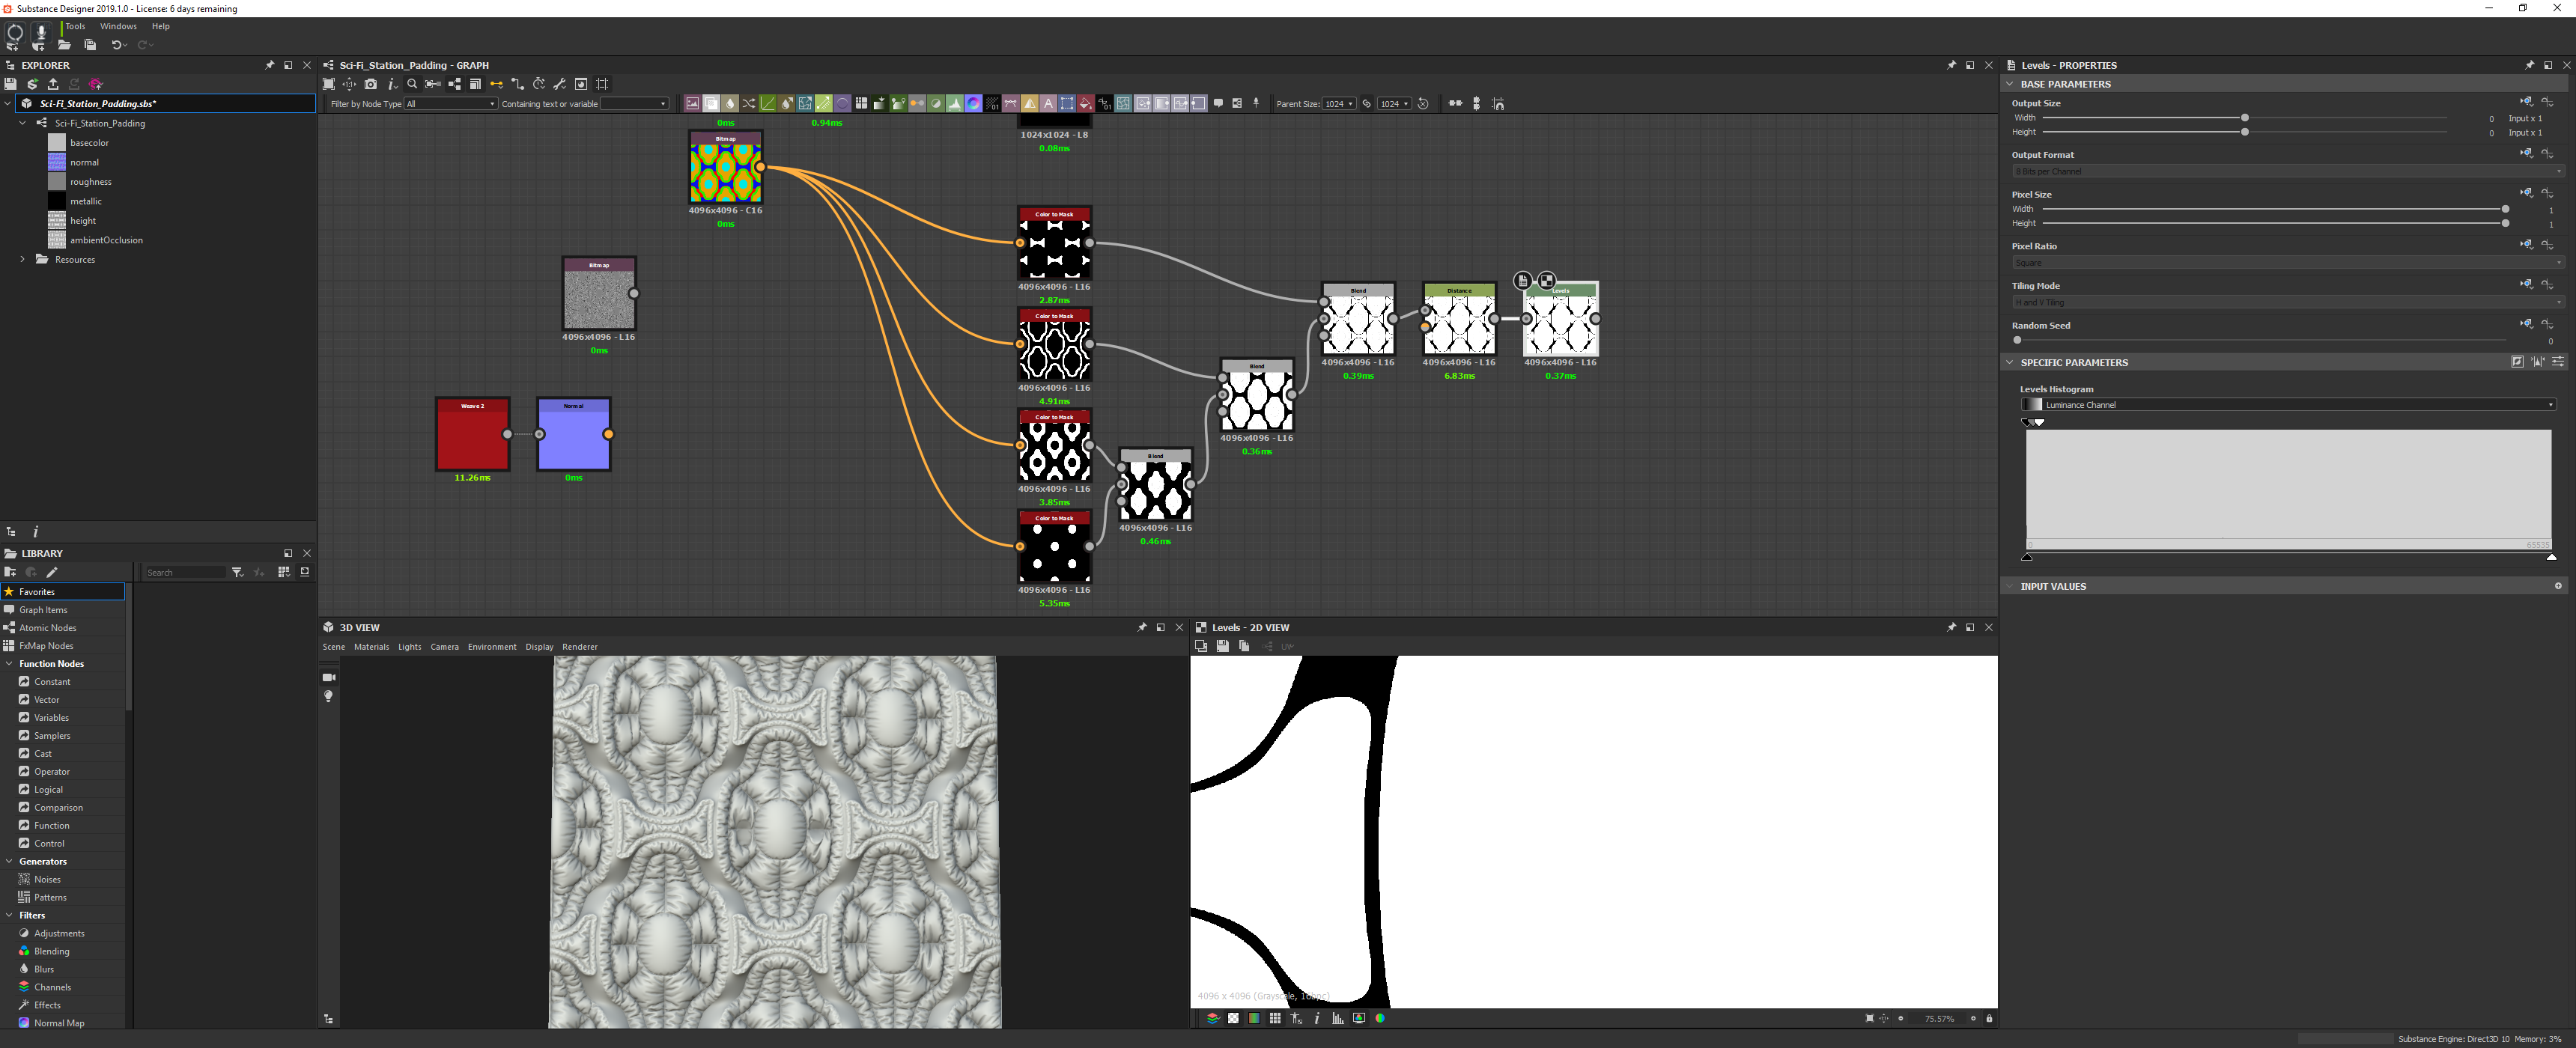
I use the color to mask node to create the masks but it often leaves thin gaps. So use a distance node at a very short distance followed by a levels to clamp it back up.
Next few images show some experimentation. I thought I wanted these to be more weaved fabric or nylon butt later made them more of a glossy plastic.
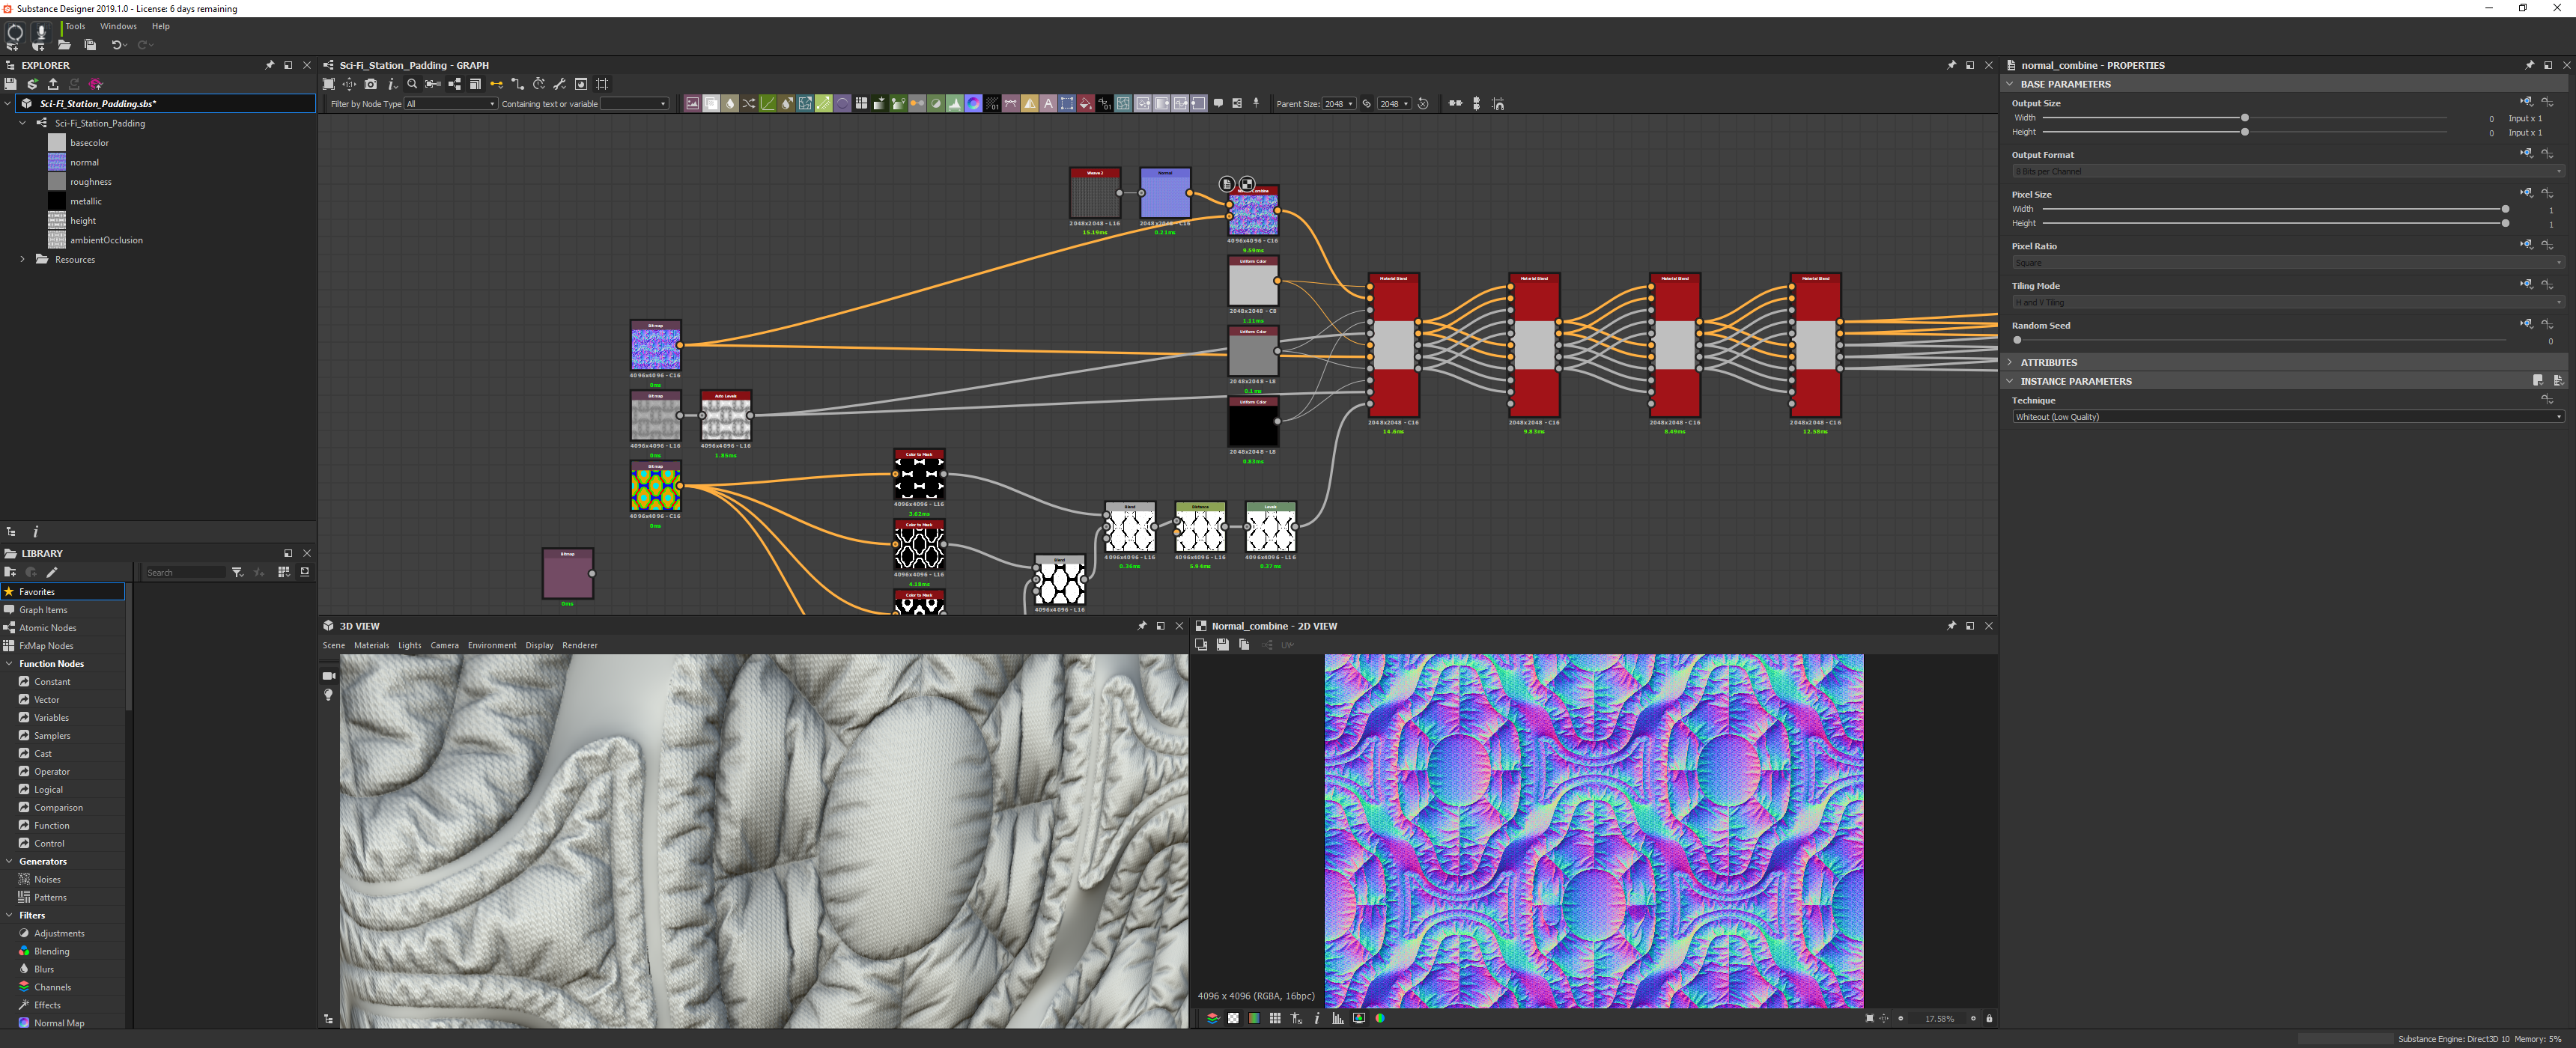
The rest is just doing general SD work. Play around with masking masks and adding in details by using a normal combine in between point and add on to the height where needed. There are also blending controls for each map in the material blend node but I wanted to make things a bit easier to see.
I decided I want this to be smooth plastic with text on the plastic like a company logo. I could just tile and image in SD on the masked sections but you can make it more realistic by having it conform to the actual simulation. So I created a simple diagonal tiling black and white logo text and then dropped that into a material back inside TB on the albedo slot to get this:

Next you can bake just your albedo again but make sure to name your output differently so you don't replace your albedo ID map. On the right you can see the material setup. I noticed some UVs were rotated off and that the text traveled across. I now go back into Blender and adjust the UVs and also make sure they are not longer overlapping so I get a more unique result for panel.

At this point you layer more gunge or whatever other details fit your texture.
how to make a line pattern in maverouls designer
Source: https://medium.com/@keeganzkeene/texture-creation-w-marvelous-designer-8-582579d65a66